How to play a PowerPoint presentation on iPad


Would you like to play your PowerPoint presentations on iPads? It’s well known that Microsoft PowerPoint presentations are not supported on iPads or other Apple devices. However, you can still make your PowerPoint projects available on these devices. Your clients, colleagues, students and all other Apple users will certainly appreciate it! In this article we will demonstrate how to view PowerPoint presentations on iPad.
Key Takeaways
The article explains several ways to play a PowerPoint presentation on an iPad by converting or adapting it, since iPads do not natively support PowerPoint files. Options include converting the PPT to HTML5 to retain animations and interactivity, turning it into a video, exporting slides as images, or saving it as a PDF for basic viewing. Each method has trade-offs in features like animations, navigation, and file size. The article concludes that HTML5 conversion best preserves the original look and functionality for iPad playback.
1. Convert PowerPoint to HTML5
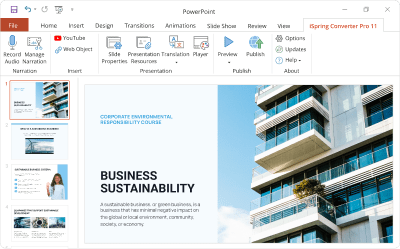
The majority of mobile devices, including iPads, can seamlessly play HTML5 presentations. You can convert PowerPoint presentations to HTML5 using a third-party tool, for example iSpring Converter Pro. iSpring Converter is PowerPoint to HTML5 converter that preserves all PowerPoint functionality and appearance.
Pros
- Crystal-clear images and text: iSpring takes care of adapting hi-res images for the best performance on retina displays. Text is saved in a vector format which keeps the edges razor-sharp even if you magnify.
- Support of all PowerPoint features: Converted to HTML5 with iSpring, presentations still keep all animations and transition effects, embedded audio, video and interactivity. You can see an example below.
- Sharing PowerPoint content via mobile devices and iPads: Presentations in HTML5 can be easily placed on a webpage and delivered to a wider audience via iPads and other iOS and Android mobile devices.
Cons
- Normally, HTML5 files offer a low level of content protection, as viewers can access the project’s source code in their browsers. In response to this, HTML5 files generated with iSpring have built-in protection options which effectively prevent content from unauthorized copying.
Download fully functional iSpring Converter Pro free trial
2. Convert PowerPoint to video to play it on iPads
With iSpring Converter Pro, you also can convert PowerPoint to MP4 video and play it on any device. It’s good for simple linear presentations that don’t have any interactivity and that might be shared on YouTube.
Pros
- PowerPoint-like playback: Converted into a video file, your presentation will keep the animation effects and slide transitions. However, on-click animations will be played automatically because the video format doesn’t support PowerPoint’s interactivity.
- Easy sharing: You can upload your video file to YouTube to make it available for viewing on iPads anytime.
- A Presentation’s interactivity is not supported: After the conversion to video, all animations of your presentation will play on the slide all right, while all trigger animations and hyperlinks will be lost.
Cons
- Loss of custom navigation scenarios: Video performance is only suitable for simple linear presentations. If you use PowerPoint custom shows or hyperlinks to advance slides in regard to viewers’ choices or feedback, all these sophisticated features will be lost when converted to video.
- Increased file size: Video format usually takes up more memory than a .ppt file, so be prepared for your presentation to be a larger size after it’s converted to video.
- Lower resolution: While attempting to reduce the size of a video, screen-capturing software tends to “downgrade” the quality of your slides.
Download iSpring Converter Pro free trial
3. Turn your slides into pictures
The most popular presentation service SlideShare converts your PPT presentations into set of pictures. iPads can easily display images. This set up is great if your presentation is mostly charts, tables, or photos.
Pros
- Slides that are crystal clear: You get perfect quality of the graphics of your slides.
- Control slideshow pace: You can control your slideshow flow by pausing at the important slides and moving through others faster.
Cons
- No animation, no hyperlinks, no audio, no video: Your presentation is turned into a set of static pictures of your slides. It shouldn’t be a problem if you’re only concerned about the graphic content in your presentation.
- Many separate files: Instead of having all of your slides as a single .ppt file, you will have a bunch of separate images as per the number of slides in your presentation.
- The presentation can be navigated only slide by slide in a fixed sequence. Custom navigation scenarios are not supported.
4. Create a .PDF file
iPad supports .pdf format just fine. Again, if you only care about the graphic content of your presentation, it can be a great way to view your PPT on iPad.
To convert your presentation to .pdf, you can use special software, available in both free and paid versions. You can even use PowerPoint in the latest versions (PPT 2007 with SP2, PPT 2010, PPT 2013) to create a .pdf copy of your slides.
Conclusion
Depending on your requirements, you can choose any of the above methods. However, when comparing all methods, conversion to HTML5 is the best option to view PowerPoint on iPads while keeping its interactivity and original look. Besides, it’s an excellent option for professional PowerPoint authoring enhanced with extra features like a responsive player, built-in audio narrations, direct-to-YouTube publishing, and more.
Useful Resources on PowerPoint
Are you a PowerPoint lover? If so, here are some other helpful articles for you:
Create online courses and assessments in record time.

How to Email a PowerPoint Presentation: 5 Proven Ways
How to Embed a Web Page in a PowerPoint Presentation
How to Make a Video Presentation in PowerPoint