Streamline Your eLearning Development with the ADDIE Model
There are many different methodologies that instructional designers can use when building online courses. The most well-known and battle-tested of these is the ADDIE model.
The ADDIE model provides a robust framework for developing training by dividing a project into discrete phases. Each is completed and signed off before the next one begins, which helps to reduce errors and reworks.
This article will look at each phase of the ADDIE model in turn and describe how they can be applied to the development of an eLearning course.
ADDIE Explained
ADDIE is an acronym for Analysis, Design, Development, Implementation, and Evaluation. It is the ideal methodology for designing traditional online courses with a defined scope and deliverables. It can seem a bit daunting to less experienced IDs, but it’s actually a very simple step-by-step process. The five phases of ADDIE are:
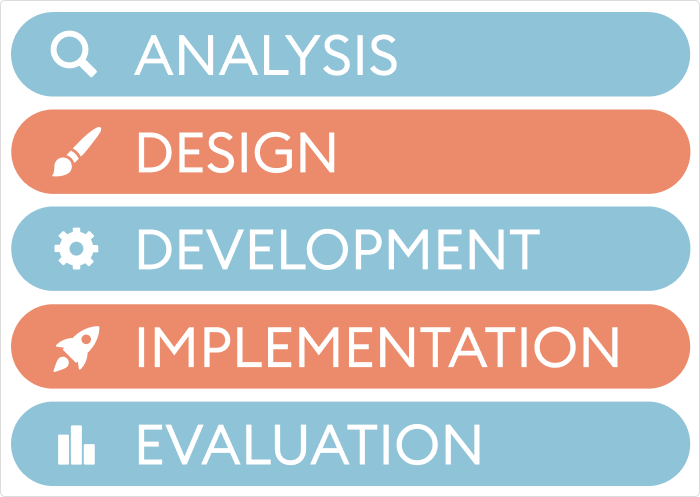
The 5 Steps of The Addie Process
Let’s break down the five steps of the ADDIE model in greater detail using an actual course as an example to get a better understanding of what should be covered in each phase. Before we begin, it’s a good idea to take a look at the final course, to allow you to see how the ADDIE steps we follow turn into the finished product.
Step 1. Analysis
In the Analysis step of the ADDIE framework, we will analyze all the factors needed to develop a course that fits the project brief. There is no prescribed list of what has to be included in the Analysis phase, but general outputs would include:
- Goals: What are the goals of the organization or individual offering the training? These can be teased out by considering the issue that has been identified and how the training will provide a solution to that issue. This is about what overarching result you want to achieve after your employees complete your online course.
- Learning objectives: What do you want your learners to be able to do after they have completed the course? Establish the links between the training objectives and real-world concepts from the work environment to ensure maximum retention of information.
- Current knowledge: What skills or knowledge do the trainees already have? This should be analyzed to avoid duplicating content or offering redundant information.
- Prerequisites: What skills and knowledge do the trainees need to have prior to taking the course, in order for it to be effective?
- Barriers/issues: Are there any barriers to using eLearning as the method of delivery? For example, if the designated students don’t have access to a particular technology, they won’t be able to take the training.
- Dependencies: Is there anything that could stop your course from being completed on time and within budget? Dependencies could include access to subject matter experts, or the availability of IT infrastructure managed by people outside of your direct team.
Course analysis
Here’s what the deliverable for the analysis phase looks like for our sample course.
| Output | Example solution |
| Goal | Help employees transition to working from home effectively and maximizing productivity via the arrangement of tools, space, and an adjustment in mindset. |
| Learning Objectives | Learners will be able to:
|
| Current Knowledge | This is a general course suitable for all employees, no specific prior knowledge is required. |
| Prerequisites | Internet access, personal or company computer or mobile device, access to work networks. |
| Barriers/Issues | Trainees will need a stable and fast internet connection to access the training. This is a prerequisite to be able to work from home, so it is presumed to be available to all trainees. |
| Dependencies | LMS to deliver training |
Step 2. Design
This step is the main part of the ‘offline’ course design, where the content is mapped out as a course. In this phase, we will plan and specify the following:
- Course outline: Each module, section, and topic that is required to meet the course and training objectives.
- Assets and media: The media and resources that will be used to support the eLearning effort, such as images, narration, training activities, and quizzes
- Content: The content of the course mapped to the course outline.
- Evaluation: How the students and the effectiveness of the course itself will be evaluated. This may take the form of an online survey or direct feedback via email or telephone.
Course outline
If you created some solid learning objectives in phase one, then this step of the ADDIE model should be a breeze. While keeping your learning objectives in mind, divide your course into a content hierarchy. The standard approach is module > section but there are multiple ways to slice up a course, so pick the way that works best for you.
We decided our example course would consist of two modules, each broken down into a number of sections.
| Module | Section | Detailed content |
| 1. How to work from home and stay productive | 1.1 Introduction | |
| 1.2 Create your workspace | ||
| 1.3 Maintain regular hours | ||
| 1.4 Plan your day | ||
| 1.5 Get your priorities right | ||
| 1.6 Set deadlines | ||
| 1.7 End your day with a routine | ||
| 1.8 Two techniques to boost your productivity | Kanban method | |
| 1.9 Self-check | Multiple choice quiz | |
| 2. How to maintain effective relations with colleagues | 2.1 Introduction | |
| 2.2 Set the time frame of your conversation | ||
| 2.3 Be clear and concise | ||
| 2.4 Listen actively and express empathy | ||
| 2.5 Don’t take offense easily | ||
| 2.6 Follow your team rules and traditions | ||
| 2.7 Self-check | Multiple choice quiz |
Storyboard
Now that we have established the structure of our course, we can start mapping out the scenes of the course, often referred to as the storyboard. The storyboard is a course blueprint that outlines the placement of text, visuals, interactions, navigation, and other elements that will be used in the eLearning course. At this stage, you may not know exactly what images, text, etc. you will use, but you should have an idea of what you want to be shown in the course.
A storyboard can be created in a number of ways; for example, it can be a Word file, a PowerPoint slide deck, or Figma. You can even draw your storyboard by hand if you prefer, as in the example below.
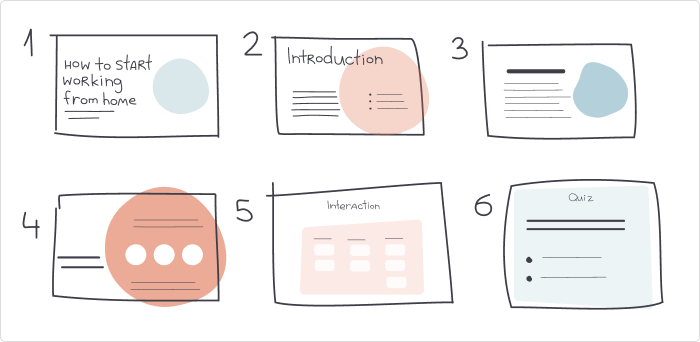
If you are using a fast authoring tool like iSpring Suite AI, you might decide to use a more iterative design approach – trying out different templates and setting layouts for creating a storyboard.
No matter what kind of storyboard you use, the main thing is that you have a general picture of your course in front of you.
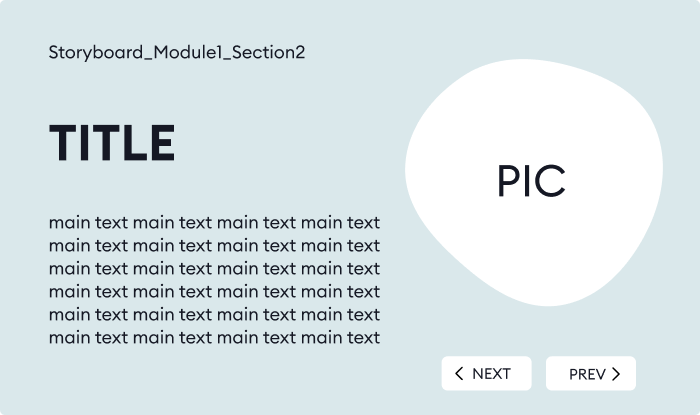
For our course, we are aiming for a simple and accessible design that will be quick to develop and provide a clean look, so our storyboard just shows what we need, on-screen titles, text, and image assets.
Script
In this step, you need to create the text a learner will see on the slides. To make the course really effective, you should consider the following things:
- One idea per slide. It will be easier for a learner to concentrate if there is one key thought that needs to be understood on each slide. To better convey the idea of the slide, you can use different content formats: audio narration, video, supportive graphics, and more.
- Only crucial text on the slides. Crowded slides can confuse and overwhelm course takers. Cut out unnecessary words and reduce content to the essentials. Also, avoid making the lines too long to make it easier for learners to read. Each line should be no more than 40 characters long.
- Perfect view on mobile devices. Make sure the text, as well as other content items, look good on the small screens of tablets and smartphones.
If your course is more complex, or you intend to include voiceover or TTS narration, then you’ll need to write a detailed narration script. In our case, we don’t need a separate script as we are using minimal amounts of on-screen text supported by strong visuals.
Branding and style
Now that your storyboard and script are ready, it’s time to think about the design of the course. The entire course should be designed in the same style – this makes it easier to perceive. You can work on the style yourself: choose colors, fonts, and layout templates, and stick to them throughout the course. However, many companies have brand books or brand style guides that provide distinct guidelines for maintaining brand identity across all aspects of an organization, including employee training.
Brand books usually include:
- Fonts and font sizes
- Color and branding guidelines
- Image placements and dimensions
- Image formats and resolutions
- Use of tone and language
Style guides can be formatted as Word documents, created as PowerPoint slides, or presented in some other format.
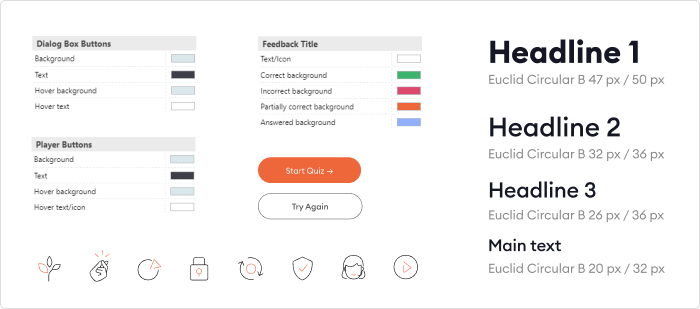
Graphics and media
The next step is to assemble all of your content based on the storyboard that was created in the previous step. Source all the images or graphics that match your design style, add any video clips you intend to use, and record or generate a voice over from your script, if needed.
In this phase, you may choose to use a mix of the content library in your authoring tool, an online resource such as iStock, or follow your company guidelines for sourcing design assets.
For our demo course, all we really need to do is find a couple of suitable images that illustrate ‘working from home.’

Step 3. Development
In this phase of the ADDIE framework, the actual development of what was planned in the Design phase takes place. The bulk of this phase centers around the training course production in whatever authoring tool was selected for the project.
There are many eLearning authoring tools on the market that vary in type of output content, the approach to course creation, and level of complexity on offer. Some of them may need several months to master, but there are also apps that can be leveraged easily – even if you’re a beginner.
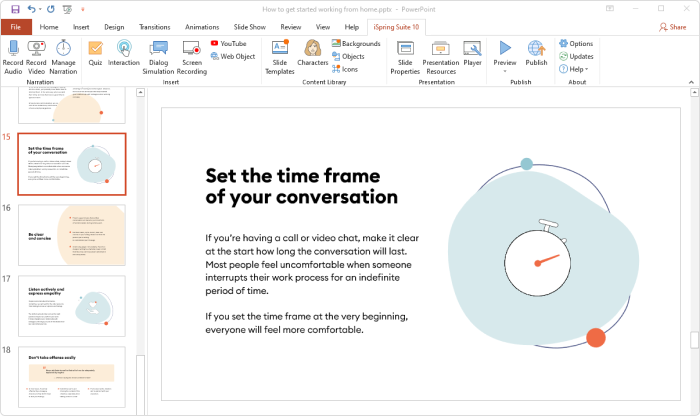
We created the example course with iSpring Suite, which is an easy-to-use authoring tool that allows you to build courses in PowerPoint and then automatically transform them into an online format. Creating courses with iSpring Suite is the same as creating a PowerPoint presentation: you add slides, type in your text, and add images or video.
We already have all the needed content, so we just have to add it to iSpring Suite and assemble the elements in the correct order.
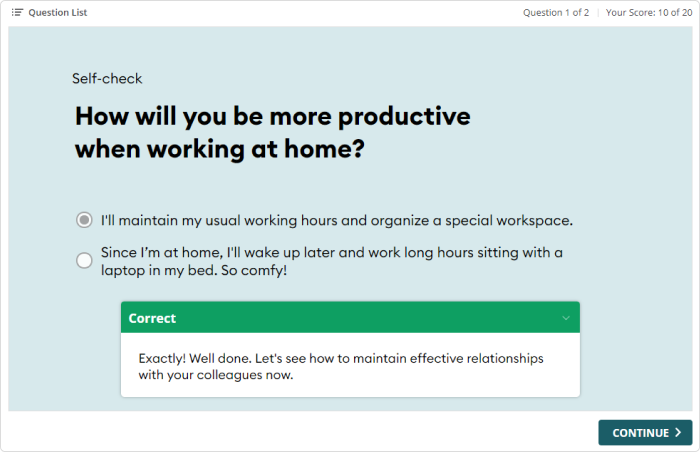
Remember that we also used self-checks at the end of each of our two modules to create engagement and facilitate retention of the material. For this purpose, we’ve chosen simple multiple-choice questions. The learner needs to select between two options, and different feedback is provided for each response, as in this example:
Evaluation
The course that has been produced should be evaluated at this stage to ensure that it meets the organization’s goals as identified in the Analysis phase.
Part of this process should be a thorough testing of the eLearning course to ensure that it functions as expected. This testing can be performed by authoring team members but ideally it should involve end users who will actually take the course.

Step 4. Implementation
This is the phase of the ADDIE model in which the course is launched and made available to your learners.
The easiest and most convenient way to deliver a course is via a learning management system (LMS). An LMS will allow your employees to access a course online at any time, from any device, and let your team automate many of the steps required for training delivery, such as scheduling, invitations, registration, and storing results.
If you don’t have a corporate LMS, you can try iSpring LMS, which makes setting up all of those processes a breeze.
LMS implementation
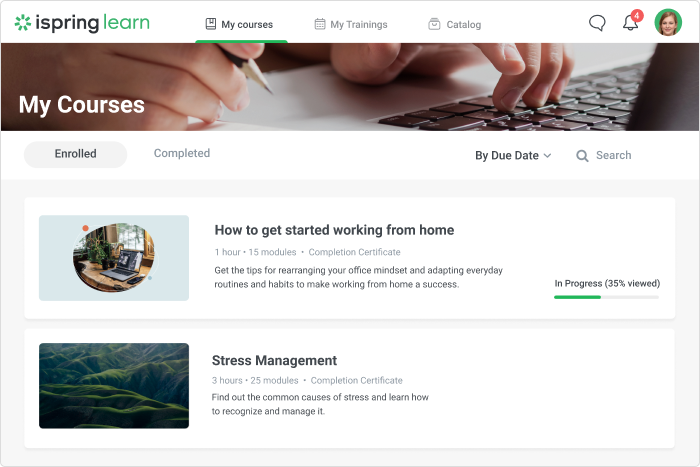
To implement our course in iSpring LMS, we simply load the package and apply the required settings.
Step 5. Evaluation
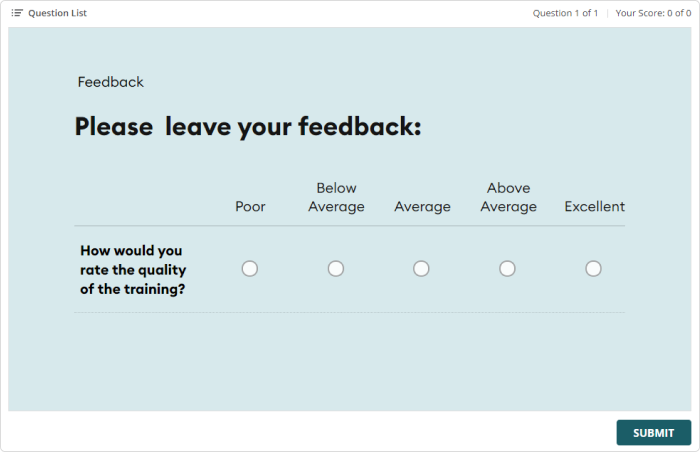
Following the implementation of your course, it’s best practice to gather feedback to ensure that the eLearning module has met the needs of the organization and the learners, and that it has been presented effectively. It’s best to view this final phase as an ongoing process of improvement.
You can use online surveys to elicit feedback on a course and training experience from both learners and from management stakeholders.
Here are some questions you might want to ask your course takers:
- Did the training material meet your expectations?
- How would you rate the quality of the training on a scale from 1 to 5?
- Did you learn something useful?
- Would you recommend the course to your colleagues?
- What could have been improved?
As learners progress through the course, continue to monitor the metrics and refer to the course objectives identified in the first step. Here are some questions for a self-check:
- Did the training cover the content thoroughly?
- Were the course goals met? For example, has employee scheduling for online meetings or conversations improved?
- Were the learners pleased with the course?
- Was the course implemented in a way that allowed trainees to access it efortlessly?
- Were the style and branding of the course in line with stakeholder expectations?
- Did all registered learners complete the course?
Trainee engagement
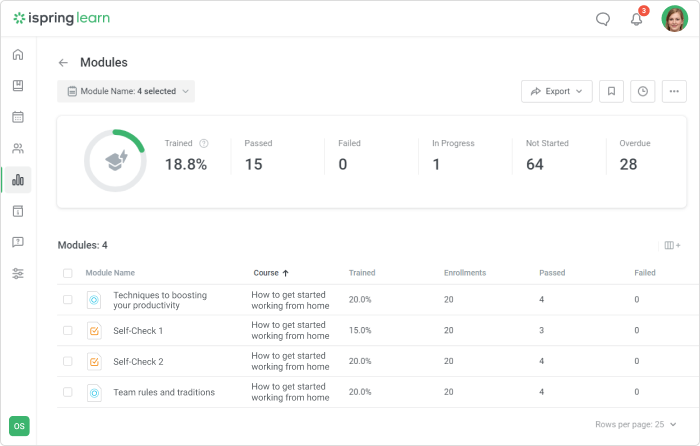
In addition to sending out course feedback surveys, you can track trainees to measure their engagement. Modern LMS reporting systems, like iSpring LMS, provide engagement metrics that demonstrate how much trainees interact with the content – and supplementary training. This can be very helpful to measure how engaging your material was and identify underperforming slides or topics.
For example, if a slide with two tabbed interactions, like the Kanban and Pomodoro slide in our example course, only has a 50% completion rate for viewing both tabs, then it may be a good idea to add on-screen instruction about how to use the content, or consider presenting it in a different way; perhaps it was too much information on a single slide to hold learners’ attention.
Training completion rates
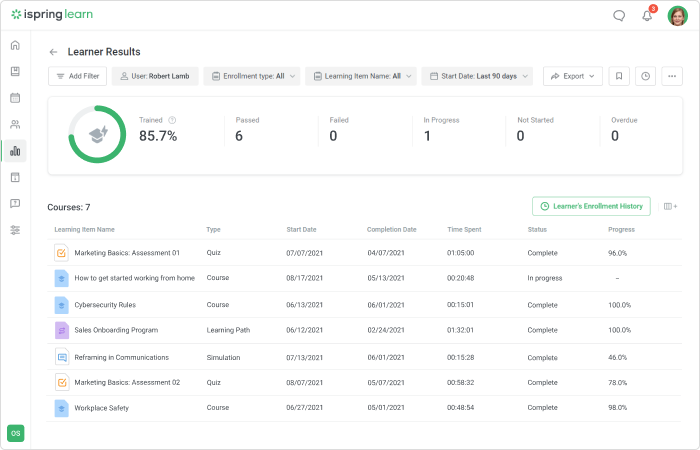
Your LMS should handle this for you and allow you to monitor trainee progress and generate automatic completion reports, as well as assessment or quiz scores.
FAQ
Is the ADDIE model the best eLearning development methodology?
Good question. The best methodology is the one that suits you and your organization. ADDIE is a very effective framework and has been road tested over many years. However there are some types of training projects that might benefit from a different approach.
For example, microlearning programs built for delivery on mobile devices and via short-form content may benefit from a more iterative approach, such as Agile development. Other methodologies you could consider include the 70-20-10 model.
Do the ADDIE phases have to be completed in order?
Ideally, the answer to this is yes, as that is how ADDIE was designed. It ensures closure and the sign-off of a phase, meaning that everything is ready to move on to the next phase without any incomplete issues.
In practice, this is not always possible. For example, you may have completed your course design but have a particular section that requires material from an SME who is not currently available. In this case, should you put the entire project on hold until they deliver their content, or move on to Development and circle back to that design section when the resource is available?
There is no right or wrong answer to this, but in the real world, project phases do not always close out neatly before the next one begins, so you’ll need to use your judgment here.
Is my authoring tool suited to using the ADDIE model?
eLearning development methodologies should be tool agnostic, so theoretically, any authoring tool you choose should be fine. In practice, the ADDIE model is ideally suited to tools that support slide-based courses, such as iSpring Suite, as these tools encourage you to formulate within the ADDIE format and apply the principles in the correct order to separate the phases.
Final Thoughts
The ADDIE model is ideal for eLearning instructional design as it provides a straightforward process that the author or development team can follow while ensuring that important things are not forgotten or overlooked.
With online training often being developed quickly to respond to organizational change, a streamlined model that keeps the authoring process consistent and transparent offers many benefits.
To get started creating your first course using ADDIE you’ll need a good authoring tool. Don’t hesitate to download the iSpring Suite free trial and start creating your course today!


