How to Create a Video Tutorial People Actually Want to Watch


Whether you want to train new hires, introduce a new product to your clients, or share your expertise in a specific field, tutorials are an excellent way to convey your information.
In this guide, you’ll learn exactly how to make a video tutorial from scratch, plus how to optimize it for YouTube or internal platforms.
What Is a Tutorial Video?
A tutorial video is an instructional video designed to teach viewers how to complete a task or understand a process. It can include screencasts, talking-head recordings, animations, or slide-based presentations with voiceovers. Tutorial videos are widely used in eLearning, customer education, and corporate training because they make learning clear, visual, and engaging.
Benefits of Tutorial Videos
Tutorial videos have become one of the most effective ways to teach, explain, and share knowledge. Unlike written instructions, video instructions show the process step by step, making even complex tasks easier to understand. Here are some of the key benefits.
- Clarity and engagement: Viewers can see exactly how something is done, which makes learning easier than reading a text-only guide.
- Scalability: One video can train hundreds or thousands of people with no additional effort.
- Accessibility: Learners can watch on demand and at their own pace.
- Consistency: The message and instructions are always delivered in the same way.
When to Use Tutorial Videos
Tutorial videos are most effective when you need to teach, demonstrate, or provide on-demand support. Common scenarios include:
- Onboarding new employees – Guide new hires through company systems and processes.
- Customer support and product demos – Explain features or solve common user problems visually.
- Internal training – Provide compliance instructions, workflow updates, or tool training.
- Self-paced learning and microlearning – Offer short lessons or make how-to videos that your learners can access anytime.
- Educational content – Record lectures, lessons, or explainer videos for an online course library.
Types of Tutorial Videos
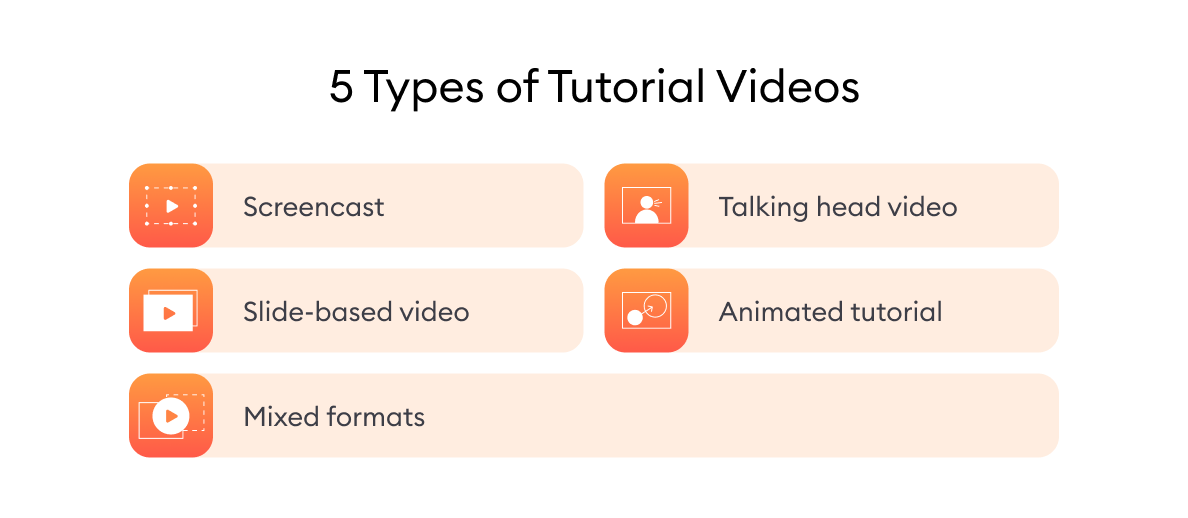
- Screencast: Screen recording with voiceover to show steps in using software or how to fill out a digital form.
- Talking head video: A presenter speaking directly to the camera to explain concepts.
- Slide-based video with voiceover: Narrated presentations, often enhanced with images and animations.
- Animated tutorial: Engaging motion graphics that visualize abstract concepts or processes.
- Mixed formats: A combination of screencasts, talking heads, and slides for versatile training.
How to Create a Video Tutorial: Step-by-Step Guide
Creating a clear, engaging, and effective video tutorial doesn’t have to be complicated, but it does need structure. Whether you’re explaining how to use software, showing a product demo, or teaching a skill, great tutorials follow a simple formula: plan, record, edit, and share.
Step 1. Define the goal of your tutorial
Before you hit record, ask: What do I want the viewer to learn or be able to do after watching this video?
A great instructional video solves a specific problem. It focuses on one clear outcome, no more, no less. This helps you stay focused and keeps your audience engaged.
Tip: Write down your goal in one sentence. This will guide your script, visuals, and editing choices.
Step 2. Analyze your audience
Before you start filming, ask:
- Who is this video for? (beginners, advanced users, customers, employees?)
- What do they already know?
- What do they want to learn?
- What action should they take after watching?
Clarifying your audience and outcome will shape your content and tone.
Step 3. Create an outline and storyboard
Start with an outline that breaks down your instructional content into clear, logical sections. This helps you stay focused and ensures that your instruction video delivers relevant information step by step.
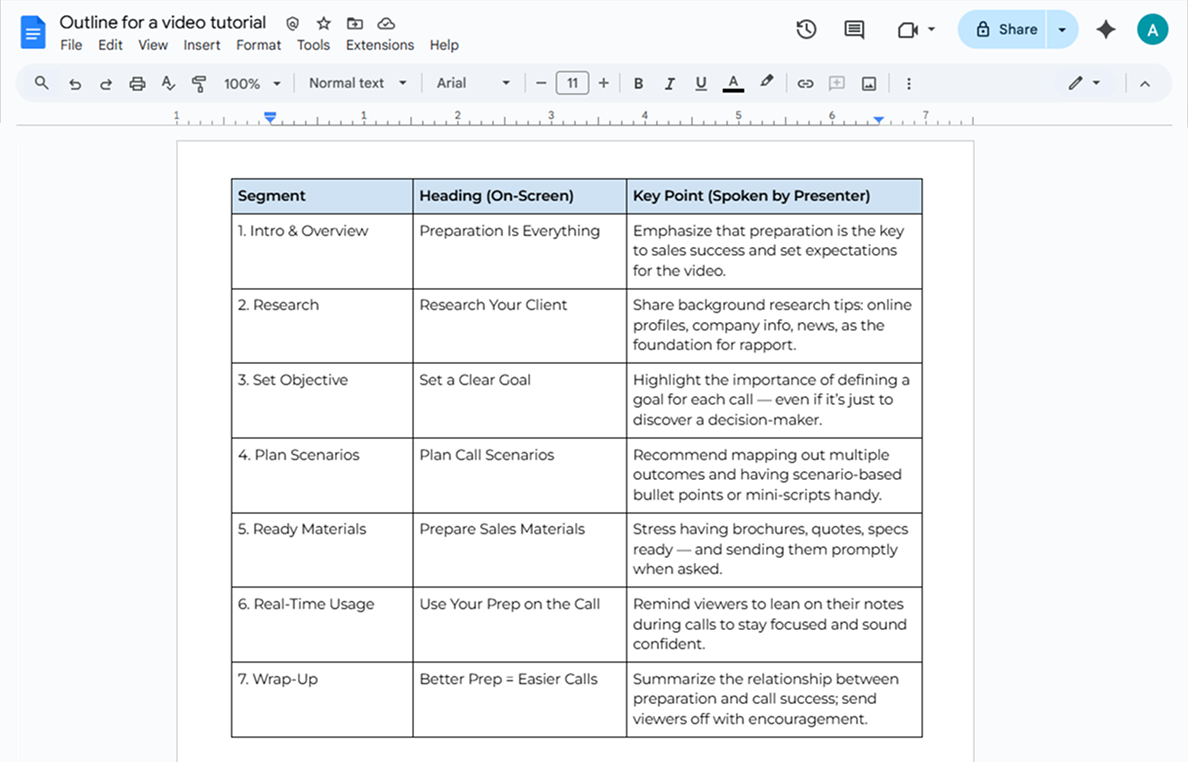
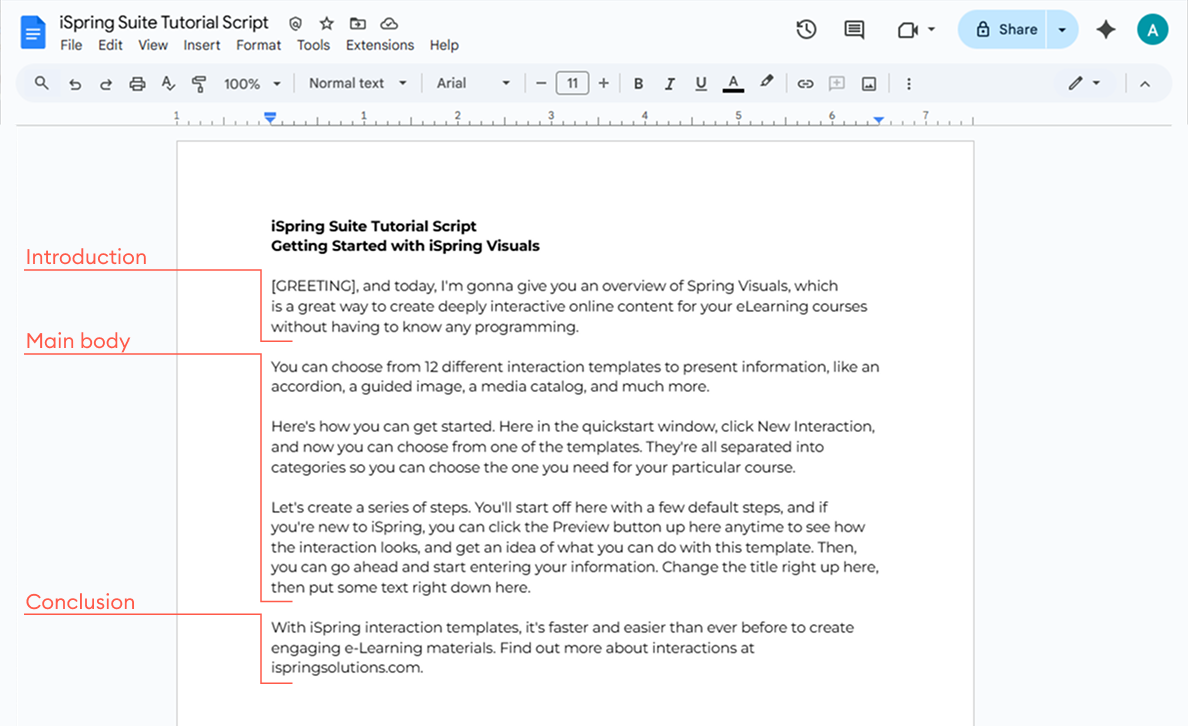
Outline for a video tutorial
| Segment | Heading (On-Screen) | Key Point (Spoken by Presenter) |
|---|---|---|
| 1. Intro & Overview | Preparation Is Everything | Emphasize that preparation is the key to sales success and set expectations for the video. |
| 2. Research | Research Your Client | Share background research tips: online profiles, company info, and news as the foundation for rapport. |
| 3. Set Objective | Set a Clear Goal | Highlight the importance of defining a goal for each call — even if it’s just to discover a decision-maker. |
| 4. Plan Scenarios | Plan Call Scenarios | Recommend mapping out multiple outcomes and having scenario-based bullet points or mini-scripts handy. |
| 5. Ready-to-Use Materials | Prepare Sales Materials | Stress the importance of having brochures, quotes, and specs ready — and sending them promptly when requested. |
| 6. Real-Time Usage | Use Your Prep During the Call | Remind viewers to lean on their notes during calls to stay focused and sound confident. |
| 7. Wrap-Up | Better Prep = Easier Calls | Summarize the relationship between preparation and call success. End on an encouraging note. |
Create a Storyboard
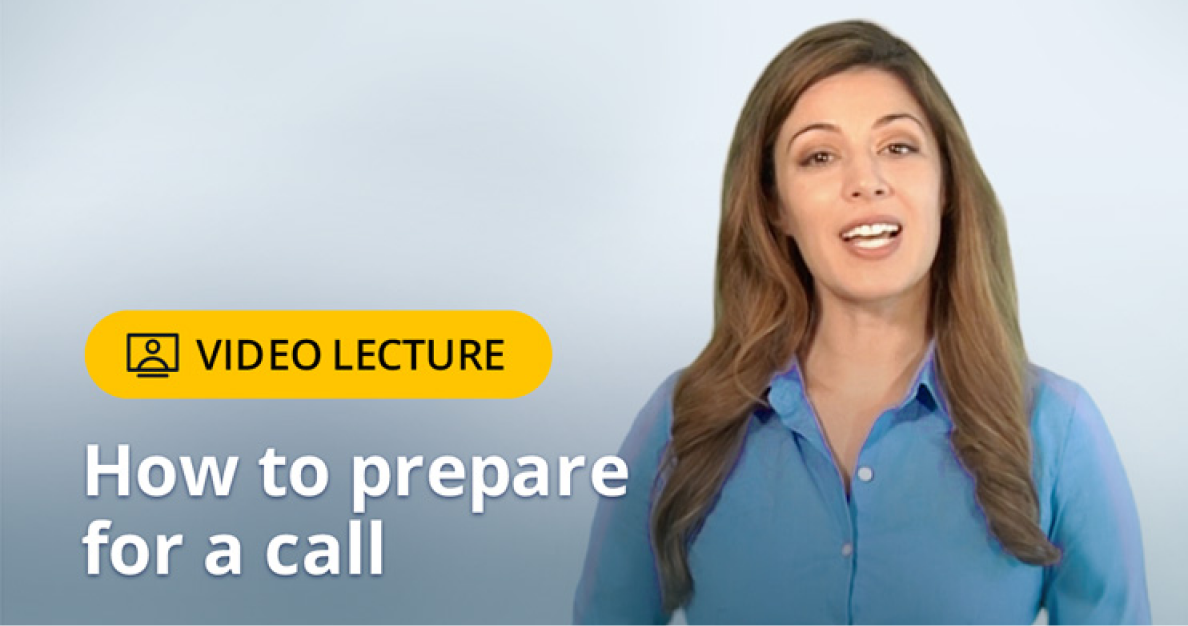
Next, turn your outline into a storyboard. A storyboard is a powerful tool that maps out all parts of the video, from what the viewer sees on screen to when a voiceover appears. It’s especially useful when you’re creating how-to videos for a knowledge base, internal training, or your next tutorial.
For example, when building our iSpring tutorial, we began with a simple outline and expanded it into a full storyboard. This helped us organize screen recorder segments, plan presenter appearances, and keep the learning process smooth and engaging.
This is how the storyboard for our iSpring video looks:
1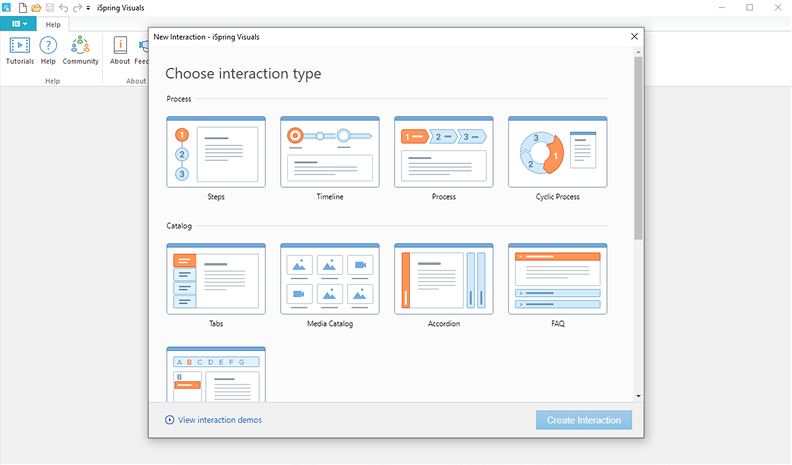 | 2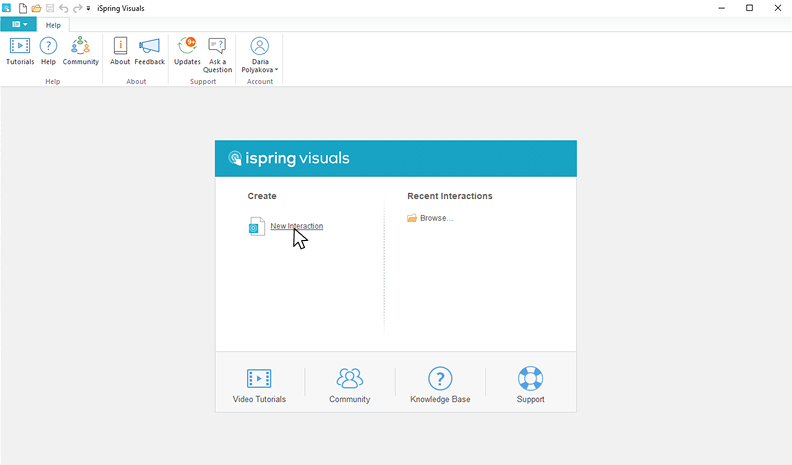 |
3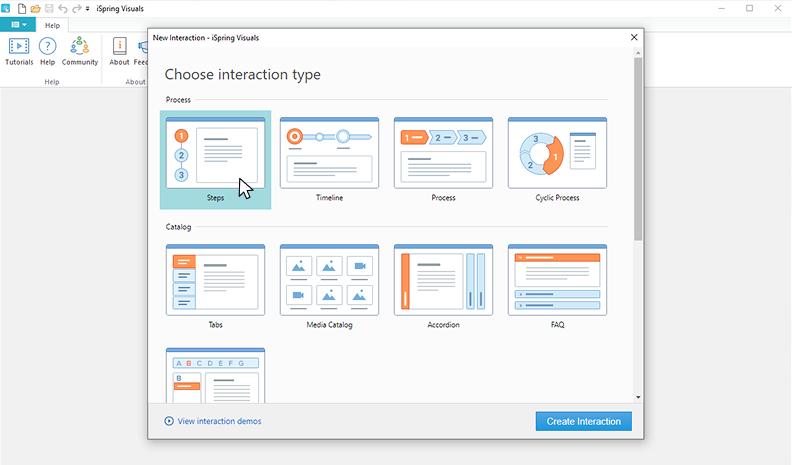 | 4 |
5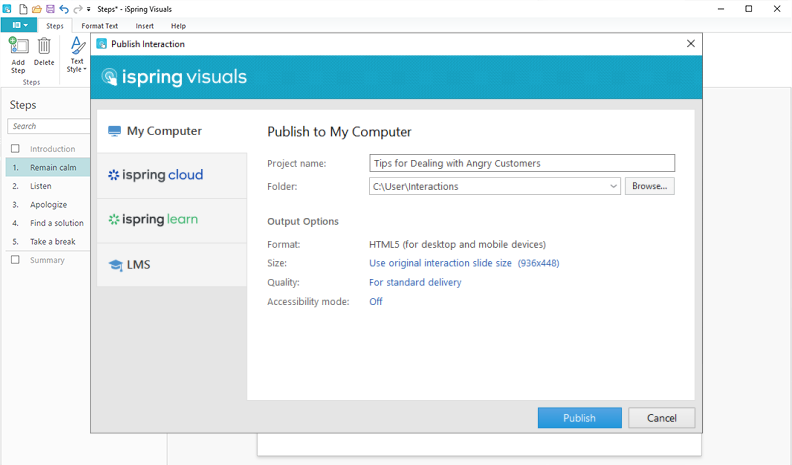 | 6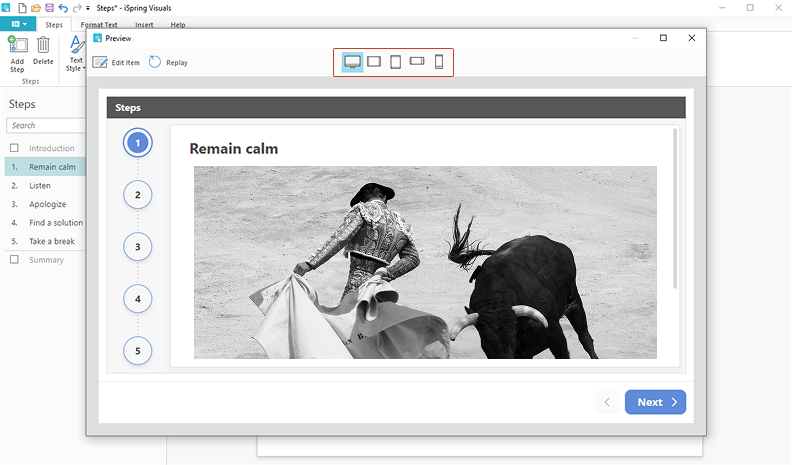 |
The storyboard will also be the lead-in to the next document you’ll create — the script.
Too much to read? Get a summary from AI
Step 4. Write a script for your tutorial video
Once your outline and storyboard are ready, it’s time to write the video script. This is where your video content really takes shape.
A clear, conversational script is essential for making tutorial videos that keep the viewer’s attention and explain complex topics step by step. Whether you make instructional videos for a knowledge base, training videos for a new tool, or explainer videos for social media platforms, a good script helps your message land.
Writing a script before you start recording also saves time during the video editing stage: you’ll know exactly what to say, when to highlight key ideas, and where to insert supporting visuals like screen recordings, text pop-ups, or animations.
Here are some helpful tips for writing an effective script:
- Keep it short and focused — the best tutorial videos are under 5 minutes.
- When adding subtitles, keep the language simple and easy to follow, even for viewers on mobile devices.
- Include prompts for any interactive elements, like quizzes or questions.
- Mark where you’ll add narration audio or when to record a video of your computer screen.
If you’re making training videos as part of a series, plan for video tutorial breaks to let learners absorb one new skill at a time.
The script is the backbone of your content. It helps you create a how-to video and other instructional content that is both clear and actionable. It also allows other team members or content creators to collaborate or reuse parts of your work for more videos in the future.
The best training videos start with a solid script.
Step 5. Choose the right microphone
Poor sound quality is one of the fastest ways to lose your viewer’s attention. Even if your video tutorial looks great, distorted or muffled audio can make it hard to follow — and easy to abandon.
If you’re serious about creating effective instructional videos, don’t rely on your computer’s built-in mic. It simply can’t deliver the clear sound your audience needs.
“When recording a tutorial video, it’s better not to use the built-in microphone on your computer. A built-in mic won’t create good sound because it doesn’t have the ability to improve voice quality or minimize background noise. The best option is a high-quality portable microphone.”

To deliver engaging, easy-to-understand training videos, invest in a good portable microphone. It’s a small step that makes a big impact.
Want help picking the right mic? Check out our screencast guide for tips on choosing the best recording equipment for your how-to videos.
Step 6. Install a recording and editing tool
With your mic ready, it’s time to choose the right software for recording your tutorial. A solid choice is iSpring Suite — a powerful authoring toolkit with a built-in video studio.
One handy feature is picture-in-picture recording. It lets you capture your screen and webcam footage at the same time. It’s perfect if you want to be on camera while explaining what’s happening on screen.
Not planning to use a webcam? No problem. You can easily record a screencast with voiceover. Just hit record and start walking through your material.
To polish your video, you can add extra elements like images, titles, shapes, or text and edit everything right on the screen. Want to guide viewers more clearly? Use visual hints: this tool detects your cursor movements and automatically highlights important actions.

Step 7. Record your tutorial video
Once your script is ready and your mic is set up, it’s time to start recording.
With iSpring Suite, you can create different types of tutorial videos depending on your goal — a screencast with narration or a screencast with a presenter video. Here’s how to record both.
Option 1: Screencast with narration
- First, install iSpring Suite. You can sign up for the 14-day free trial to get started smoothly.
- Open PowerPoint and go to the iSpring Suite tab.

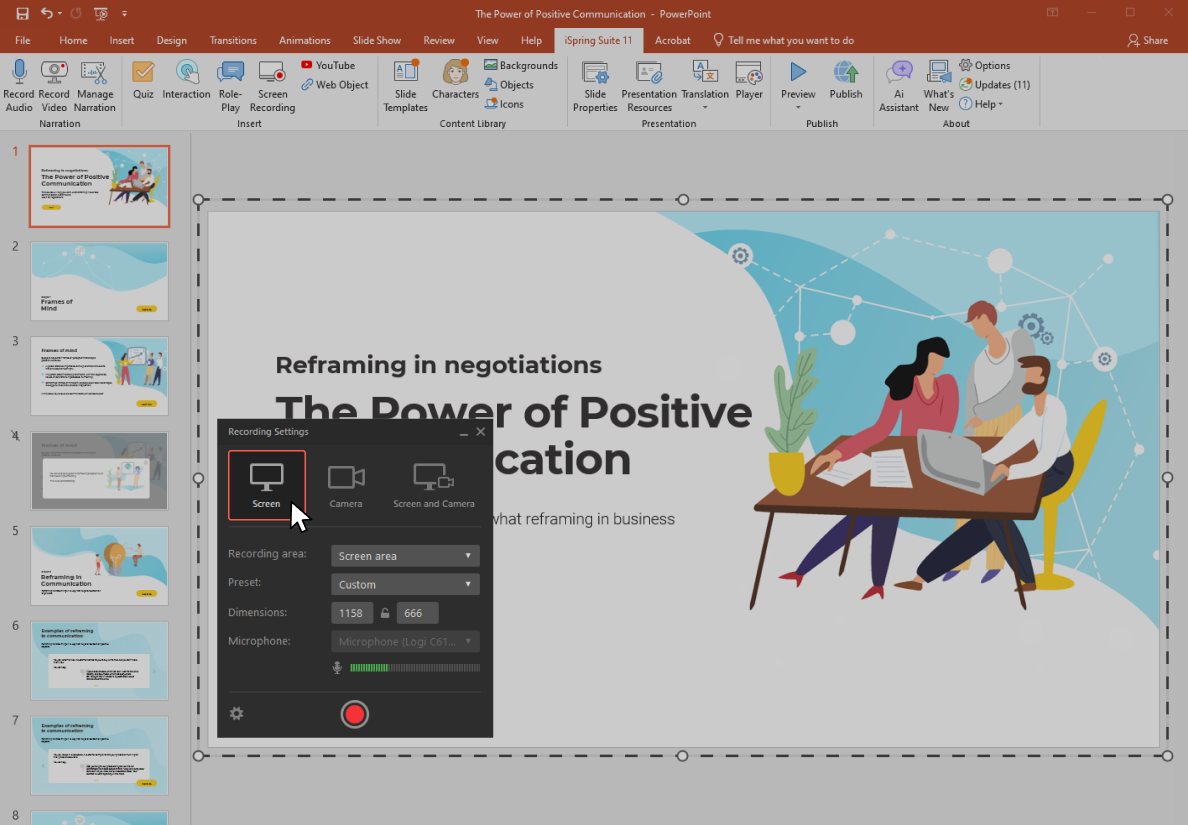
- Click Screen Recording.

- In the Recording Settings window, select Screen.

- Turn your microphone on and set the recording area — full screen, a window, or a custom area.


Tips for a smooth recording:
- Cursor: Hide it if it’s not needed, or highlight it if you want viewers to follow your actions.
- Mistakes: Don’t stop the recording; just pause briefly. This makes it easier to edit later.
- Voice: Keep your tone consistent and speak clearly at a steady pace.
Option 2: Screencast with presenter video
If you want to appear on camera while showing your screen:
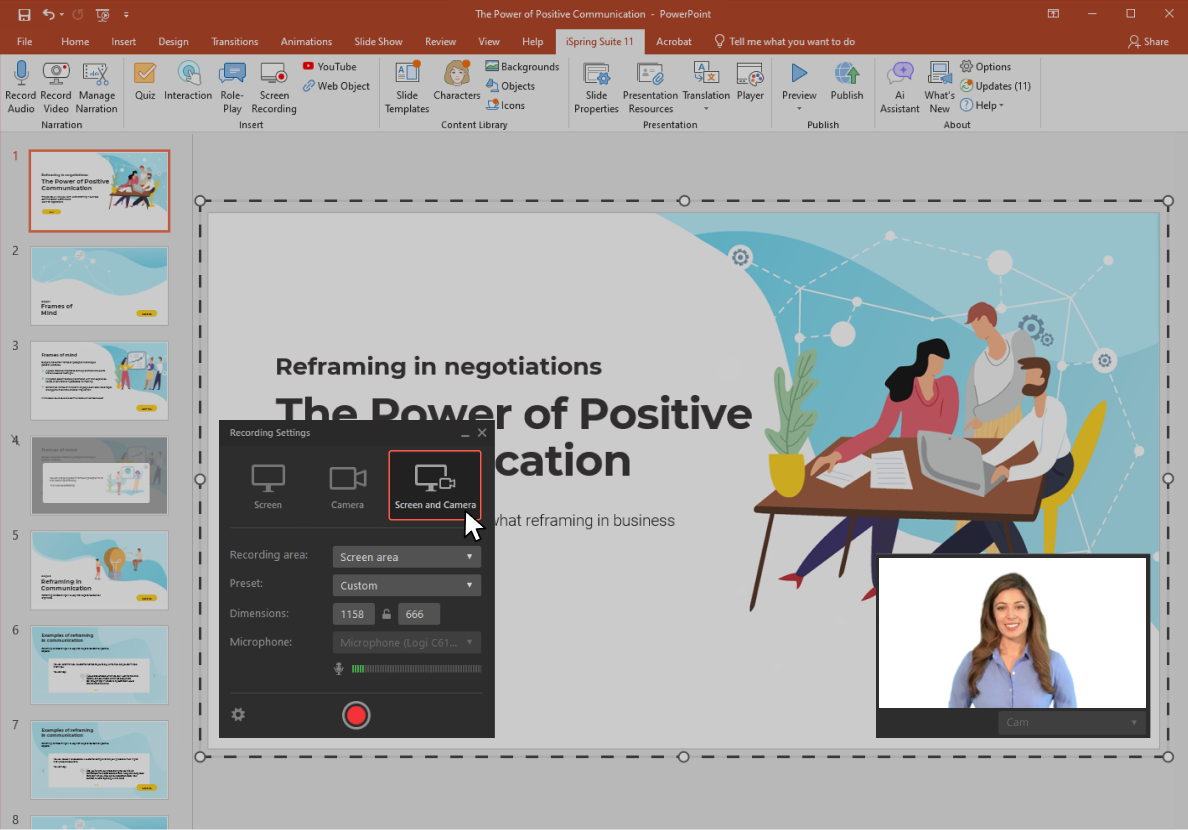
- In the Recording Settings, select Screen and Camera.

- Select your webcam.
- During the recording, you can show both video streams side by side or switch between them depending on the context.

Step 8. Edit your tutorial video
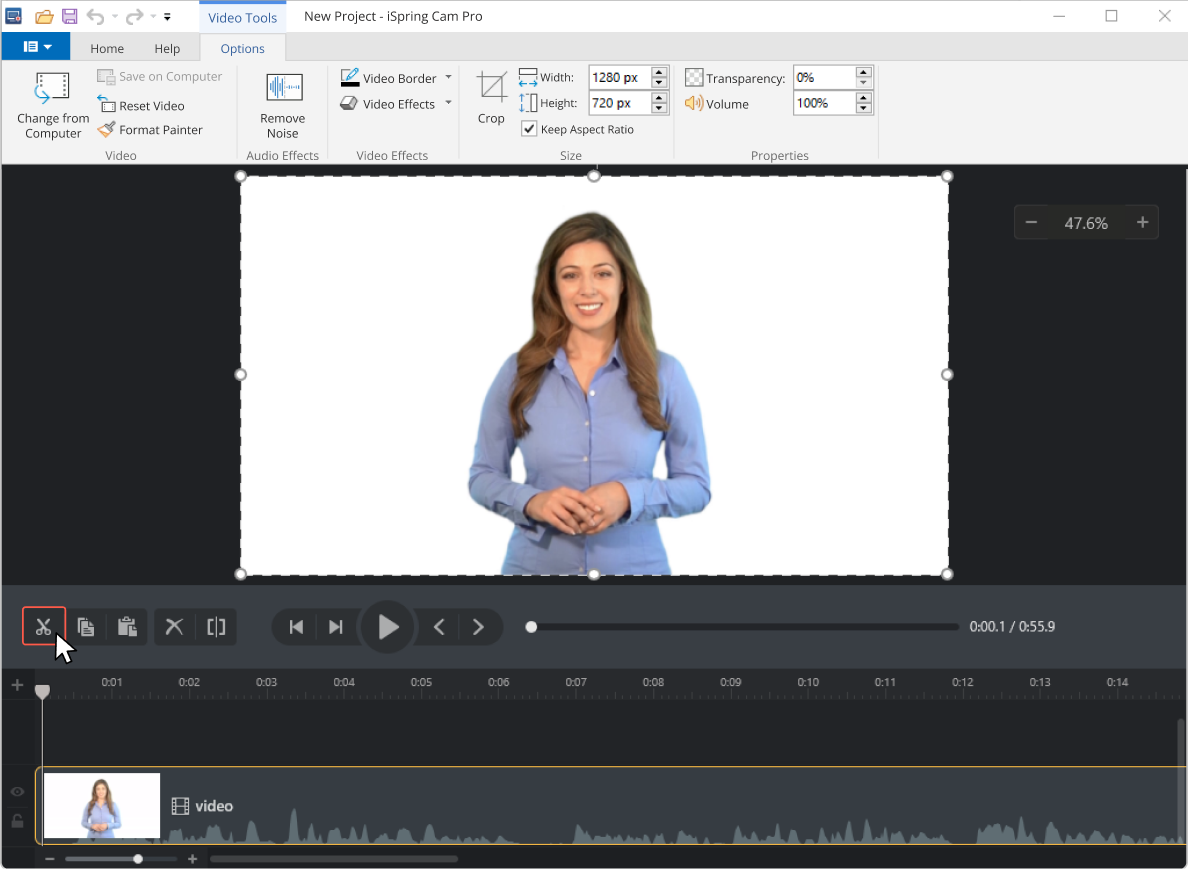
Once the recording is done, it’s time to polish your video. The iSpring Suite video editor gives you everything you need to do this quickly and cleanly.
You can:
- Remove background noise.
- Trim or delete unnecessary parts.
- Add smooth transitions between scenes.
- Adjust transparency.
- Split and merge video fragments.
- Add music or voiceovers using the multi-track timeline.
These editing tools help you turn a raw recording into a professional-looking tutorial that’s clear and enjoyable to watch.
Step 9. Make your tutorial engaging
After basic editing, focus on keeping your audience’s attention. A few simple enhancements can make a big difference:
- Captions and annotations — Highlight key takeaways by displaying keywords or steps on screen as they’re mentioned in the voiceover. This reinforces learning and supports viewers who prefer reading.
- Images and infographics — Visuals that match what you’re explaining help to illustrate concepts and make your video more memorable. They can also add some visual flair.
- Special effects — Use slow motion to spotlight important actions or steps that viewers might miss at normal speed.
These small touches make your tutorial more dynamic — and easier to follow.
Check the final result one more time.
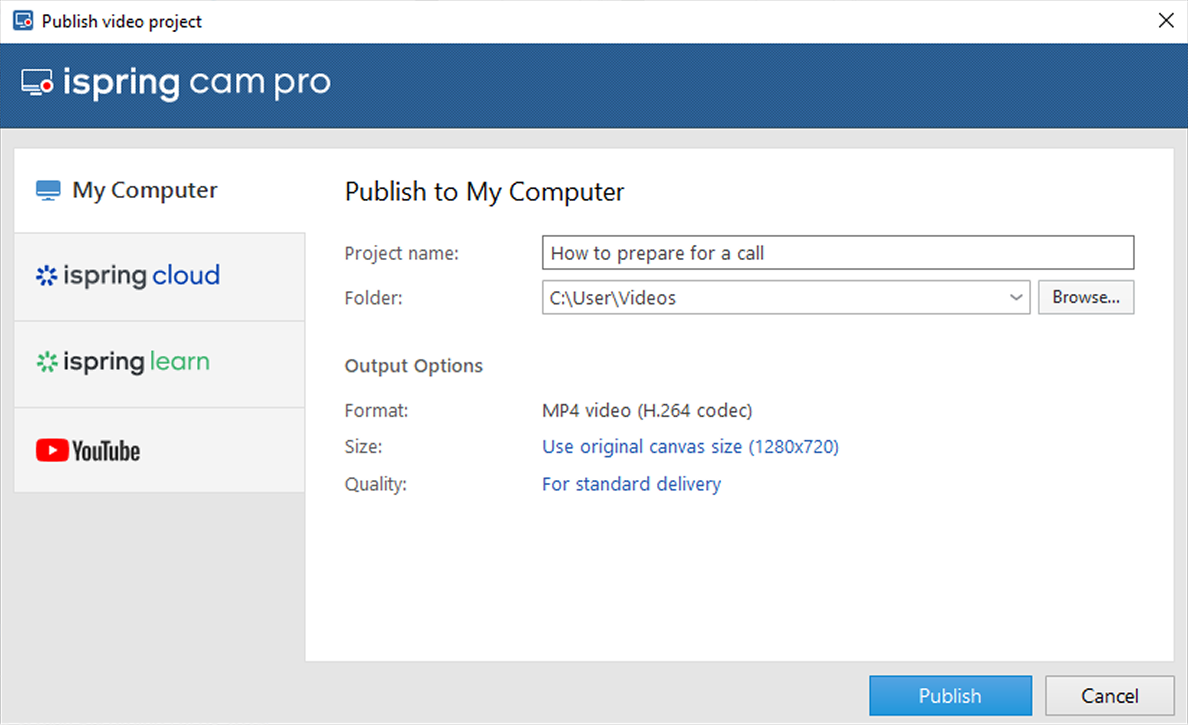
How to Share Your Tutorial Video
You’ve just learned how to make a good tutorial video — now it’s time to share it with the people who need it most. Where you’ll publish depends on your goals and audience, but don’t worry because you’ve got plenty of options.
- Save as an MP4
Download your tutorial as an MP4 so it’s easy to store, share, or upload anywhere. This format works on almost every device. - Upload to YouTube
Want a big audience? YouTube makes your video easy to find and simple to embed into blogs, websites, or even presentations. You can choose to keep it public, unlisted, or private. - Publish to your LMS
If you’re training employees or students, your LMS is the best place for it. Learners can watch your video, track progress, and even complete related quizzes. - Send by email
For quick how-tos or urgent updates, just share a link to your video in an email. Add a thumbnail image so it’s more inviting to click.
Ready to get started? Try iSpring Suite free for 14 days and explore all the tools that allow you to create and share tutorials; no credit card required.
Tips and Tools for Making a Great Tutorial Video
Making a tutorial video that’s easy to follow and actually fun to watch doesn’t have to be tricky. In this section, we’ll share simple tips to keep your videos engaging and show you the best tools for recording, editing, and adding audio. With these tips and tools, you’ll be creating instructional videos that people will actually enjoy watching and learning from.
Tips for making a great video
Want your tutorial to look great, sound clear, and keep people watching?
Let’s start with these essentials:
- Practice before you hit the record button. The way you speak matters. Read your script out loud a few times. Aim for clear and steady — not rushed, not flat.
- Choose a quiet spot. Record in a room with good acoustics and minimal noise. Smaller spaces usually work better (less echo).
- Tidy up your screen. If you’re recording your screen, close everything you don’t need. Hide personal files, turn off pop-ups, and shut down chat apps.
- Make it a story. People love stories, even in tutorials. Build a clear flow, respond to your audience’s needs, and give them a reason to keep watching.
- Talk like a real person. Use a casual, friendly tone. “You,” “we,” and “I” go a long way toward making your video feel more human.
- Smooth it out. Use transitions to connect segments. Don’t just list steps; guide your viewer through them in a natural, engaging way.
Top Tools for Making a Tutorial Video
There are many great tools to help you create a how-to video or other tutorials, even if you’re just starting.
For Screen Recording:
- iSpring Suite – A PowerPoint-based authoring tool with built-in screencast, narration, and visual enhancements.
- Camtasia – An all-in-one video creation and editing software from TechSmith.
- Loom – A fast, browser-friendly screen and camera recorder with simple editing and sharing features.
- OBS Studio – A free, open-source software for screen recording and streaming.
For Video Editing:
- Adobe Premiere Pro
- Final Cut Pro
- iMovie (Mac users)
- Clipchamp – An online video editor from Microsoft, built for ease of use and HD export.
For Audio Narration:
- Audacity – A free, open-source multi-track audio editor and recorder.
Most of these tools provide everything you need to record video and produce polished training videos.
Common Mistakes to Avoid
Creating video tutorials and explainer videos takes more than just pressing the “record” button. So, how do you make the tutorial truly effective? Here are some common pitfalls to avoid if you want your video content to actually help your audience learn at their own pace.
Poor audio or unclear instructions
Investing in high-quality sound is non-negotiable: it helps viewers focus and follow along. Keep your instructions simple, direct, and supported by visual aids where needed.
No script or overlong videos
Making tutorial videos without a plan usually leads to rambling and/or missed points. A solid video script keeps you focused and saves editing time later. Also, avoid dragging things out — people prefer informative training videos they can watch at their own pace. Stick to one main idea per video to keep it tight and helpful.
No call to action
Every effective instructional video should guide viewers on what to do next. Whether it’s exploring another topic, practicing a task, or using a product, always include a clear call to action at the end. This turns passive watching into active learning — and keeps them coming back for more.
Ignoring your target audience
If you’re not speaking your target audience’s language or solving their actual problems, even the slickest explainer videos won’t land. Before you start creating video content, take the time to understand what your viewers need, what they struggle with, and how they prefer to learn.
Final Thoughts
Making a tutorial video isn’t as hard as it looks — especially when you’ve got a clear plan and the right tools. Focus on your audience, map out your content, and take time to polish your delivery. Start with one simple video, see what works, and build from there. Every new tutorial will be sharper than the last.
Ready to create your own tutorial? Try iSpring Suite free for 14 days.
FAQ: Creating Effective Tutorial Videos
What is the best way to create a how-to video?
When creating training videos for beginners, clarity is everything. Use real-world examples and demonstrate each step in real time using a computer screen recording.
If you’re making instructional videos, walk viewers through the “why” behind each action, not just the “how.” Beginners appreciate context.
To get started, pick a focused topic, write a basic script, record your screen with clear audio, and then edit the content for flow and clarity.
What’s the difference between a tutorial and a how-to video?
While the terms often overlap, there is a subtle difference.
A tutorial video is usually longer and covers a process in detail. It often includes context, best practices, and multiple steps.
A how-to video is shorter, more focused, and gets straight to the point. Think of it as a quick fix for one specific problem.
Both are effective, especially when part of a full library of training videos or instructional material.
How do you make an effective tutorial video?
To make an effective instructional video, focus on your audience and a single clear goal. Use a simple, conversational script, add audio narration, and highlight steps with visual cues. Ensure good lighting, clear sound, and high-resolution screen recordings. Break content into short, focused tutorials so viewers can learn at their own pace. This approach covers what makes a good instructional video and keeps learners engaged.
How to create tutorial videos for YouTube?
To create a successful YouTube tutorial, focus on a specific topic, use a clear script, and prioritize high-quality audio and video. Edit for pacing and engagement, and optimize your title and description with keywords so your target audience can find it. Using a dedicated authoring tool can help you produce more professional results.
Create online courses and assessments in record time.


What Is Lecture Capture? A Complete Guide to Modern Learning Tools
The 21 Best Video Tutorial Software Programs: Free & Paid
The 9 Best Screen Recorders for PC: Free & Paid
The 10 Best Training Video Software for 2026