How to Embed Fonts in PowerPoint in Windows and macOS


Third-party fonts are custom fonts that you add to your presentation — they don’t come with PowerPoint by default. They can make your slides look fresh and unique — but there’s a catch. If you send your file to someone who doesn’t have the same fonts installed, the text might look different. PowerPoint will automatically replace missing fonts with standard ones, which can mess up your layout, style, and overall design.

 If you got creative with fonts and want the presentation you’ve created to show up perfectly on any computer, you need to make sure that the fonts are embedded right into your PowerPoint file.
Key Takeaways
The article explains why embedding fonts in a PowerPoint ensures your slides display correctly on any computer, even if the recipient doesn’t have the same fonts installed. It shows how to embed fonts on Windows via File → Options → Save by checking the “Embed fonts in the file” box, and on macOS through PowerPoint → Preferences → Save, with options to embed only used characters or all characters. It also covers checking if a font can be embedded, adding custom fonts, fixing font issues, and notes that embedding increases file size.
Before Embedding a Font in PowerPoint
Not every font is ready to be embedded. Before adding it to PowerPoint, make sure that the font file is not read-only, and that it’s available for embedding. To do that, you need to check the properties of the font file. Here’s how:
1. Log in as Administrator (to change font file attributes if necessary).
2. Open File Explorer and go to C:WindowsFonts.
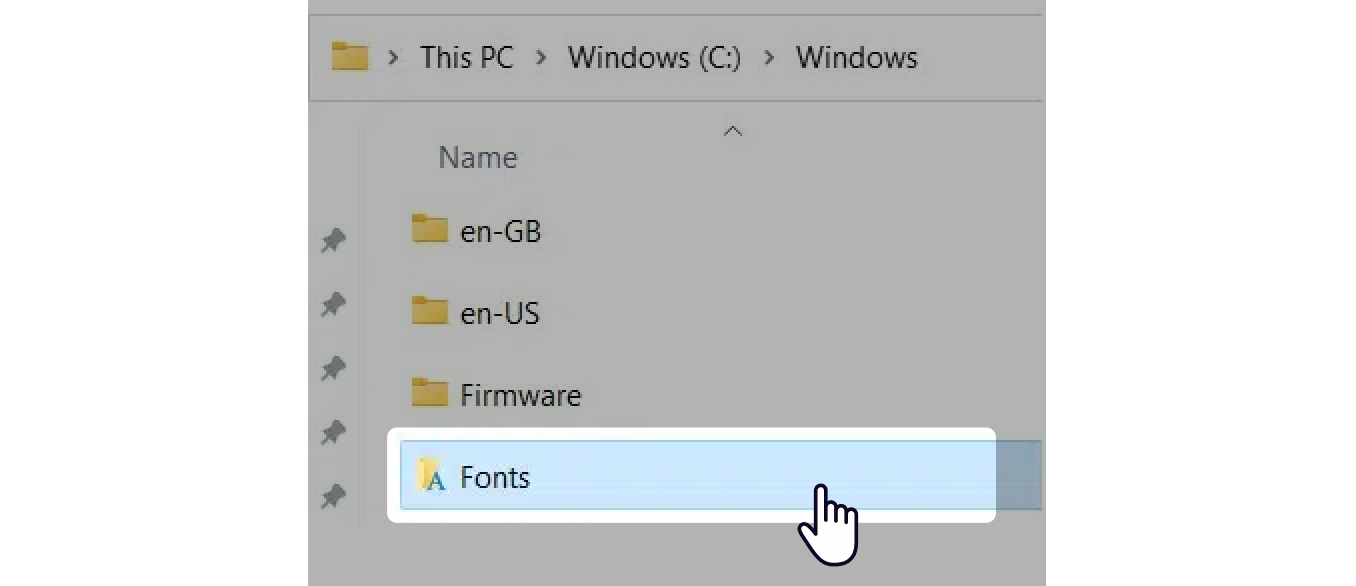
3. Find the font you’re using (Lobster Regular, for instance).
4. Right-click on it and select Properties.
5. If Read-only is checked, uncheck it and click on OK.
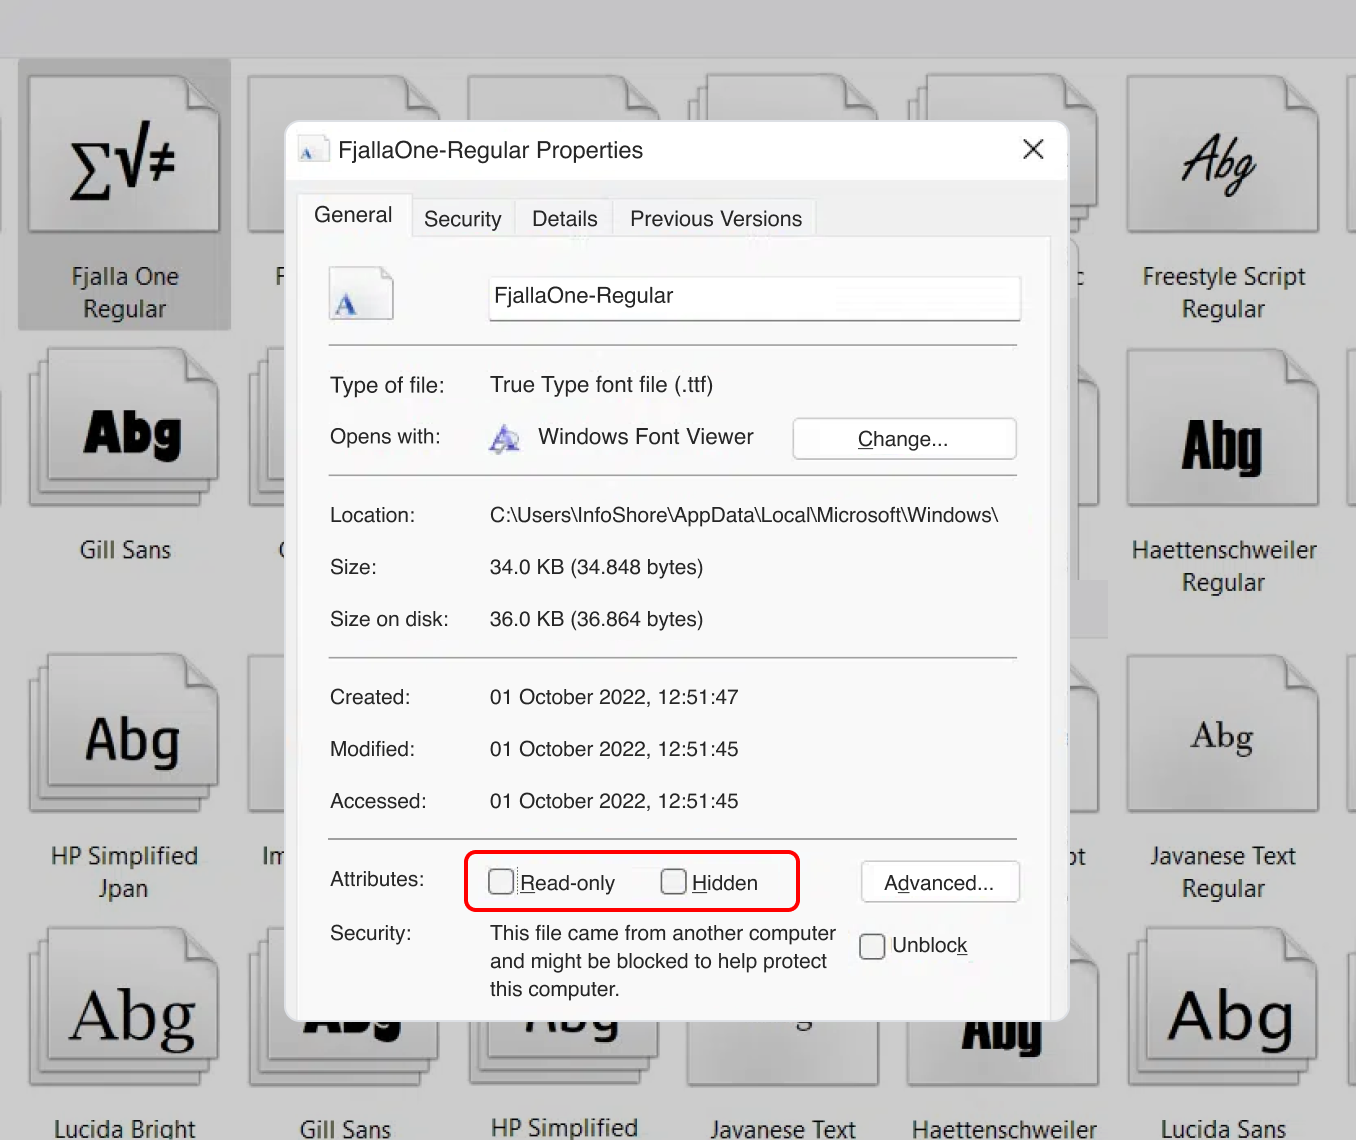
Then select Properties again and go to the Details tab. Look for Font embeddability — it should say Installable or Editable. If it doesn’t, you won’t be able to embed this font.
Select the method that suits you better:
How to Embed Fonts in PowerPoint in Windows
Want to make sure your custom fonts travel with your file? Here’s how to embed them in Windows.
Step 1: Open the presentation you want to share
Start with the file you plan to send or present on another device — that’s where you’ll embed your fonts.
Step 2: Click on File > Options in the lower-left corner
This opens the PowerPoint settings where you can access font embedding features.

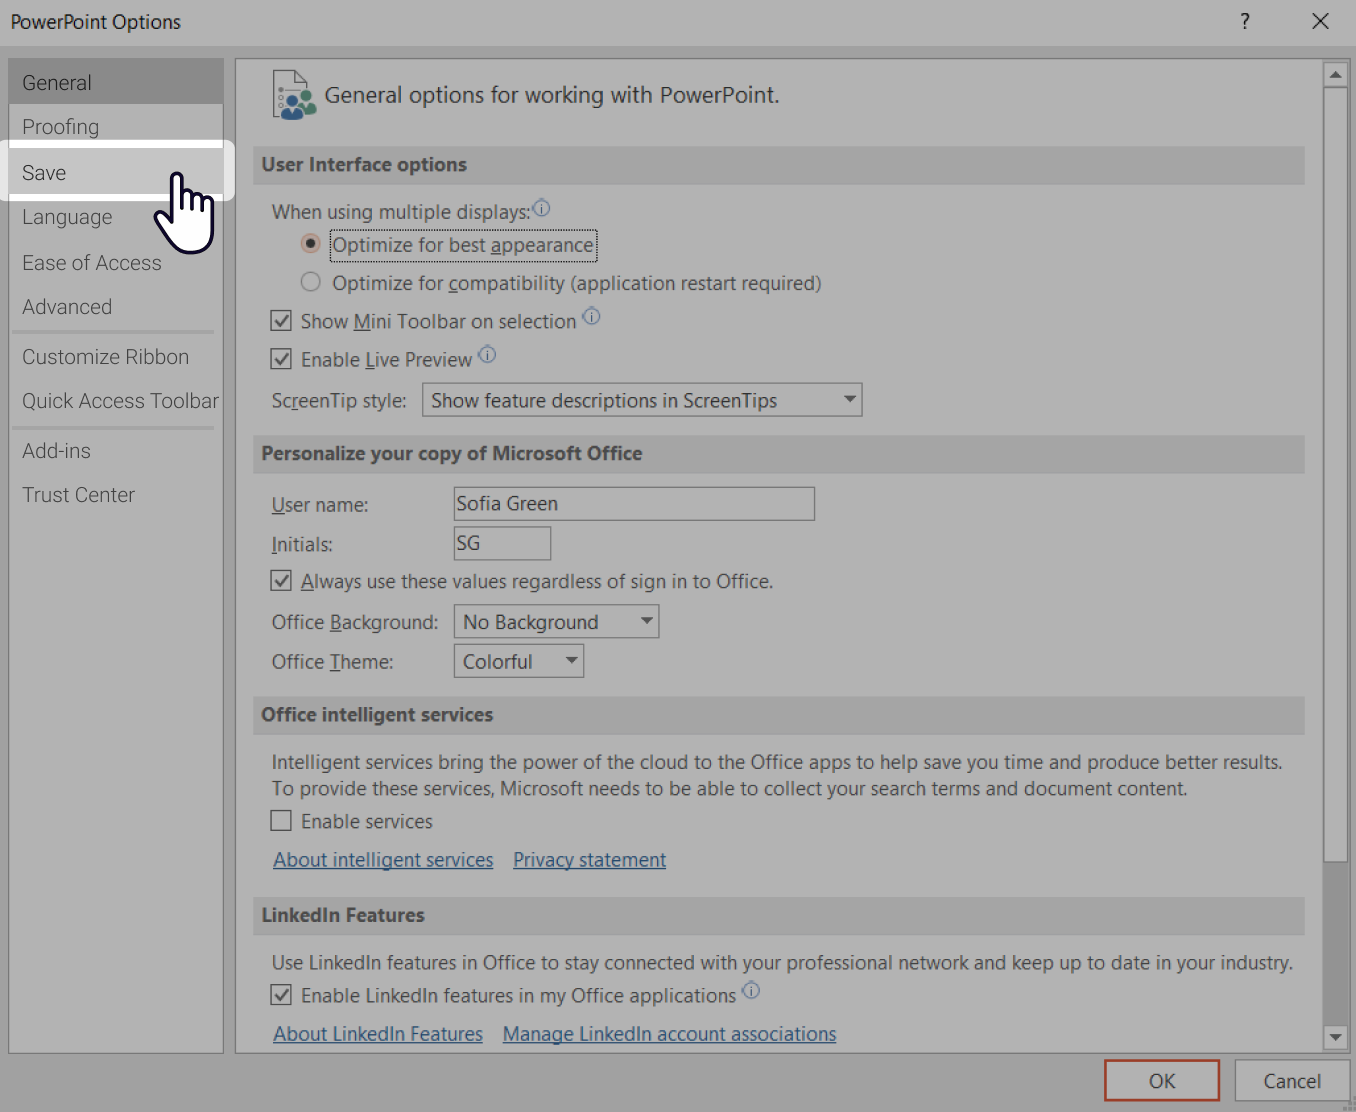
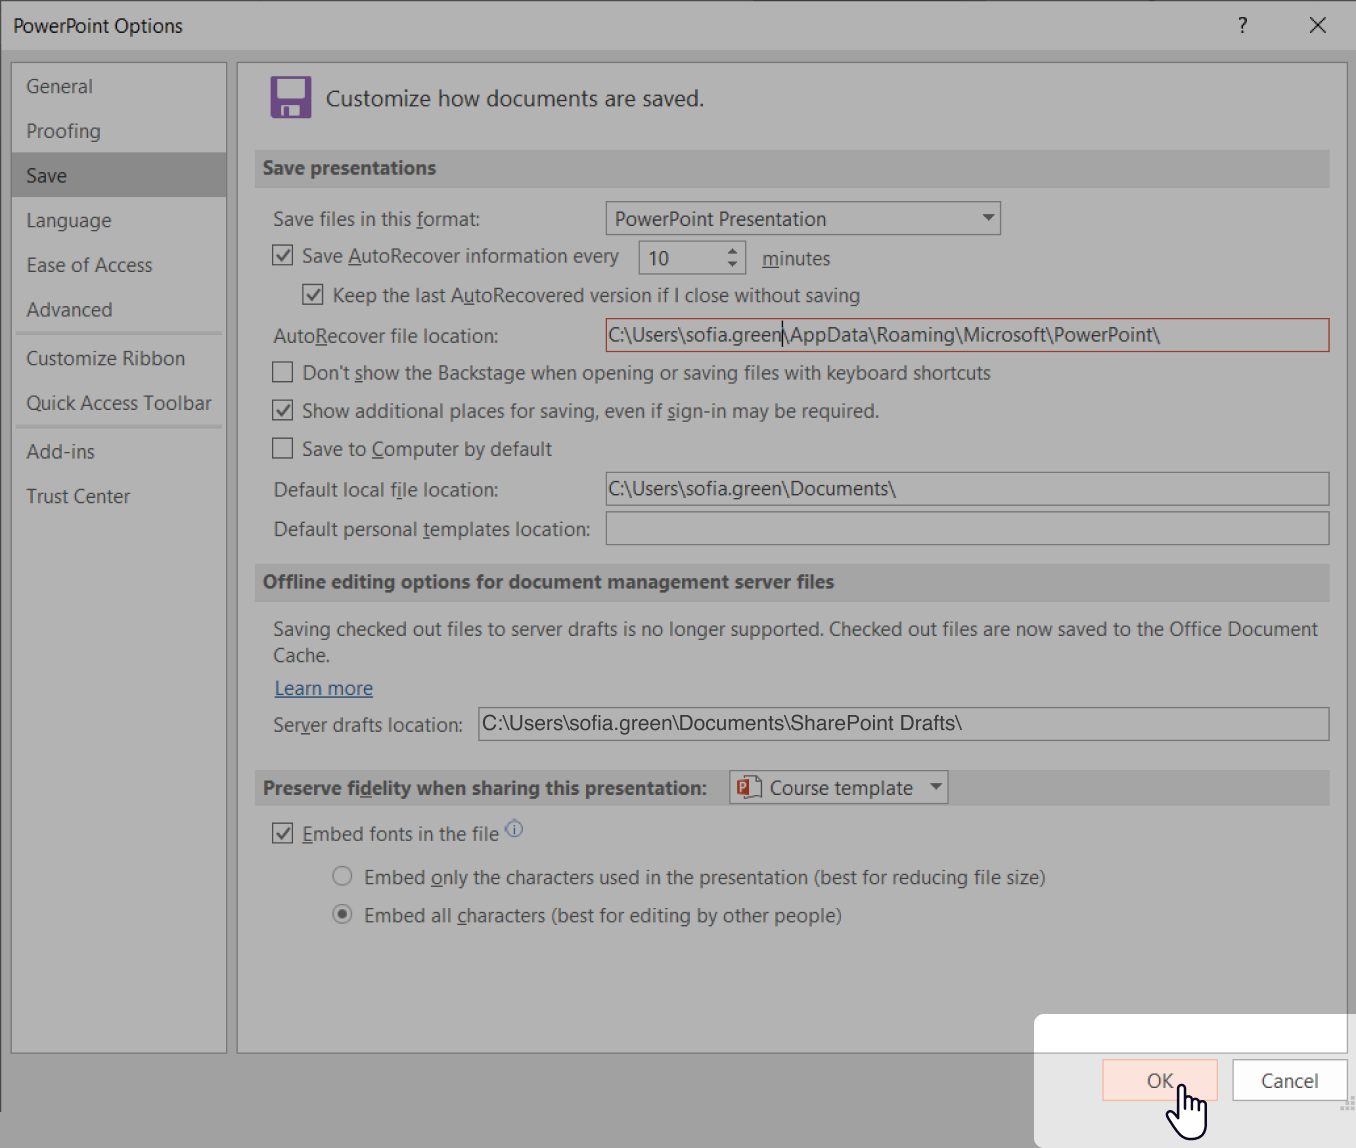
Step 3: Go to the Save tab
In the menu on the left, click on Save — that’s where all font-related saving options are located.
Too much to read? Get a summary from AI
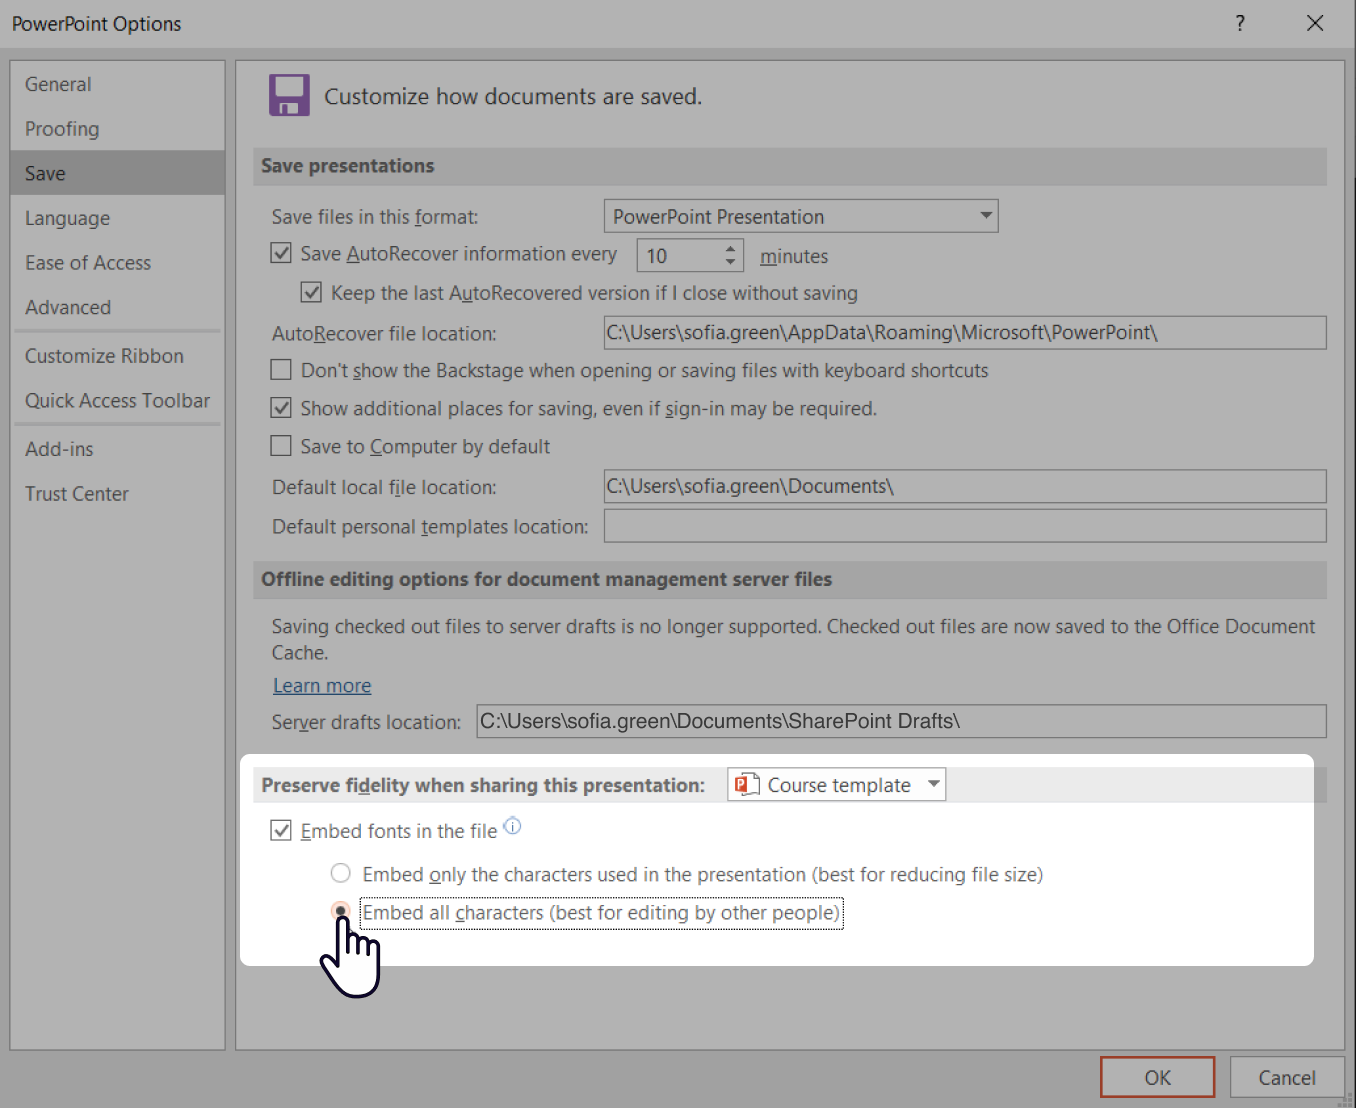
Step 4: Checkmark “Embed fonts in the file”
Under “Preserve fidelity when sharing this presentation,” make sure the checkbox is selected. For best results, embed all characters so your text will display correctly, even if it is edited later on.
Step 5: Click on OK and save your presentation
Done! Your fonts are now embedded, and your slides will look the same no matter where they’re opened.
Quick note: Embedding fonts can make your file much bigger — each font might add several megabytes. So, consider sticking to one or two custom fonts to keep your design clean and your file size friendly.
How to embed fonts in macOS
Want your fonts to look the same when someone else opens your file? Here’s how to embed fonts on a Mac.
Step 1: Open your presentation in PowerPoint
Start with the file you want to share or collaborate on — this is the one you’ll embed your fonts into.
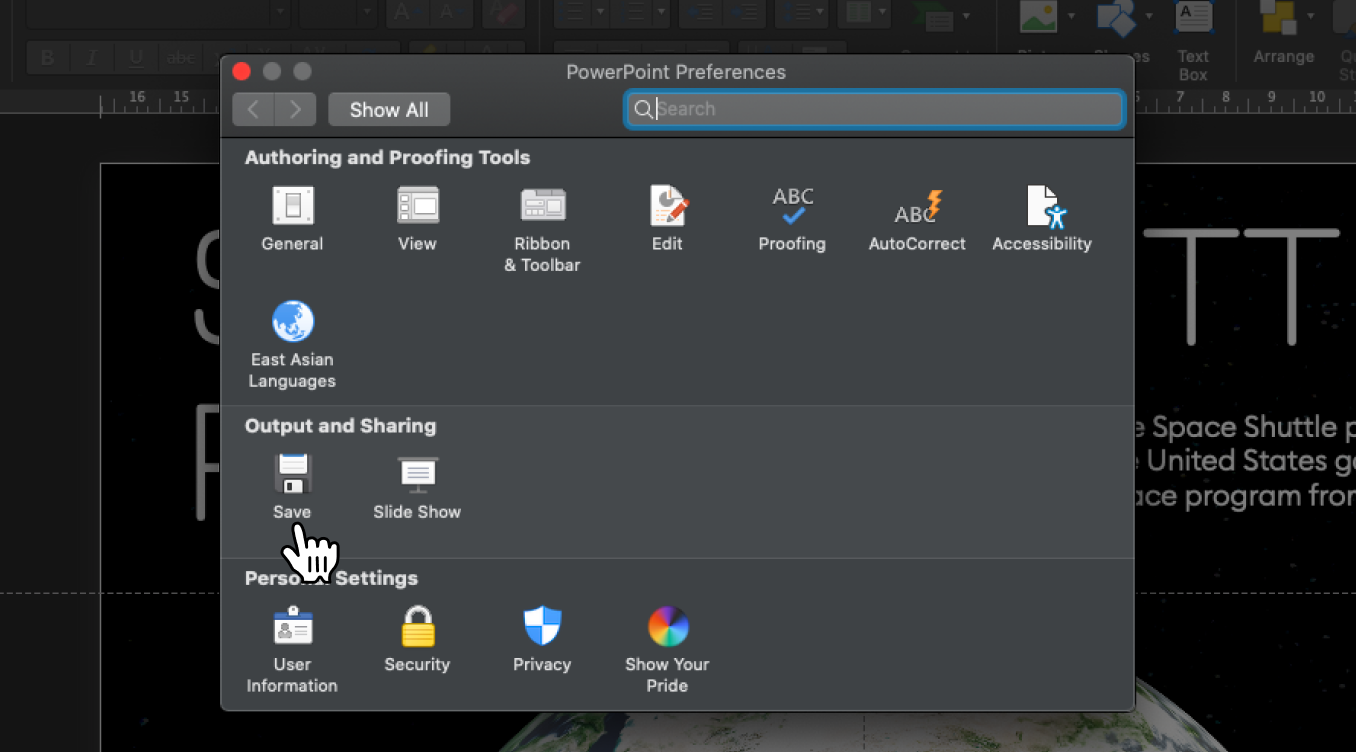
Step 2: Go to the PowerPoint menu and click on Preferences…
This opens the settings where you can manage how fonts are saved with your presentation.

Step 3: In the Output and Sharing section, select Save
This is where you’ll find the font embedding options for Mac users.
Step 4: Checkmark “Embed fonts in the file”
Once you tick this box, PowerPoint will package the fonts with your file so it will look the same everywhere.
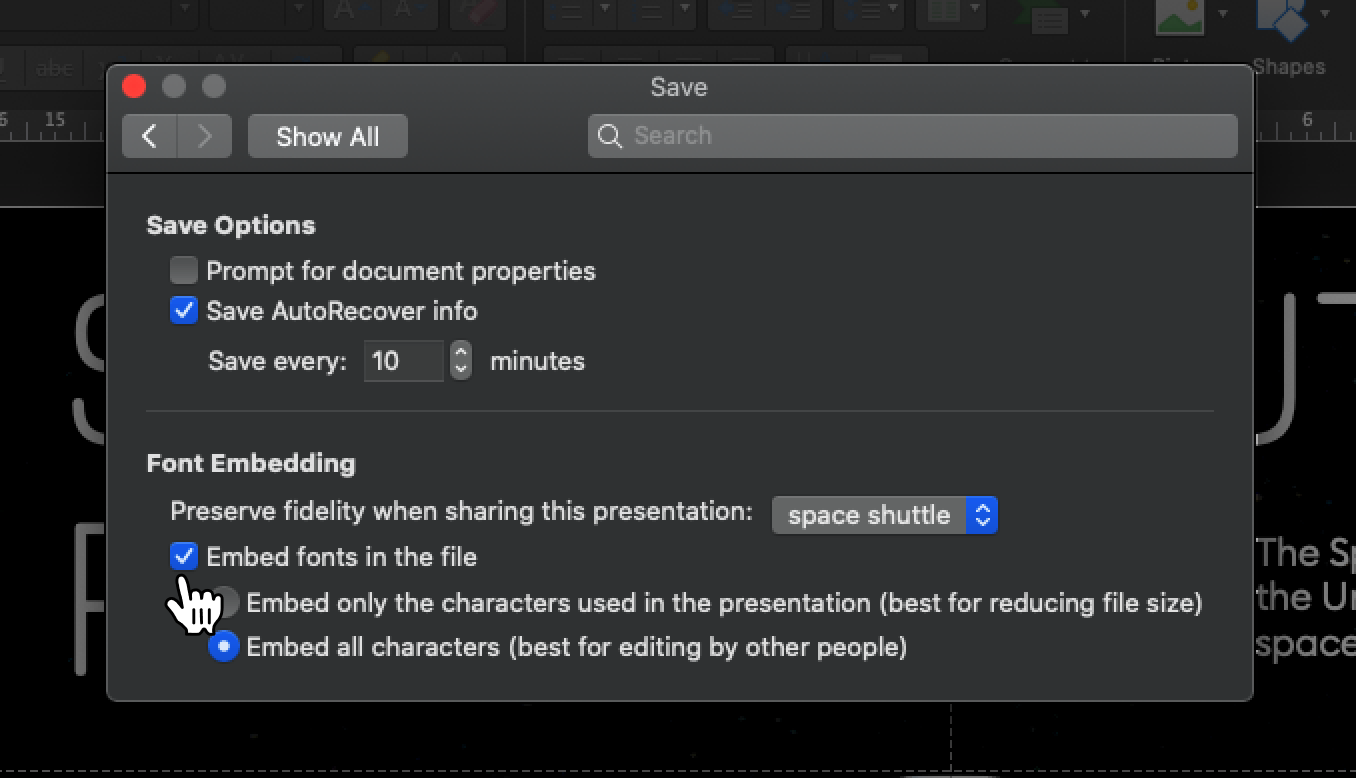
Just as in Windows, you’ll have two options:
- Embed only the characters used in the presentation — smaller file size, good for finished decks.
- Embed all characters — better if edits might happen later on by yourself or others.
Choose the option that fits your situation — but if you’re unsure, embedding all characters is usually safer.
Once you embed the fonts, your .pptx file will maintain your design exactly as you intended, no matter who opens it or where it’s shared.
How to Download and Install Custom Fonts for Microsoft PowerPoint
Want to make your presentation stand out with unique fonts? Here’s a simple way to add custom fonts to PowerPoint.
Find websites with downloadable fonts
There are many options to download custom fonts for free or purchase them for commercial use. As for the free fonts, there are trusted websites that might come in handy for you. Here are a few:
These platforms have thousands of fonts and active communities that can help if you encounter any issues.
Download the font you like
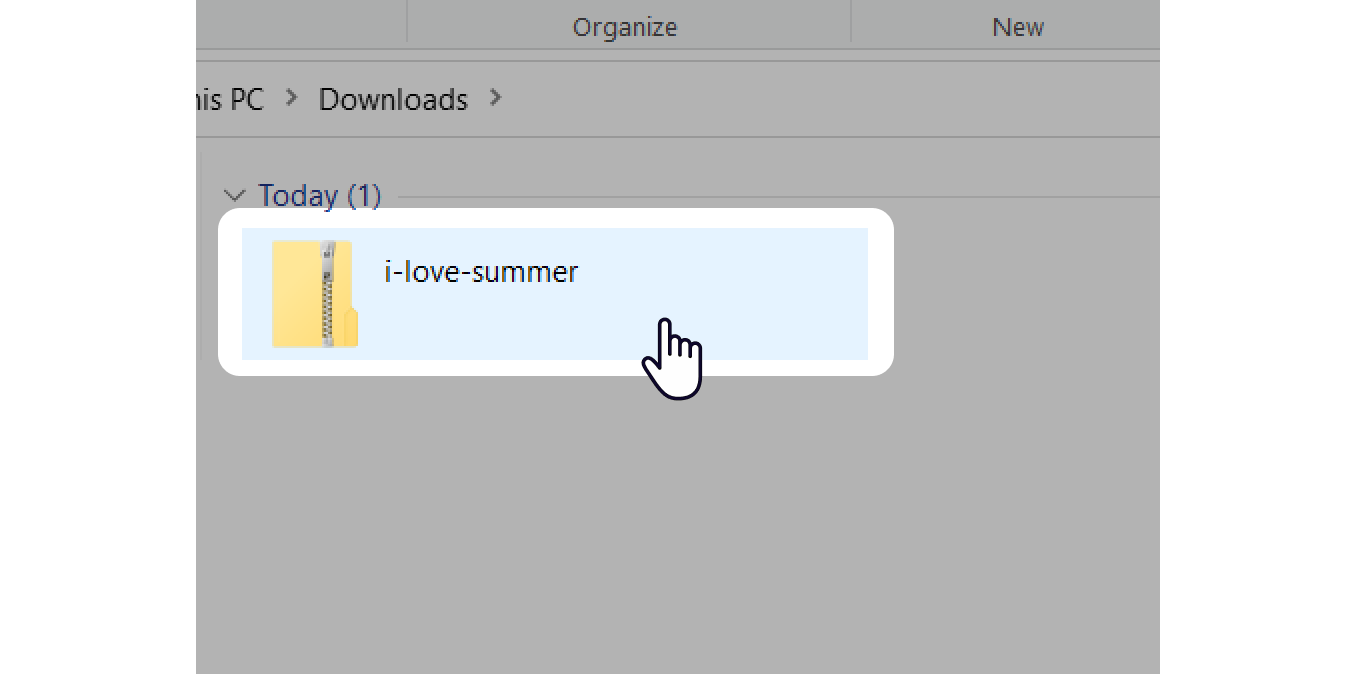
When you find a font you love, download it. Most fonts come as a .zip file.
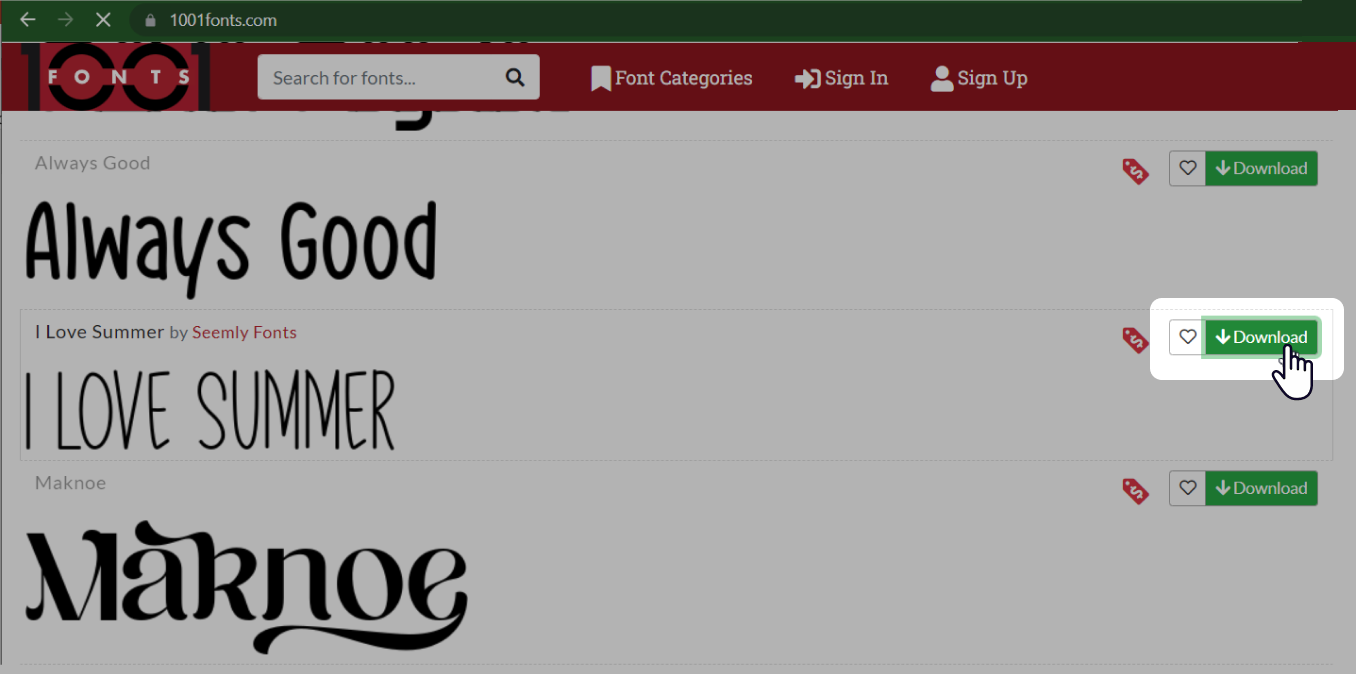
Save it to your computer — it usually lands in the Downloads folder.
Install the font on your computer
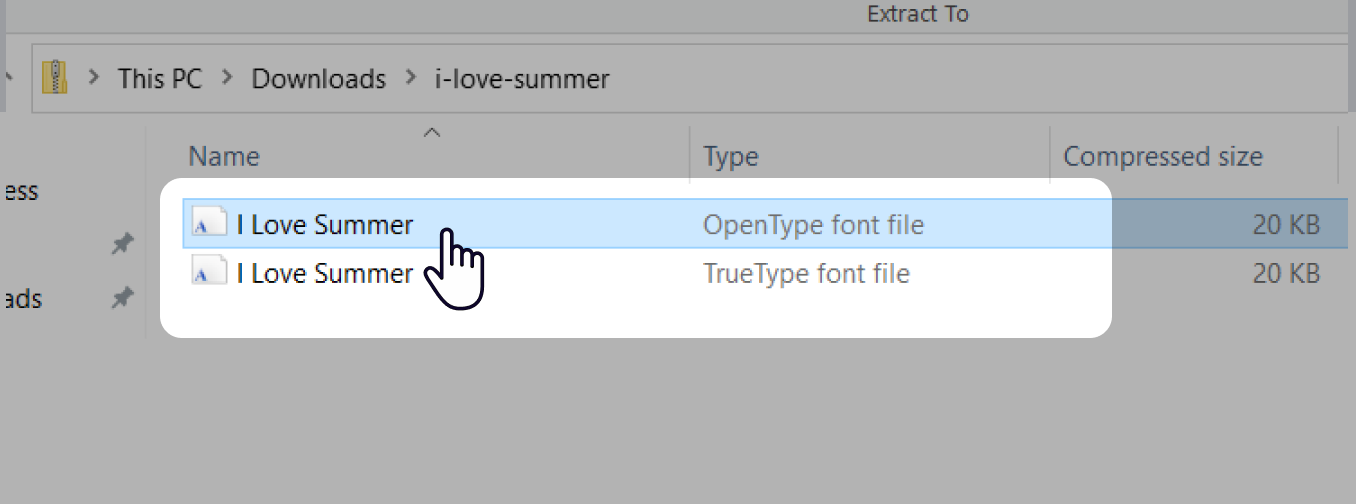
Open the .zip file, find the font (it will usually be in .ttf or .otf format), and double-click on it.
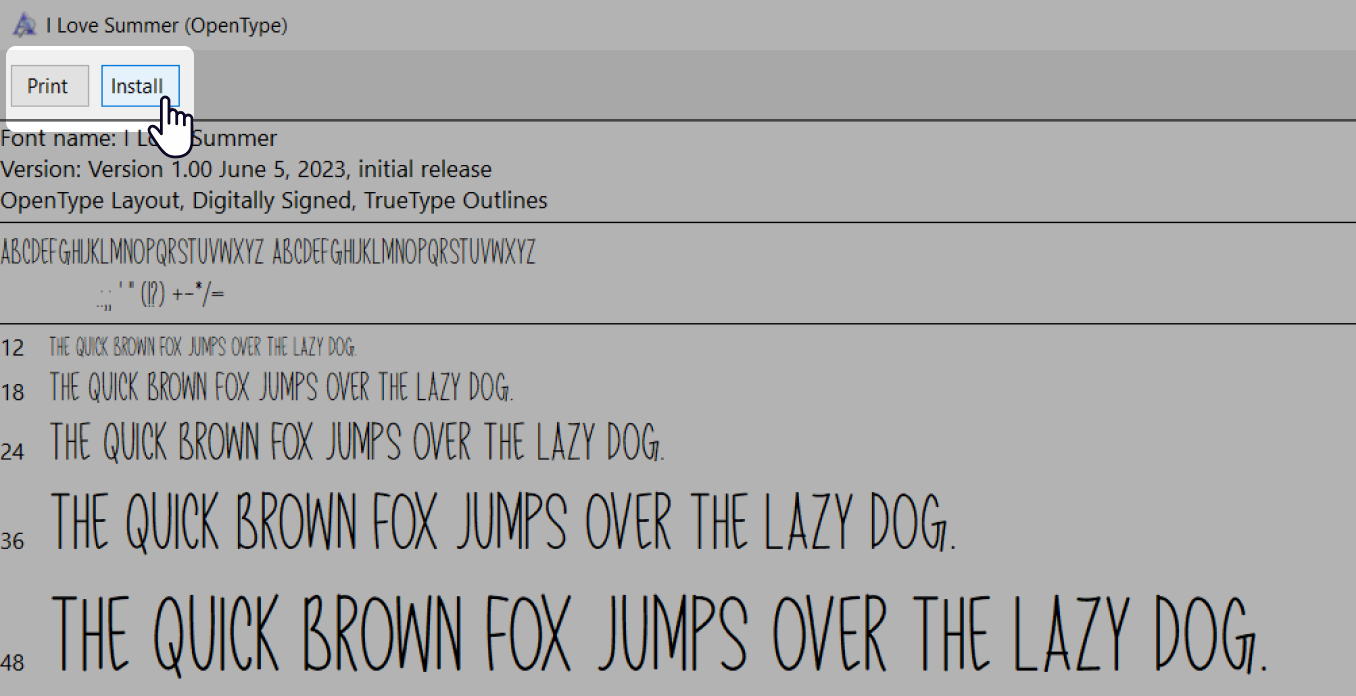
A preview window will pop up — if the font looks good, just hit Install.
Check to see if the font appears in PowerPoint
After installation, open your PowerPoint file. Your new font should now appear in the font list, ready to use.
Quick note: Once installed, your font will show up in all your Microsoft Office apps — not just PowerPoint.
FAQ
Here are some common questions (and solutions) to help you handle font issues like a pro.
How can I send a PowerPoint with custom fonts?
To share a PowerPoint file with custom fonts, embed the fonts first. Here’s how:
- Open your presentation.
- Go to File → Options → Save.
- Check the box that says Embed fonts in the file.
How do I fix fonts not available in PowerPoint?
If you open someone else’s presentation and notice that some fonts look off, you can replace them manually:
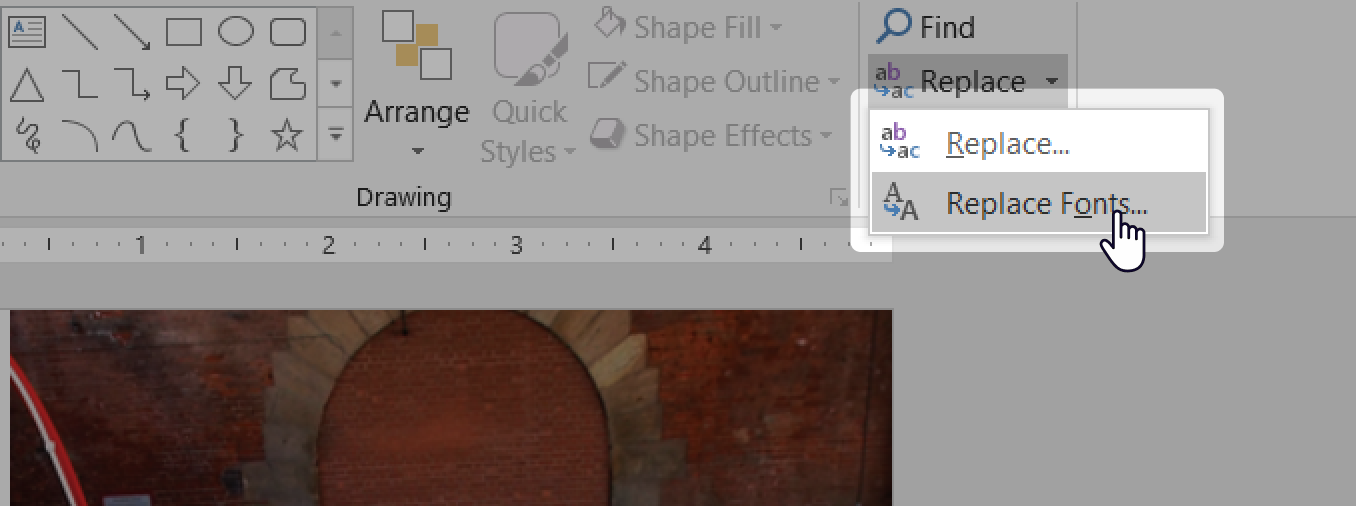
- Go to the Home tab.
- Find the Editing group, click on the arrow next to Replace, and choose Replace Fonts.
- In the pop-up window, pick the font you want to replace it with and select a new one from the dropdown menu.
- Click on Replace, and you’re done.
If you’re the author and notice that your embedded font still isn’t working, try this workaround:
- With your presentation open, go to File → Save As.
- Choose PowerPoint XML Presentation as the format.

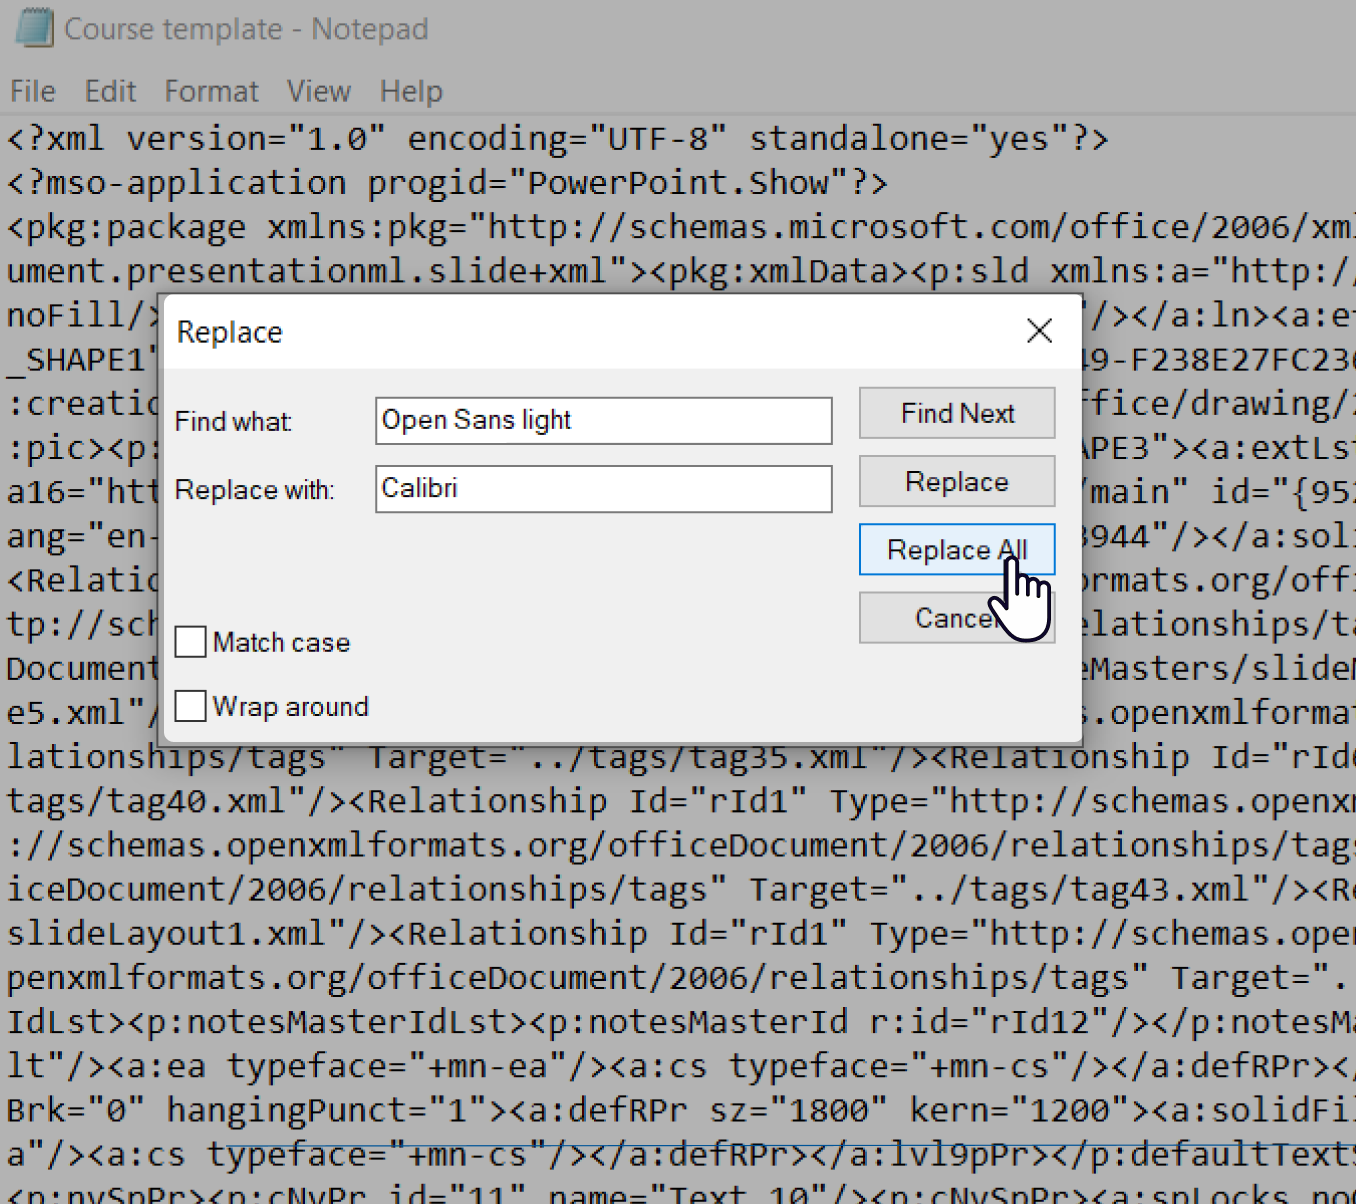
- Open the saved XML file using Notepad.
- In Notepad, click on Edit → Replace.
- Enter the name of the problematic font and the font you want to replace it with.
- Save the file and open it again in PowerPoint to check the results.
Some commercial fonts are protected by DRM and cannot be embedded, no matter what you try. You can check a font’s permissions by right-clicking on the font file, selecting Properties, and looking under the Details tab.
Also, downloaded fonts can have broken character sets, which might cause issues. It’s rare, but it happens.
Final Thoughts
Want to turn your presentation into a ready-to-go online course? Try iSpring Suite — a PowerPoint-based tool that helps you turn PPT slides into beautiful, interactive courses or flipbooks in no time.
No glitches, no font issues — just a seamless experience on any device. Plus, you get access to hundreds of templates and design assets to make your content shine.
Start your free 14-day trial and see how easy it can be.
Create online courses and assessments in record time.


How to Add a Hyperlink to a PowerPoint Presentation (PPT)
How to Add Action Buttons to Set Up Navigation and Commands in PowerPoint
How to Create a PowerPoint Template with Company Logo