How to Translate Courses with iSpring Suite AI Fast


Companies with departments in different countries need their eLearning content to be available in a variety of languages. They typically have to translate and rebuild tests manually for each department. And this takes time.
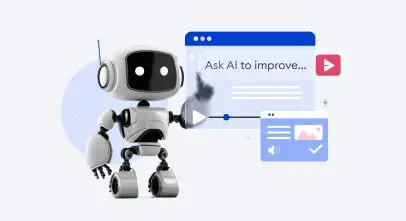
But now, with iSpring Suite AI, you can save time and effort by automating this process.

After you translate the text, your design and settings will remain identical to the original. Everything will work just as you planned it to. You will have the same content, but in a different language.
How can this new feature benefit you?
Save time. You no longer have to do the same work twice. Create a course only once, and iSpring Suite AI will help you translate it into any language quickly.
Avoid mistakes. There’s always a risk of making a mistake when copying a text from a course to a document, and vice versa: you might skip a slide, delete a word, or add the same sentence twice. iSpring Suite AI will help you avoid such mistakes. The tool will change texts on each slide automatically.
Also read -> eLearning translation 101
Step-By-Step Guide on Translating Courses
In short, to translate a course with iSpring Suite AI, you should export texts from the course to your computer, translate them, and import them back to iSpring Suite AI. The software will put your text in the right places automatically. It will also maintain the original design and text formatting, so you won’t have to reedit it.

Let’s take a closer look at each step.
Step 1: Export a text for translation
Open your course. Then click on the Translation button and choose Export text.

In the opened window, choose the language your existing text is written in, and click on Export. The file will be in the XLIFF format.

Choose where you want to save the file on your computer, and click on Save. The file contains all the texts that were in your course.
Step 2: Translate the text
Now you need to translate the text to a different language. To do this, upload your XLIFF document to a translation management platform, such as Crowdin, Smartcat, or Localazy. Here, you can get a machine translation, or hire a translator.
These platforms don’t change the structure of your text. Therefore, when you import the translated text back into iSpring Suite AI, every phrase will be just where they were originally.
The translation process is fairly similar on all the platforms. Let’s use Crowdin to translate a text as an example.
First, sign in. The platform has a free basic version.
When you have an account, create a project to work with the text. To do this, click on the ‘ ’ button, or Create Project.

Create a title for your project. For example, “iSpring Suite AI Texts.” Then, choose the language you want to translate your text from and the language(s) you want to translate it into. Click Create Project.

You’ll be directed to the page of your project. Now, upload the file with the text from iSpring Suite AI.

Click on the Home button. Select the language you want to translate your text to and click on it.

You will now see a translation bar. Add a translation for each question, answer, and button from your text. The platform suggests several translations for each phrase. You can select the one you prefer, click on Save, and move on to the next phrase.

Once you have finished with all the phrases, click on the focus menu button.

Now, you can download your translations. If you need any assistance, feel free to contact Crowdin support team.

Step 3: Import the translation into iSpring Suite AI
Open iSpring Suite AI. Click on Translation, and choose Import Text.

You’ll get a warning that the current text will be replaced with the translation. So, if you need the original text, first make a copy.

Now, choose the file with the translation on your computer, and click on Import.
Congratulations! Your course is now in a different language.
This update is already available in your iSpring Suite AI
You can test this new feature right now. Just open PowerPoint, and click on Updates on iSpring Suite bar.
This update comes free for all iSpring Suite AI subscribers. If you don’t have a subscription yet, download a 14-day free trial.
Create online courses and assessments in record time.


How To Record a PowerPoint Presentation With Audio
Adobe Captivate vs. Camtasia vs. iSpring Suite
The 10 Best SCORM Authoring Tools for 2026 [Free and Paid]
How to Create an Online Course: A Comprehensive Guide