How to Use Copilot in PowerPoint to Create a Course


There are plenty of polished videos showing what Copilot can do in PowerPoint. But is the tool really worth the cost for course creation?
Short answer: Copilot doesn’t do wonders with your course development process if you’re already using AI tools. But it can save you a couple of hours per week on back and forth between tabs and manual copy/paste.
 Check out our article — I tested how Copilot works in terms of course creation and shared a simple way to boost its output for a solid interactive course.
How to Create a Course with Copilot in PowerPoint
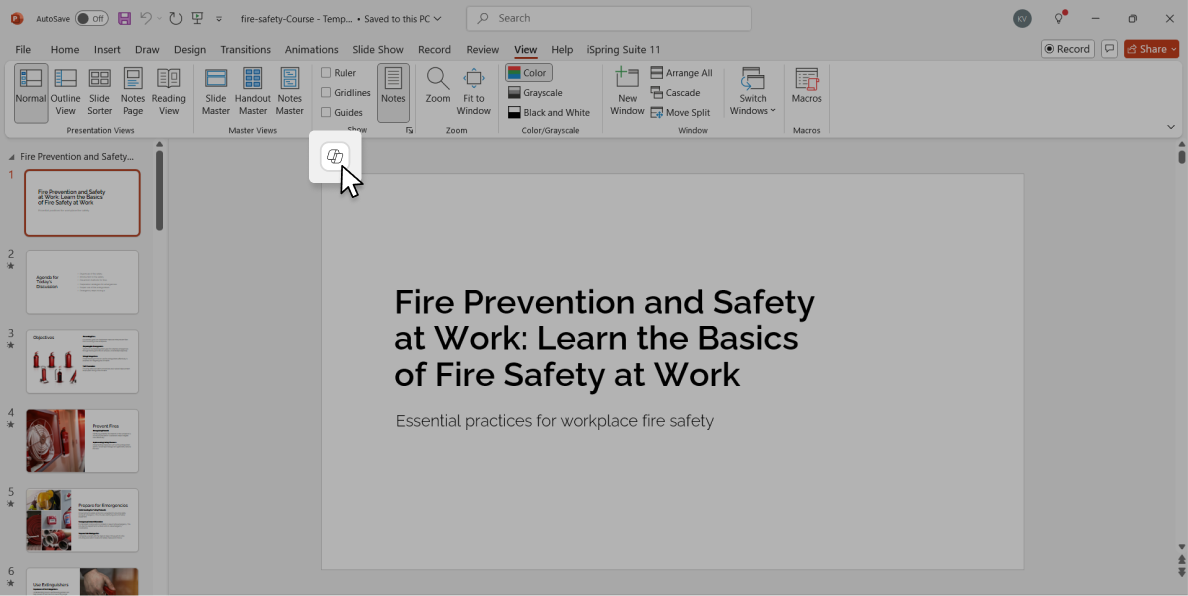
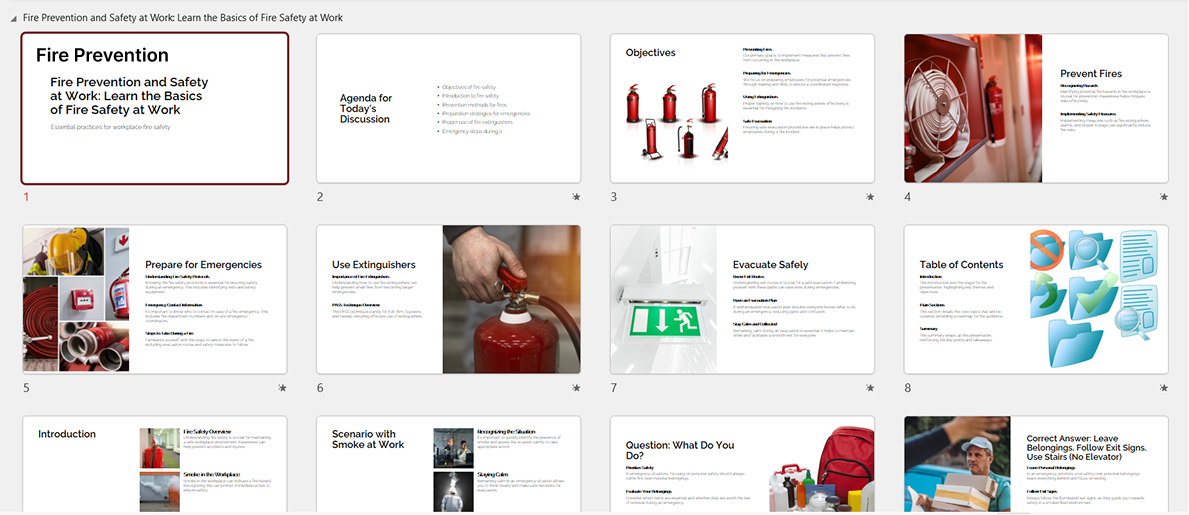
To show you the process, I’ll create a course on “Fire Prevention and Safety at Work” using Microsoft Copilot for PowerPoint.
Tip: If you ask Copilot something less straightforward or don’t get the results you want, try asking it to refine your prompt.
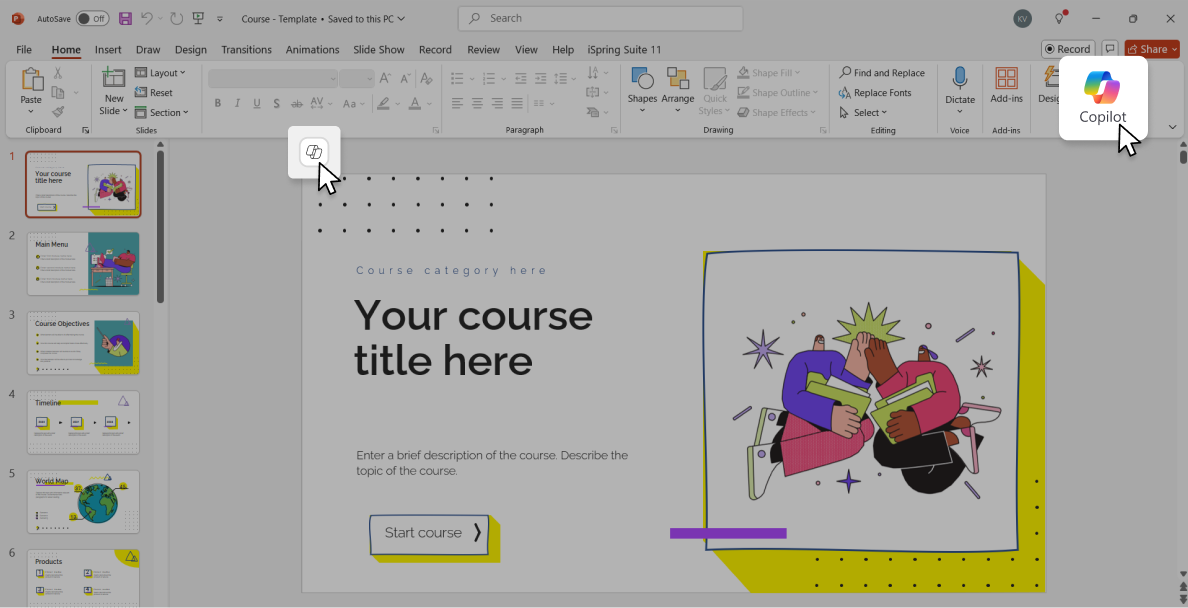
Step 1. Add Copilot to PowerPoint
If your company uses Microsoft 365 Business and you don’t see Copilot in PowerPoint’s Home tab, ask your IT admin to check your subscription or permissions and enable Copilot in PowerPoint.
To use Copilot with a Microsoft 365 Business subscription, you need to have Copilot for a Microsoft 365 subscription (different from Copilot Pro) — available for $31.50 per user/month.
If you have a Microsoft 365 Personal or Microsoft 365 Family license, you should have Copilot. If you don’t have access, Microsoft recommends:
- Refresh your Microsoft 365 apps.
- Make sure that you’re logged into your Microsoft 365 app with the same Microsoft account that is subscribed to both Microsoft 365 and Copilot Pro.
Note: Some prompts, such as “Create a presentation from {file},” require a Microsoft Business subscription.
If you don’t have an MS 365 subscription, you can use Copilot in the free PowerPoint web app. In this case, you’ll need a Copilot Pro subscription, which costs $20.00 per user/month.
All the products mentioned here have free monthly trials.
Step 2. Create a presentation
Important: Copilot will replace your current presentation, so make sure to save anything you have already worked on.
You can create a new presentation with Microsoft Copilot PowerPoint in three ways:
- Use a prompt of up to 2,000 characters — but that’s usually too short for a detailed prompt that’s needed for a decent output.
- Generate a presentation from a file.
- Proceed slide by slide, providing a prompt for each one in the Copilot chat.
For course creation, I think the best option is to generate a presentation from a file. You can focus on quality content first and then let AI turn it into a draft presentation.
Source: YouTube.
If you already have pictures to insert, you can add them to your text document, and Copilot will use them to create a presentation.
If you have a branded PowerPoint template, open it before generating a presentation. Copilot will use that template for the new presentation.
The Microsoft website also states that you can use your on-brand images. Here is Microsoft’s guide on how to connect an organization’s asset library to Copilot.
-1746018196.png)
Source: Microsoft Support.
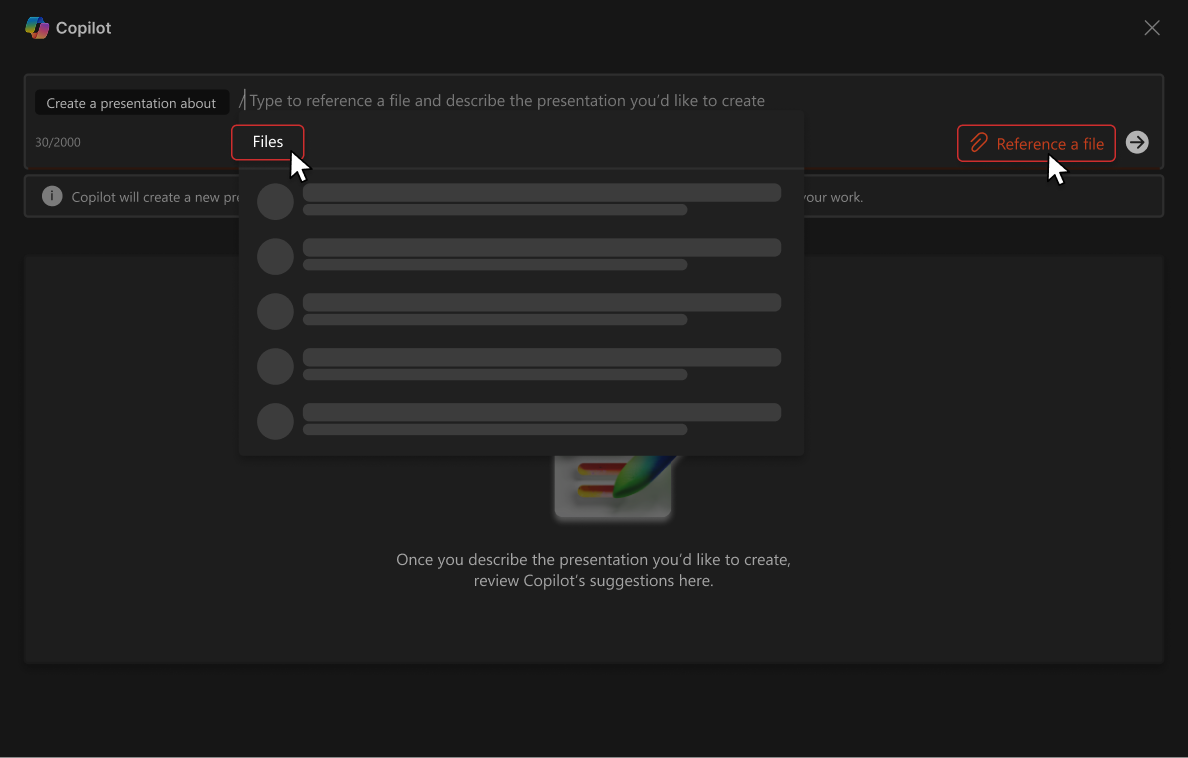
Since I don’t have a Business subscription, I tried to generate a presentation with a prompt — Copilot generates a presentation by inserting AI-generated text.
Here’s how to try the feature:
After you click on the “Replace with a presentation about…” Copilot button, you’ll see this window:
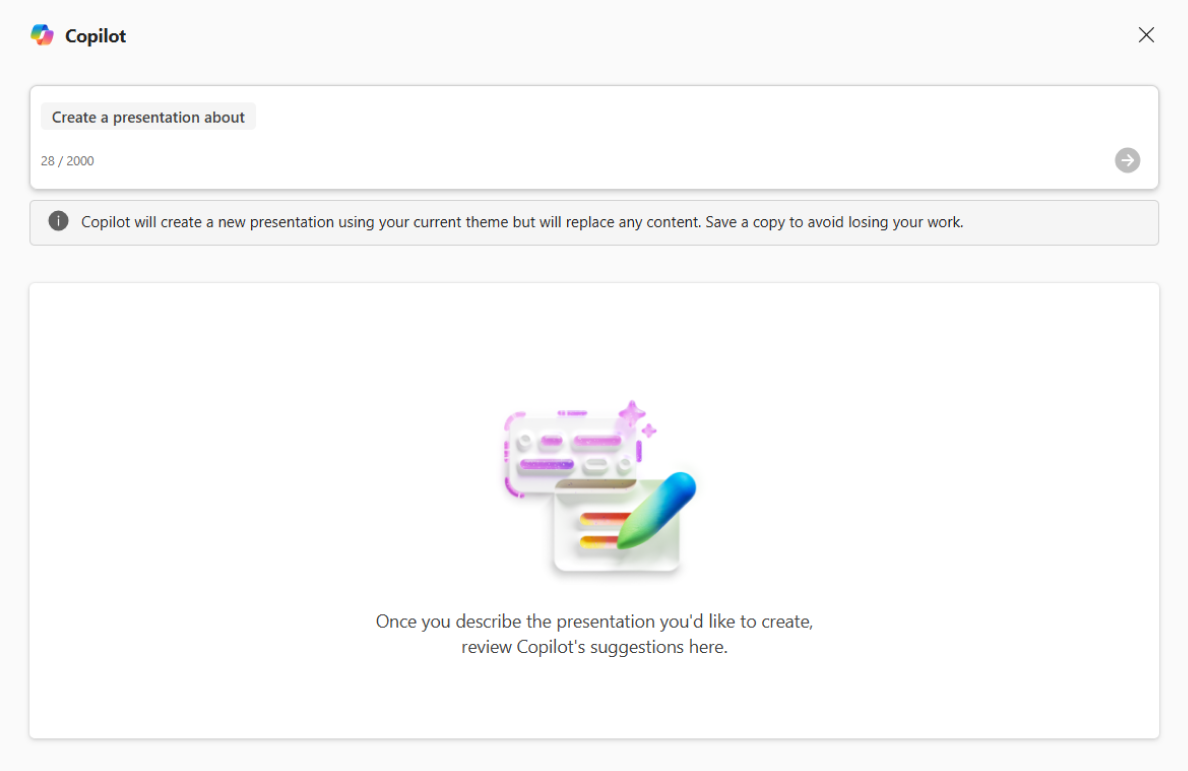
I find this Copilot feature quite useless, especially for course content creation:
- You’ll get a generic text that you’ll end up completely rewriting, in addition to editing the slide design and adding interactions.
- Even if you generate text with AI, it’s more convenient to refine it in Word.
Here’s what I got after providing a basic outline and instructions within the 2,000-character limit. It looks clean, but the design is repetitive and plain. The text (no surprise) is too generic and keeps repeating itself.
Step 3. Generate and add images
Copilot can offer royalty-free stock images to insert based on your request.
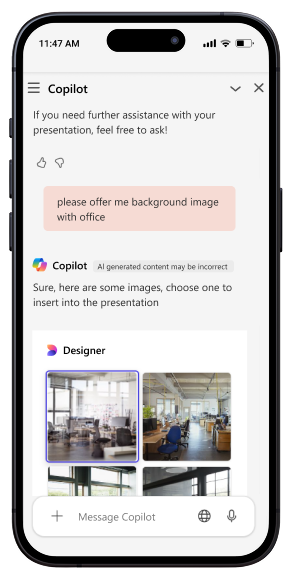
You can also generate a picture.
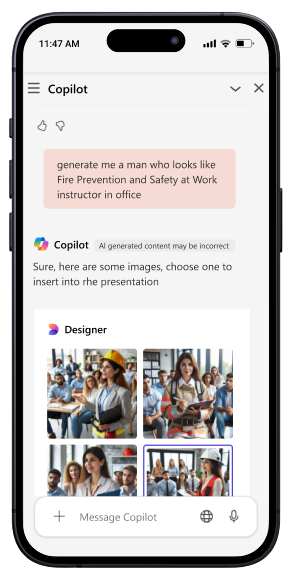
Tip: Generating images with Copilot in PowerPoint is especially useful when you want to visualize abstract ideas.
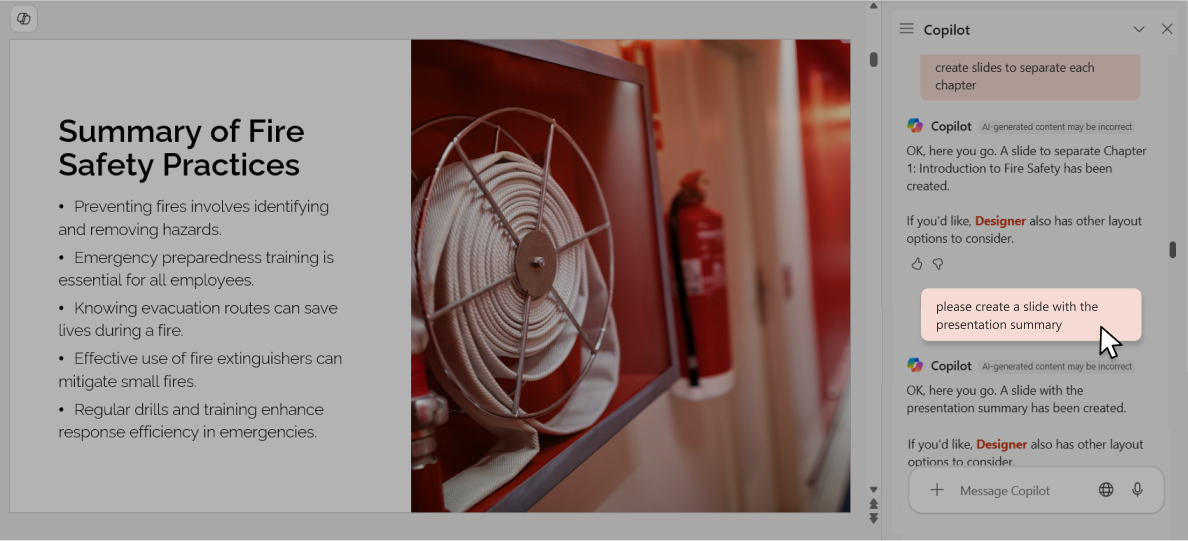
Step 4. Summarize each module
You can generate a slide with the presentation summary or just summarize it in the chat to use outside of PowerPoint.
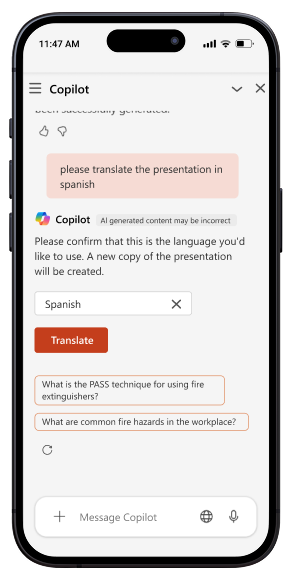
Step 5. Translate a presentation into different languages
If you need your PowerPoint course to be in multiple languages, Copilot simplifies the process. You don’t have to translate the text in a separate tool and manually insert it across slides — and then repeat that process over and over.
Copilot allows you to translate the entire presentation directly in PowerPoint. The content will mostly be accurate, but it’s best to have a native speaker proofread it.
Just ask for a translation in a specific language, and Copilot will create a copy in that language.
The Pros and Cons of Copilot in PowerPoint
Here’s my summary of how Copilot works and its pros and cons to help you decide if it’s worth adding to your workflow.
Pros
- Privacy. Copilot adheres to the security, compliance, and privacy policies that users have already set up in the Microsoft 365 ecosystem.
- Quicker first draft. Copilot saves you time compared to manually creating slides and inserting your content. I saved about 30 minutes at this step.
- Faster text refinement. You can chat with AI to improve your text directly in the document, and it will take the presentation content into account.
- On-the-spot guidance. If you are not an advanced PowerPoint user, you’ll benefit greatly from asking Copilot how to do one thing or another in your document and getting immediate instructions.
- Prompt suggestions. Copilot offers actions you could take next based on its abilities and your chat. You can click on Refresh to get more suggestions.
Cons
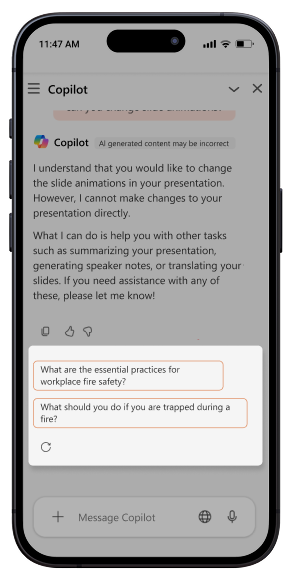
- Formatting. You can’t edit slides with basic changes like updating title colors across all slides or adding specific animations to certain slides.
Microsoft says Copilot can edit presentations, but in practice, it just adds new slides based on your text or AI-generated content.
It also means that there is no way to automate interaction/quiz creation with Copilot in PowerPoint. - Designs. It provides a basic and repetitive slide design.
- Cost. It’s expensive for what it offers if you’re only planning to use Copilot for PowerPoint.
- Hallucination (an obvious but important shortcoming). You can’t rely on PPT Copilot to be accurate — even when you ask it to create a presentation from your text. You will still have to double-check everything to make sure it didn’t corrupt your notes.
How to Improve Copilot Outputs with Less Manual Editing
If you create a self-paced course with Copilot, you’ll still end up with a lot of manual work to make your new presentation engaging — especially in terms of adding interactions and quizzes.
When using it in PowerPoint, Microsoft Copilot can only support you with instructions on how to create animations and generate questions from the content (which you’ll probably do anyway before jumping into PowerPoint).
In my experience, the best solution is a PowerPoint-based authoring tool. iSpring Suite is probably the only solid option in this category. A 14-day free trial is available.
This is a highly intuitive, PowerPoint-based authoring tool that speeds up the authoring process. Once installed, I found that it provides multiple ready-made templates specifically designed for course development.
Here is the proof from a client:
“The entire development process starts from building quizzes with iSpring Suite, then getting them validated by our Research and Development team, and finally they are delivered to our sales representatives.
This way, I need about 5 hours to create one complete quiz that may include from 25 to 30 questions. It’s like 3 hours of creation and 2 hours of validation, respectively.”
Here is what the process looks like in practice.
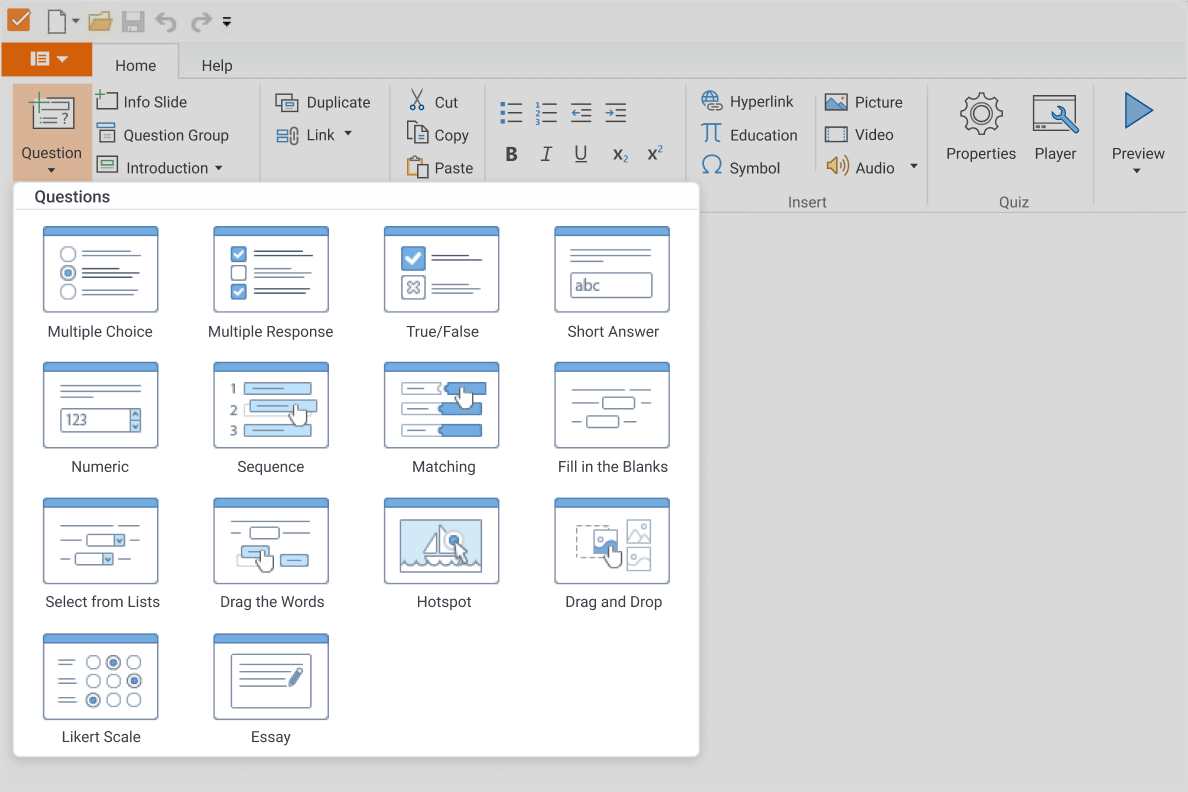
Quiz creation
1) You get access to 14 question types — from basic ones like multiple-choice to advanced formats like drag-and-drop, sequencing, and even Likert scale. It’s perfect for all kinds of quizzes and self-checks. Just pick what you need.
 14 Types of Quiz Questions to Use in Your Tests
2) Insert your question and answer options. Customize the question design, add media and introduction slides, and set up cheat-proof testing rules: limit the time and the number of attempts allowed, apply branching, and more.
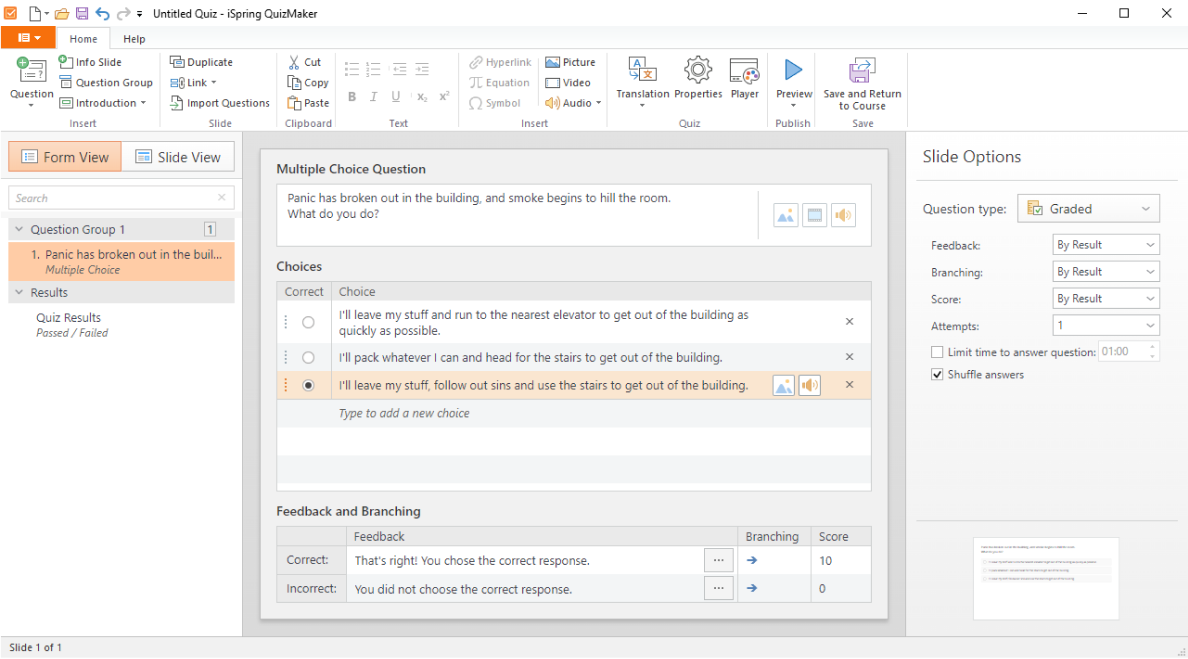
3) Click on Save on the home tab and return to the course.

4) Find your quiz in the PowerPoint presentation.
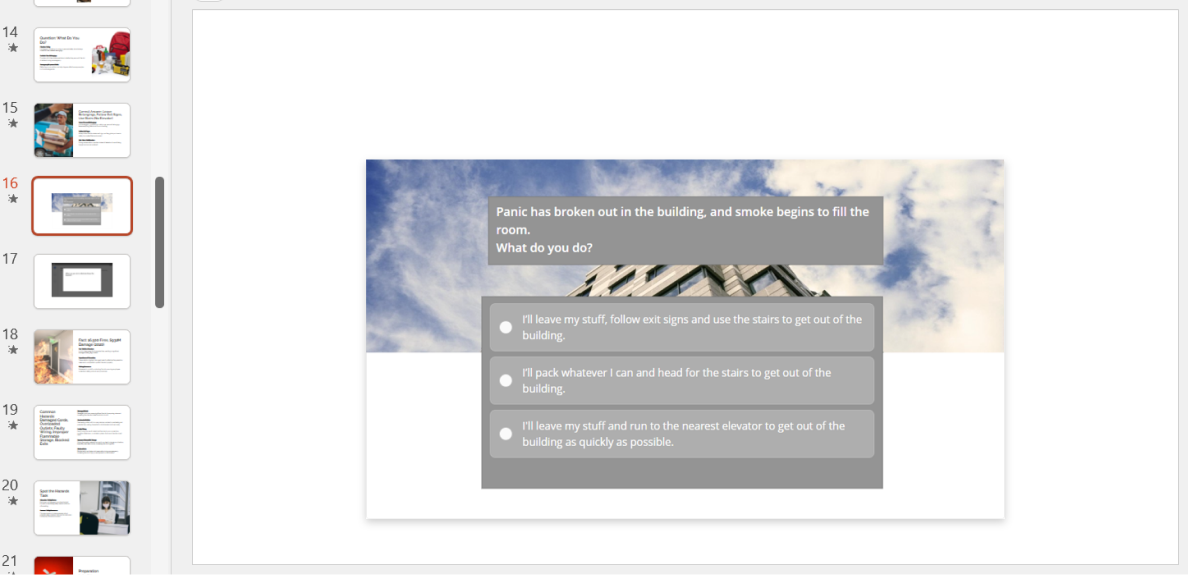
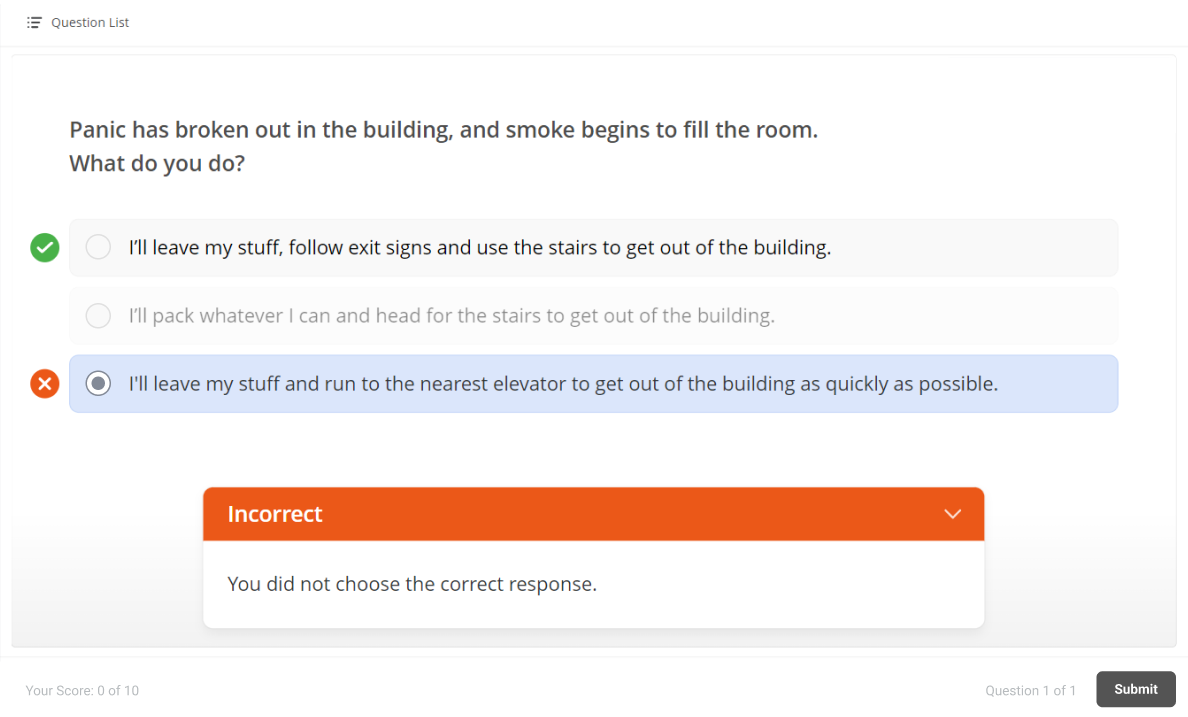
Here is how it looks in action:
That’s it. No hyperlinking or multiple slide creation! To compare the quiz creation process with PowerPoint alone and with iSpring Suite installed, check out this comprehensive guide:
How to Create a Quiz in PowerPoint
Designing interactions
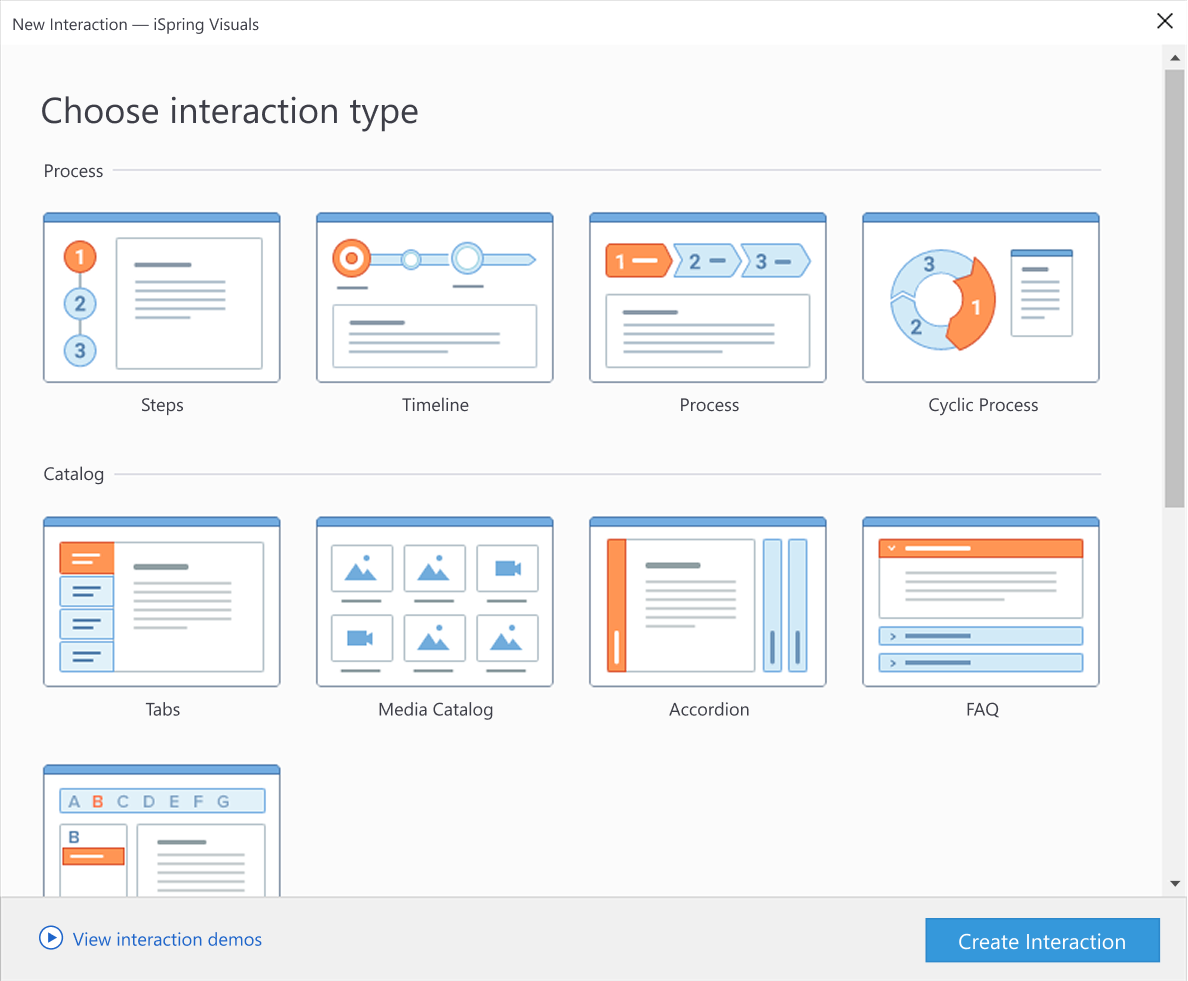
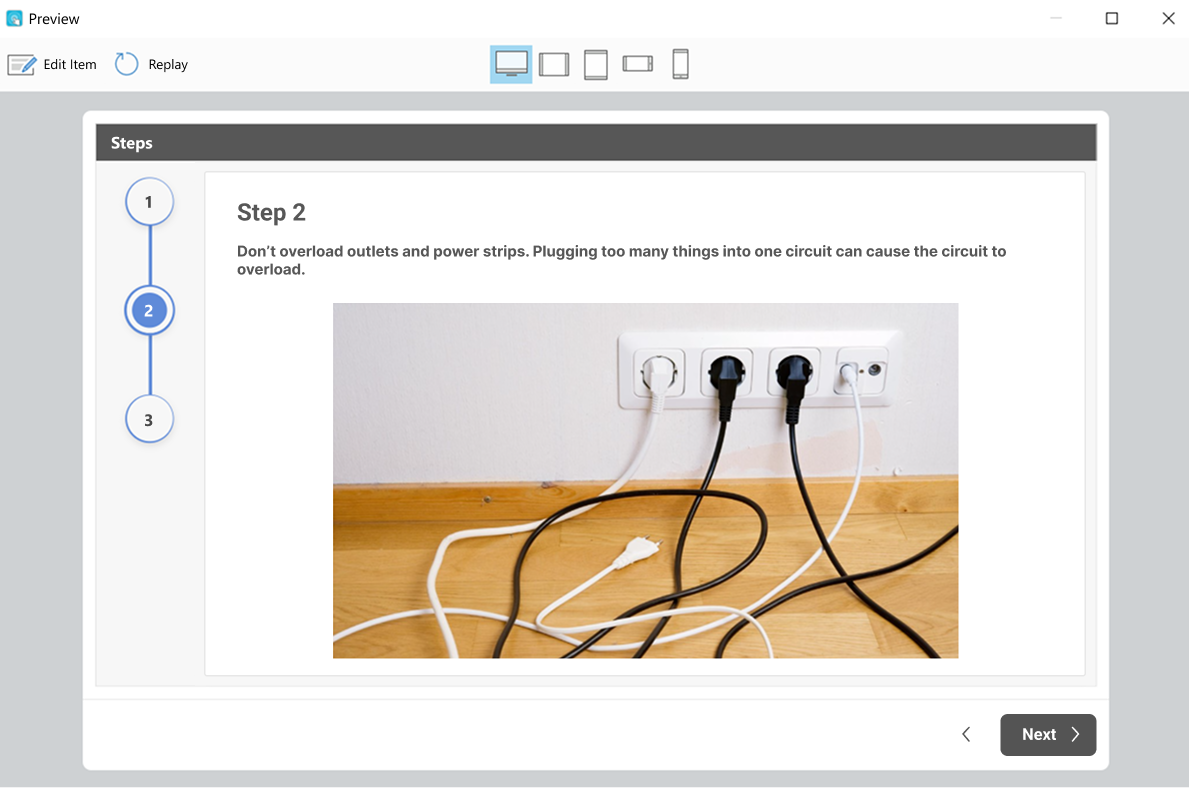
iSpring Suite interactions are templates that help structure information for better understanding and memory. They support active learning by letting users click on infographics to digest content in small visual chunks. Here’s how to do that:
1) Choose from 14 templates for almost any type of information. I’ll try the Steps interaction.
2) Input your text.
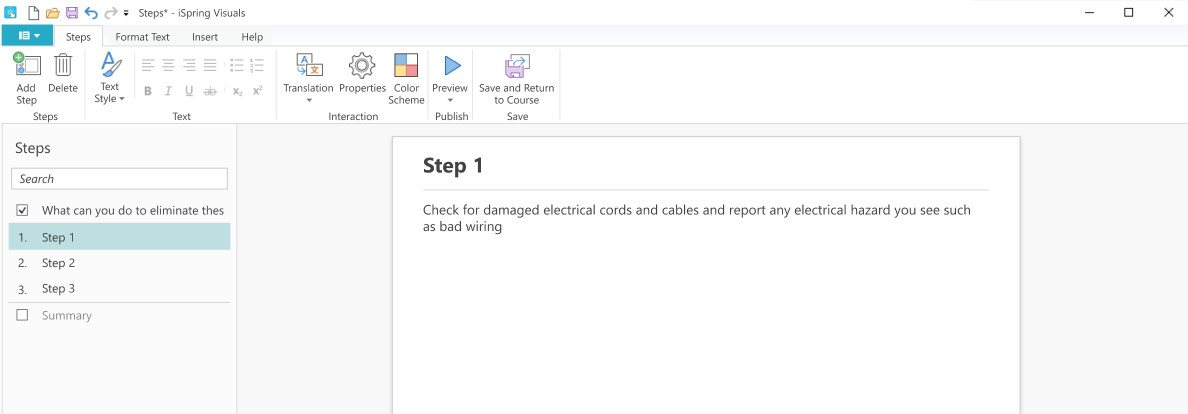
3) Get it into your slide.
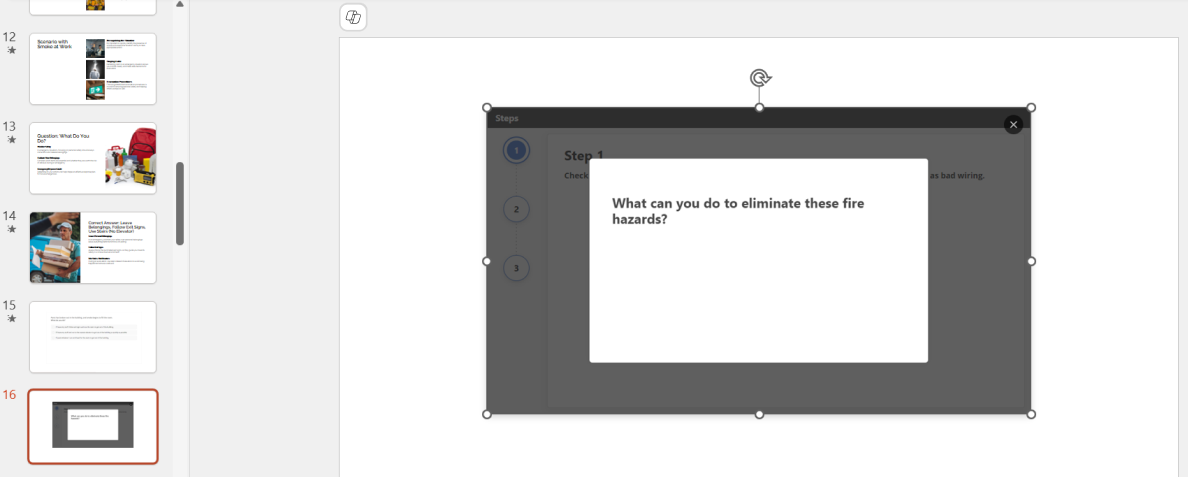
Here is how it looks in action:
In contrast, here’s what’s necessary to create interactions in PowerPoint manually.
More reasons to use iSpring Suite Max for course creation
iSpring Suite Max is an advanced plan of authoring tool with a set of cloud-based tools to simplify your course development process further. Here is what you’ll get in the package, on top of the quiz and interaction templates:
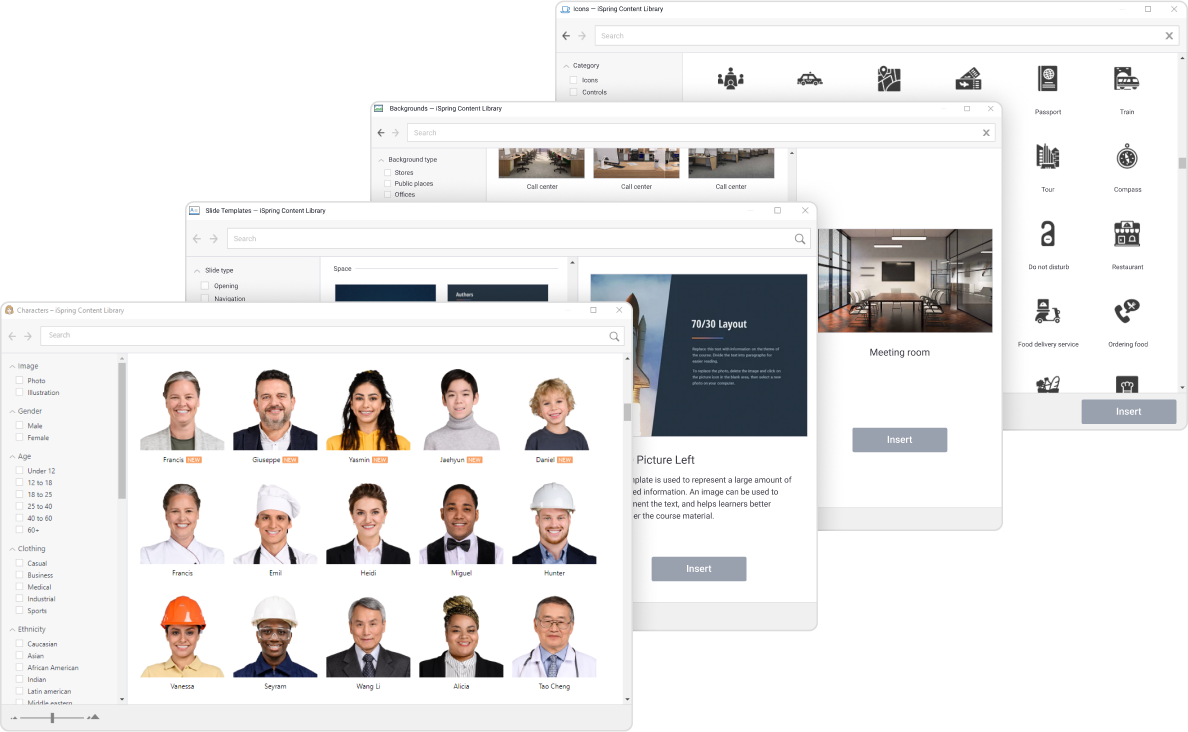
1) Regularly updated content library. 127,000+ editable course templates, characters, backgrounds, and images. Each content type has helpful search and detailed filters, so you’ll save a ton of time when searching or creating content assets. Plus, the library keeps growing with every product update.
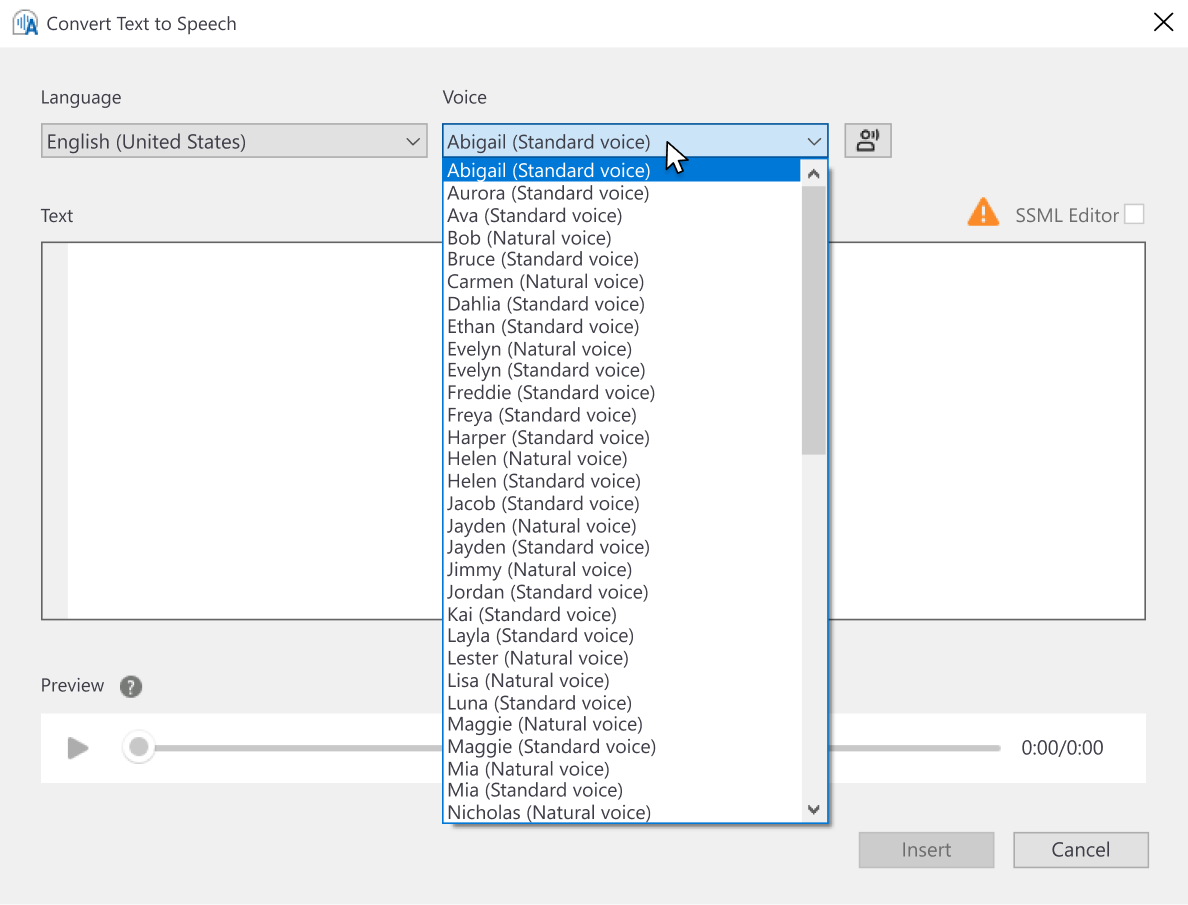
2) A text-to-speech feature for making realistic voice-overs in 53 languages right in PowerPoint.
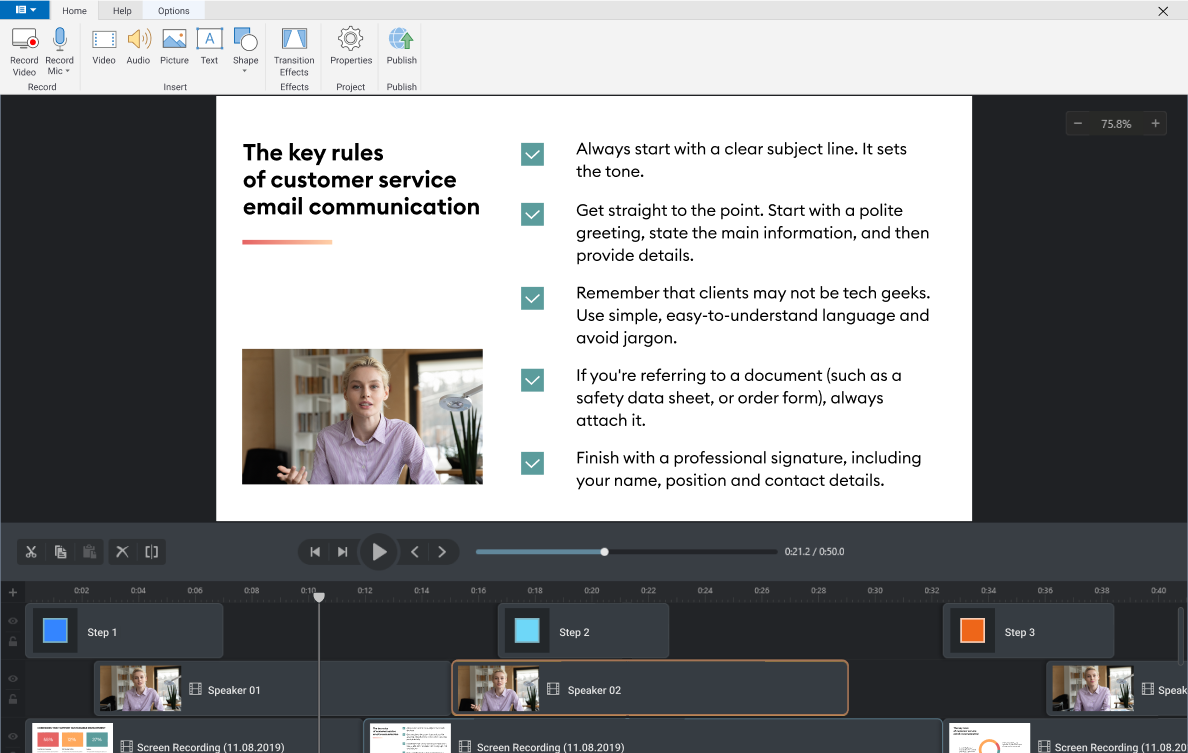
3) A video tool for recording and enhancing your video with narration, visual hints, annotations, and special effects.
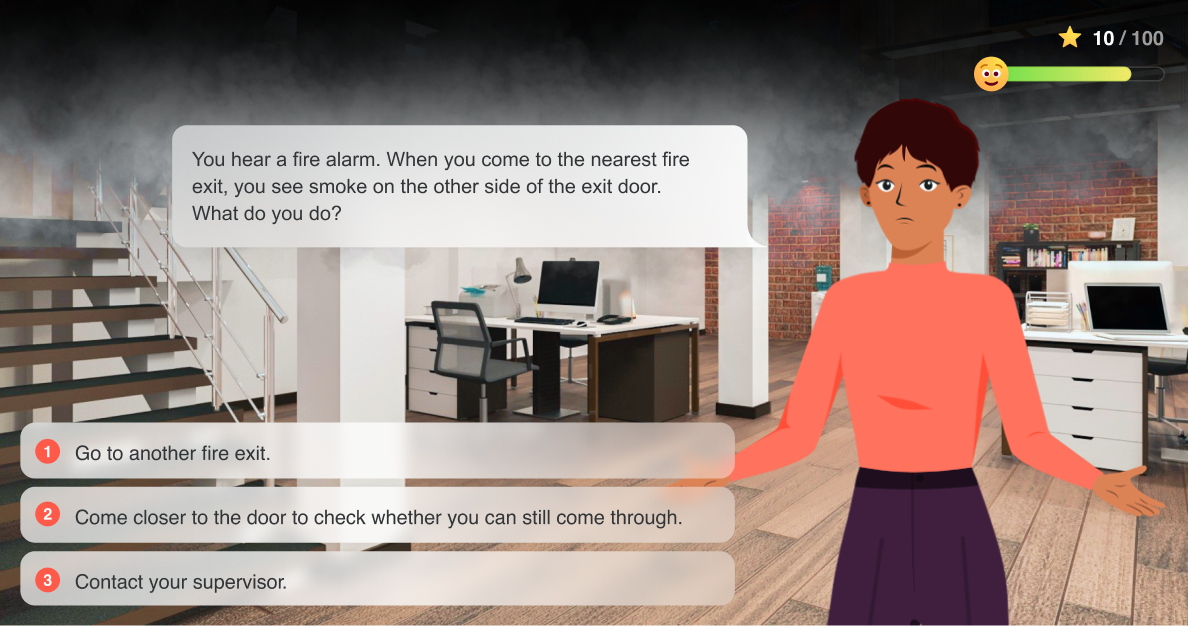
4) Role-play simulation. These are great for creating branching dialogues; they’re used for sales, customer service training, teaching foreign languages, and developing communication skills. You can even build an entire course around conversations to create a sense of presence in a self-paced format. Managers or mentors can send simulation results to their email addresses or LMS.
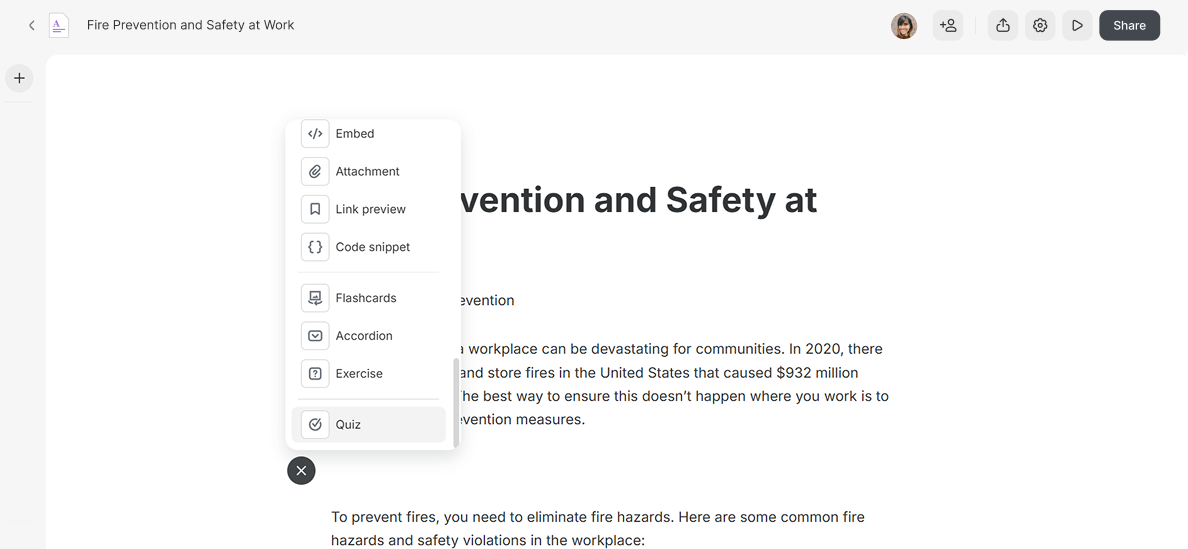
5) An AI-powered scrollable course builder that you can use to quickly create content, and then convert it into a PowerPoint course using Copilot’s option to generate a presentation from a file.
You can chat with AI about your content, rewrite, fix grammar, translate, summarize, and even generate quizzes.
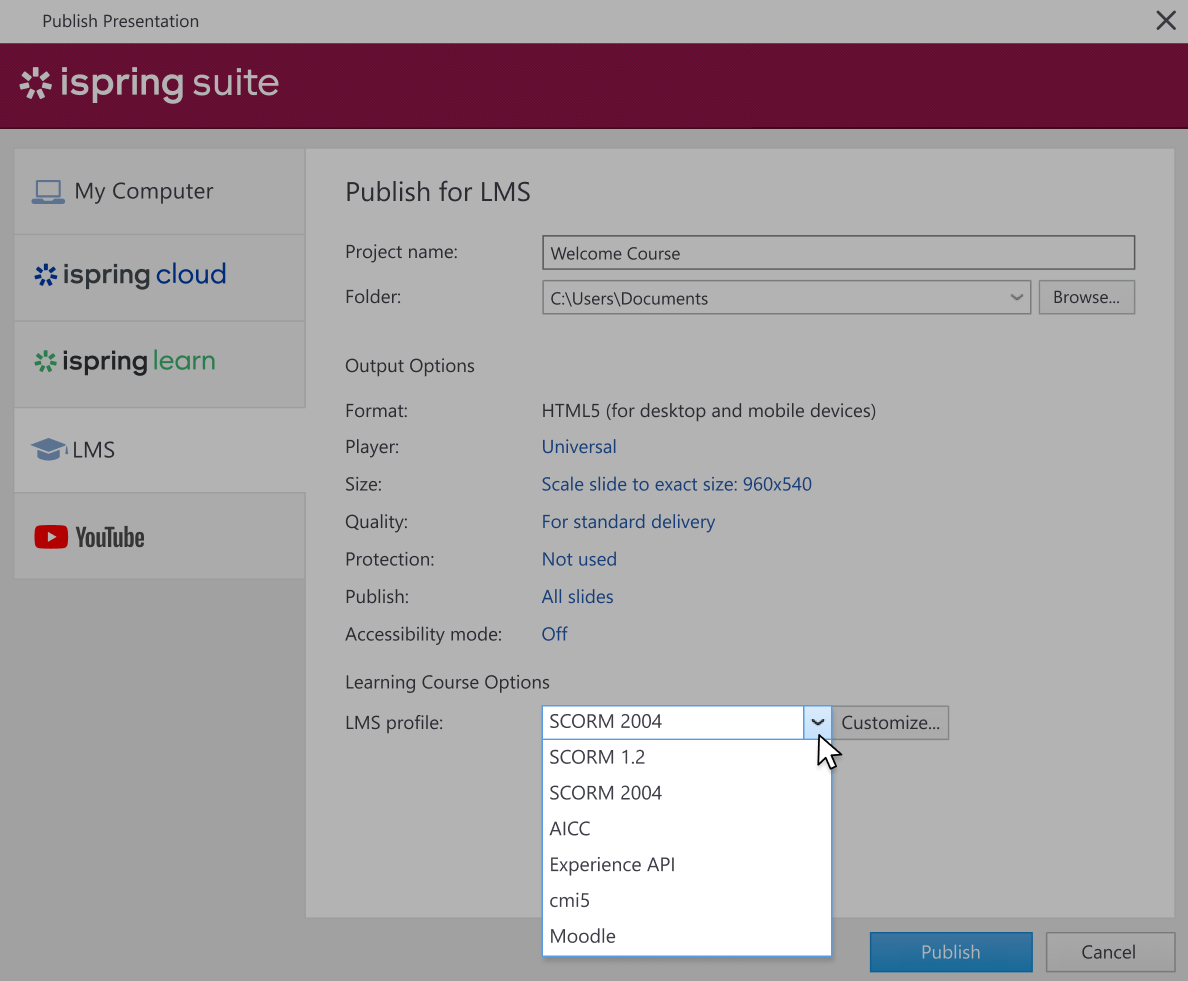
6) Effortless publishing to iSpring Cloud or any LMS in SCORM or other standards like xAPI, cmi5, and AICC.
7) Online team collaboration to review course projects and get them approved faster.
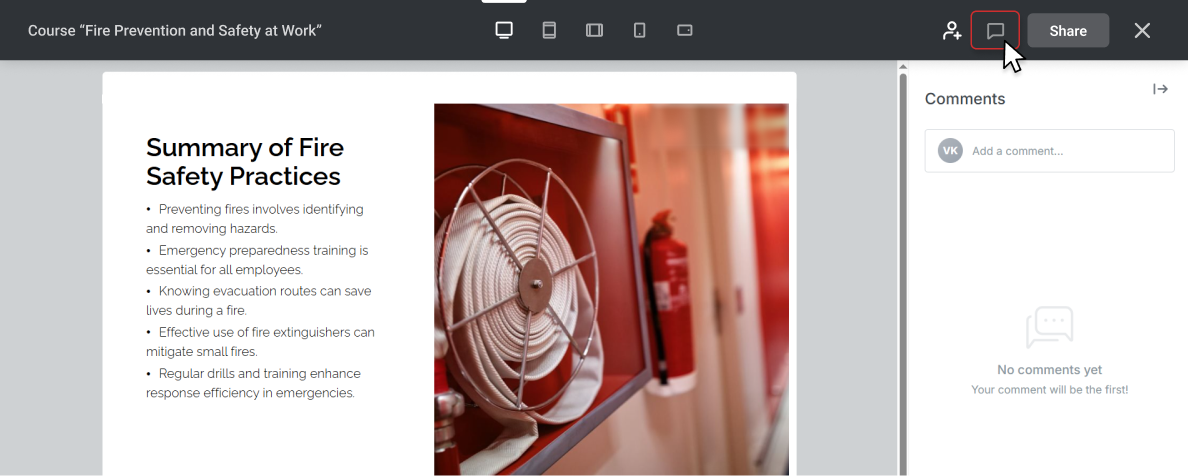
Comment section in iSpring Cloud
8) An adaptive player to ensure your content looks flawless on every device and platform. By the way, it maintains all PPT animations and transitions intact.
9) Customer support. iSpring Suite support is available 24/7 via phone, chat, and email on weekdays and email on weekends. 83% of all cases are resolved within 2 hours.
10) Reporting. Learners’ quiz results are automatically emailed to them and their instructors. Quizzes published in an LMS can be turned into reports based on user and course.
FAQ on How to Use Copilot in PowerPoint
Here are answers to common questions about using Copilot in PowerPoint.
Are there alternative AI solutions for PowerPoint?
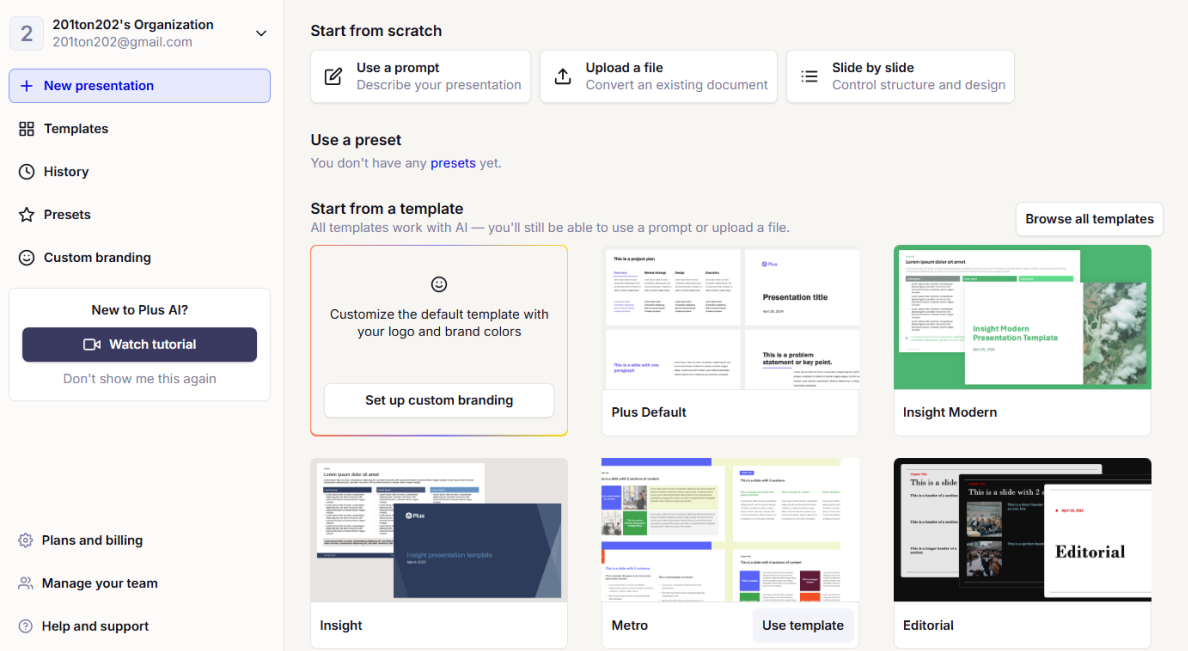
Yes. When it comes to AI that helps create presentations in the PowerPoint window (not other software), we’ve only found Plus AI, which works as a PowerPoint add-in.
Based on our quick test, Plus AI has more customization at the prompt stage (language choice, 100k character prompts, number of slides, variety of document formats to attach) and delivers better results in terms of slide design.
Compared to Copilot, you can’t chat with AI but only input the initial prompt and then request listed actions.
Some users complain about poor customer support. On their support page, they mention that they are a small team and it may take a couple of business days for them to handle your request.
The price is comparable to Copilot. A free trial is available.
How to use Copilot in PowerPoint on Mac
According to Microsoft, the Mac desktop app supports all the Copilot for PowerPoint features that are available for Windows.
Conclusion
Copilot in PowerPoint might save a significant amount of time in specific cases — like if you’re new to PowerPoint or when you need to translate PowerPoint courses into multiple languages regularly.
But from my experience and user feedback, its abilities for course creation are still quite limited.
That said, AI tools evolve quickly. So it’s a good idea to check Copilot updates every few months to see if it’s made any major advances in terms of what it can do for PowerPoint.
If you want to speed up advanced PowerPoint course creation, iSpring Suite Max can help with its quiz templates, interactions, text-to-speech function, and role-play simulations. Sign up for a 14-day free trial to see if the solution fits your course creation needs.
Create online courses and assessments in record time.


