SCORM Hosting: How to Host SCORM Content

The SCORM format is perfect for hosting your courses on learning management systems. Due to its technical nature it can be quite a headache when you need to place your SCORM content somewhere else. The SCORM standard allows communication between eLearning content and an LMS, and the latter allows you to utilize the strengths of SCORM to the fullest.
But what if you don’t have a SCORM-conformant LMS yet and need to show your course to a client as quickly as possible? SCORM packages won’t play if you simply upload them to the cloud.
Don’t worry, however, because we’ve got you covered with a roundup of the best ways to host SCORM content.
In this article, you’ll find out how to host your course in 4 different ways: on an online course platform, in the SCORM cloud, on a website (via FTP), and on GitHub. Let’s dive in!
| Ways to Host SCORM | Best for |
| iSpring Cloud AI | Instructional designers who need a solution that’s both fast and simple |
| SCORM Cloud | Course developers who want to host, test, and manage courses in one place |
| A website (via FTP) | Creators with an existing portfolio |
| GitHub | eLearning geeks and tech-savvy specialists |
iSpring Cloud AI
iSpring Cloud AI is a web-based service that allows users to create online courses, upload and store eLearning content, and share it with others. It supports both SCORM 1.2 and SCORM 2004. Once you’ve uploaded a SCORM course to your account, you only need to copy the link to share it. Simple as that! Viewers don’t need to create an account on iSpring Cloud AI and log in to view your content.
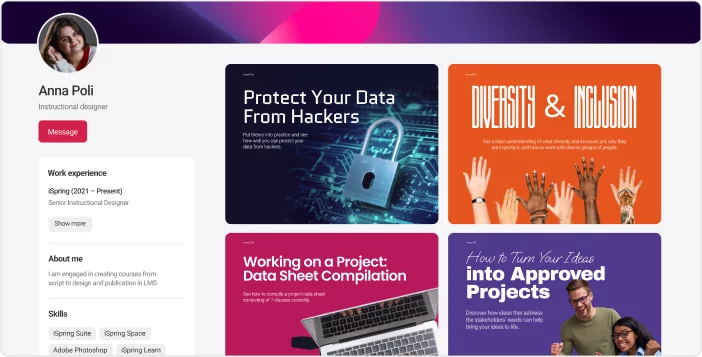
The great news is that iSpring Cloud AI now allows users to create a full-fledged course portfolio. If you’re an instructional designer, choosing iSpring Cloud AI can hit the nail on the head. To share your work, you just need to upload courses, add a photo and information about yourself, and send a link to the client.
Pricing: starting at $540 per year for 1 author
Start publishing your content by signing up for a free 14-day trial of iSpring Cloud AI!
How to upload a course to iSpring Cloud AI
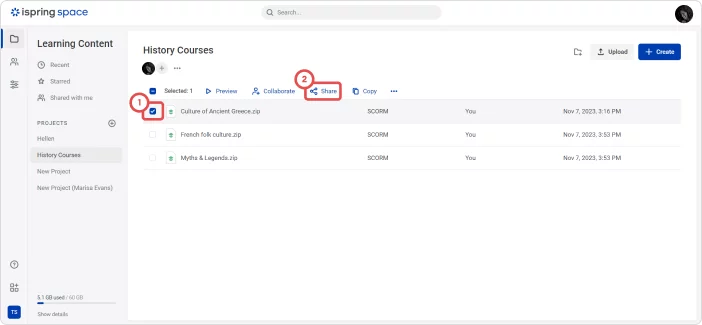
1. Open your iSpring Cloud AI account and select a project folder on the bar on the left. Click on the Upload button to upload a SCORM course from your local drive.

2. Select your SCORM archive and click on Share.
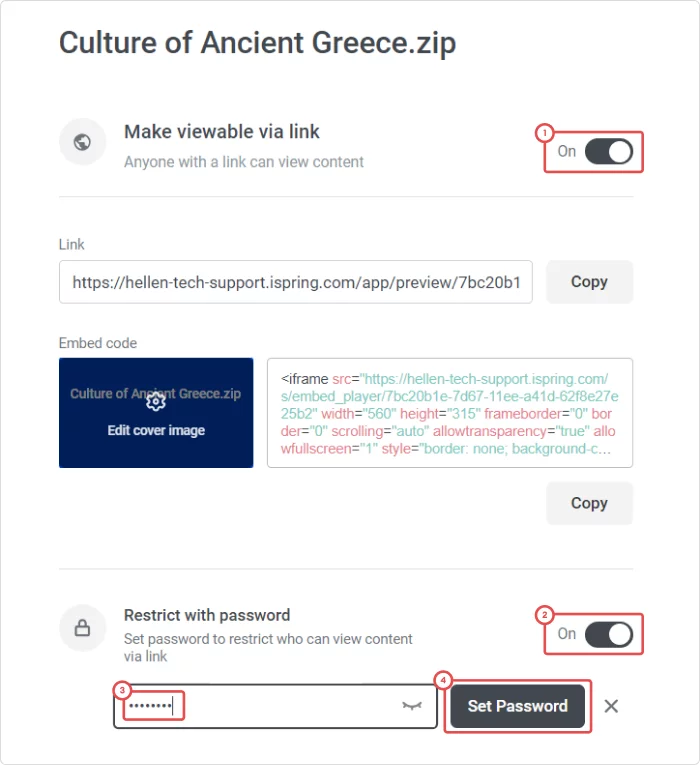
3. Enable the Make viewable via link feature. If you worry about your data safety and who can access the course, you can also protect it with a password. To do this, enable the Restrict with password feature, enter your password, and click on Set Password.
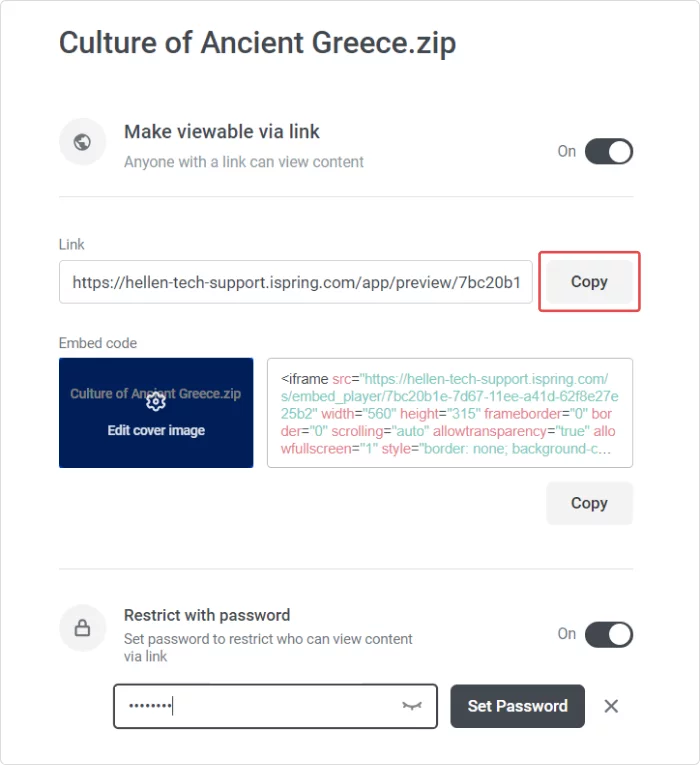
4. Copy the link in the Link field and send it to the person you need to share your course with.
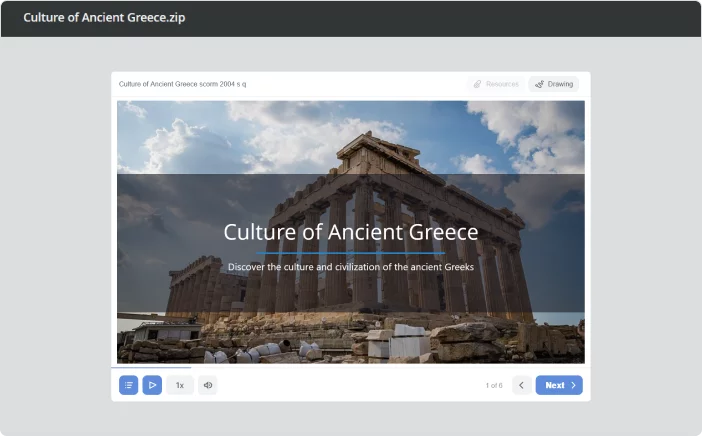
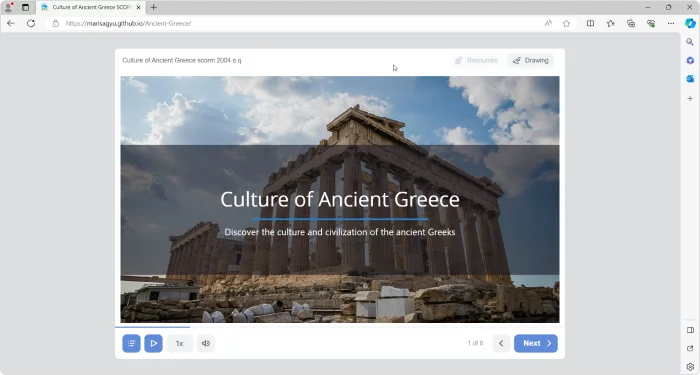
The course will open in a browser. Here is how it looks:
Once you upload courses, you can add them to your portfolio.
How to add a course to My Portfolio
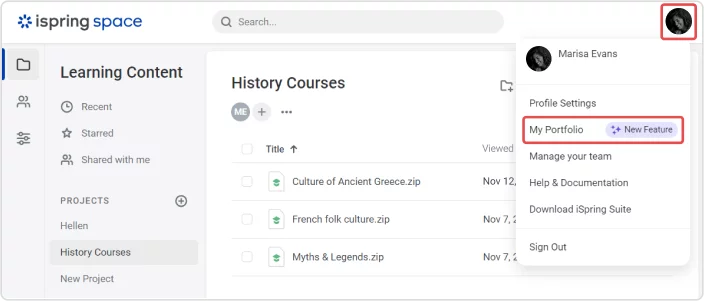
1. Click on the profile icon in the top-right corner and select My Portfolio.
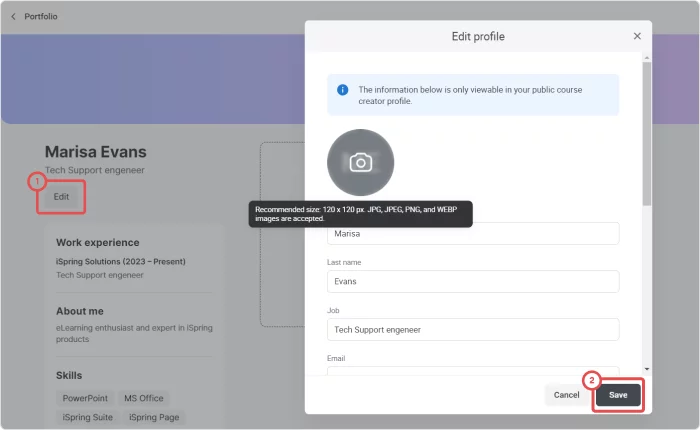
2. You can click on Edit to add information about yourself and upload a photo.
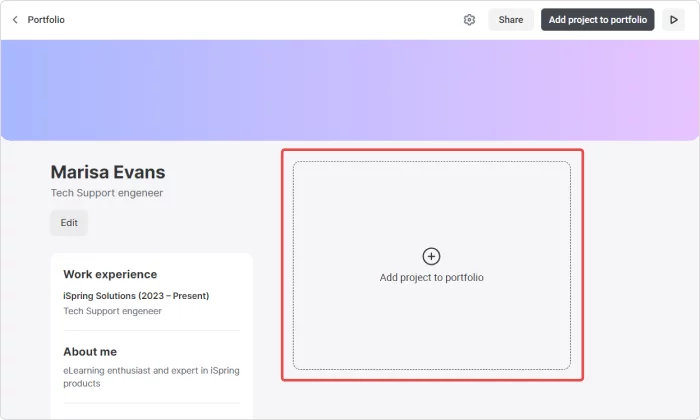
3. Click on Add project to portfolio to select your course in the storage of iSpring Cloud.
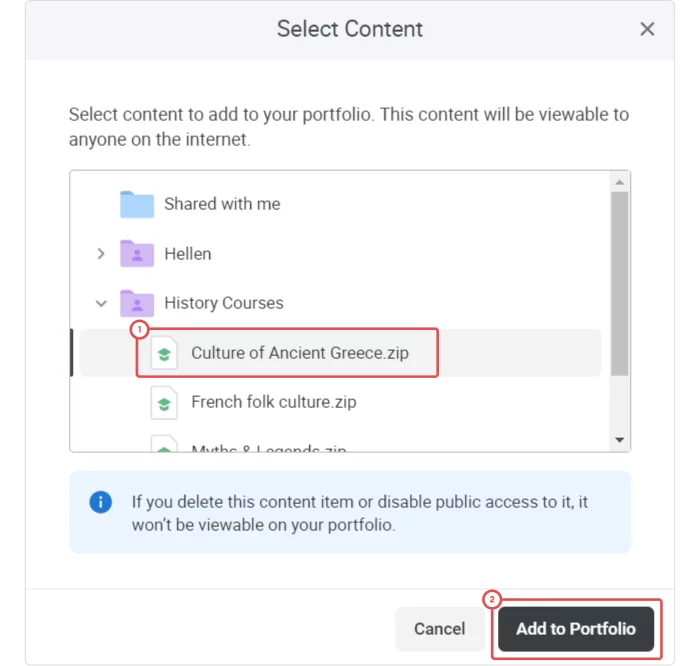
4. Select a course in the project folder and click on Add to Portfolio. Please note that all settings applied to your SCORM course (such as password protection) will be retained.
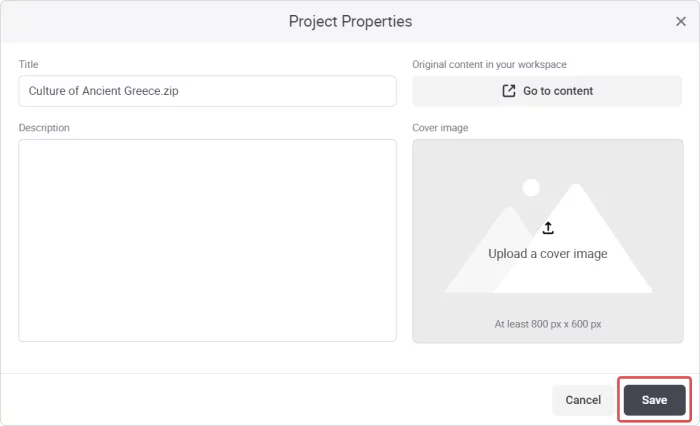
5. You can add a title, a description, and upload a cover image in the Project Properties window.
iSpring Cloud AI is a perfect solution if you need to host SCORM content, create a portfolio, or share your courses with clients, thanks to its simple interface. It allows users to view courses but doesn’t collect data on their progress. If you need to track users’ progress and run reports, we encourage you to try out a learning management system like iSpring LMS.
SCORM Cloud
SCORM Cloud is a cloud-based platform that’s well known among course creators and SCORM developers. It is commonly used for SCORM testing, but it also has several neat features, which we’ll cover in this article. You can use it for SCORM hosting because it allows users to upload, view, and share courses, and even access reports. Besides, SCORM Cloud supports not just SCORM 1.2 and SCORM 2004, but also AICC, xAPI, and cmi5.
Pricing: Starts at $0 for the Trial account
Too much to read? Get a summary from AI
How to host a course on SCORM Cloud
SCORM Cloud has a free plan, so you can create a SCORM Cloud account and start hosting your content free of charge.
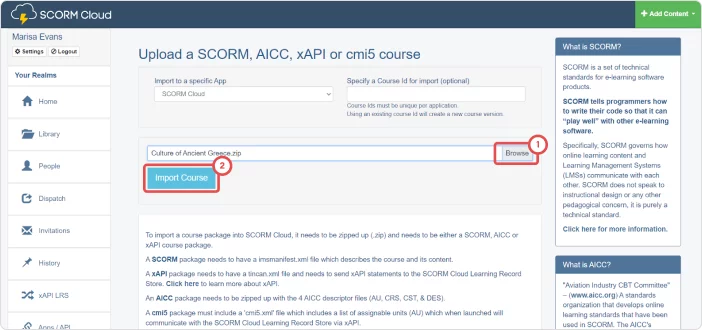
1. Click on Add Content and select Import a SCORM, ACCI, xAPI, or cmi5 package.

2. Click on Browse to select your course on your local drive, and then click on Import Course.
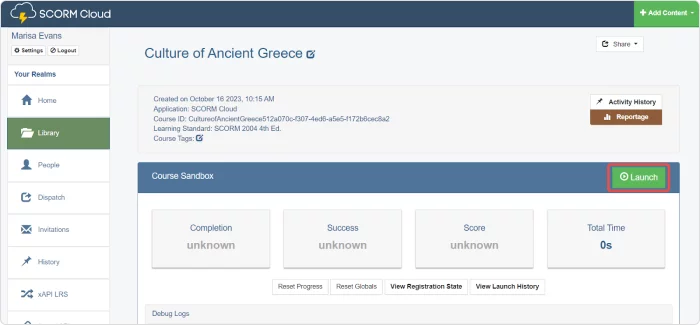
3. Once the course is uploaded, you can click on Launch to start. Your course will open in a new window.
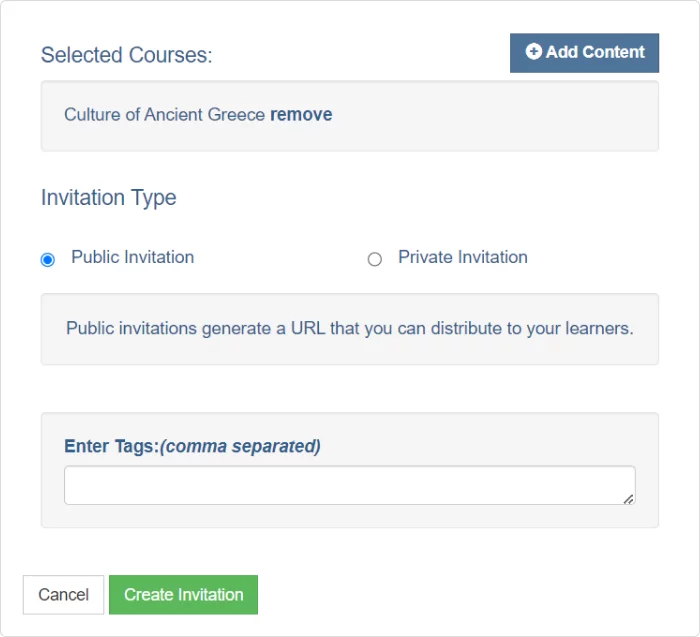
4. To share your course with someone, you need to click on the Share button and select Invite.

5. Select the Public Invitation or Private Invitation option in the Invitation type field. In the first case, a sharing link will be created, and in the second case, an invitation will be emailed to a user. Then, click on Create Invitation.
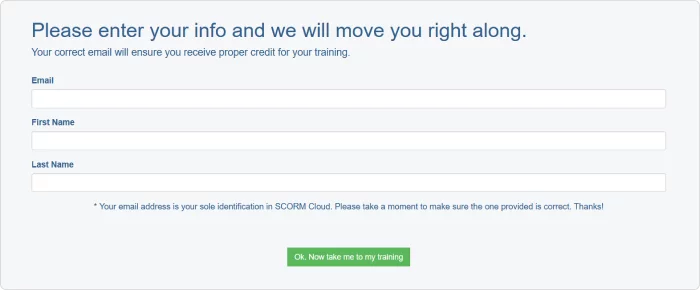
6. We selected the Public Invitation option and sent a link to another user. After they follow the link in their browser, they’ll see the registration window where they need to log in to view your course.
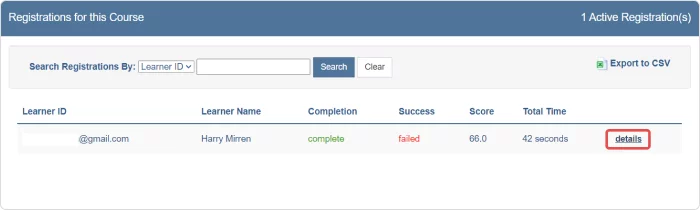
7. You can see the user’s course completion results in the Registration for this Course field. Click on details to see the detailed report. Please note that the free plan includes only 10 active registrations.
More about hosting courses on SCORM Cloud
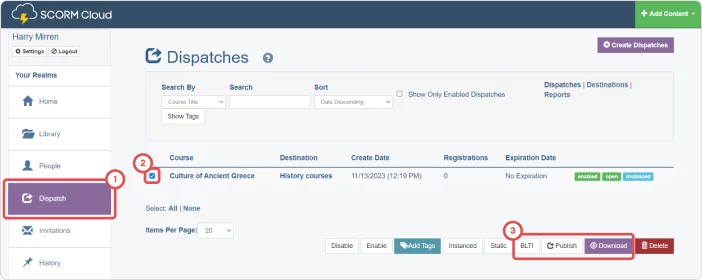
SCORM Cloud allows users to host courses and then manage them on other LMSs by creating dispatches. This feature can be helpful if you need to deliver, update, or disable your course on multiple learning management systems. It also consolidates data about course usage. This is how to create a dispatch:
1. Click on Share and select Dispatch.

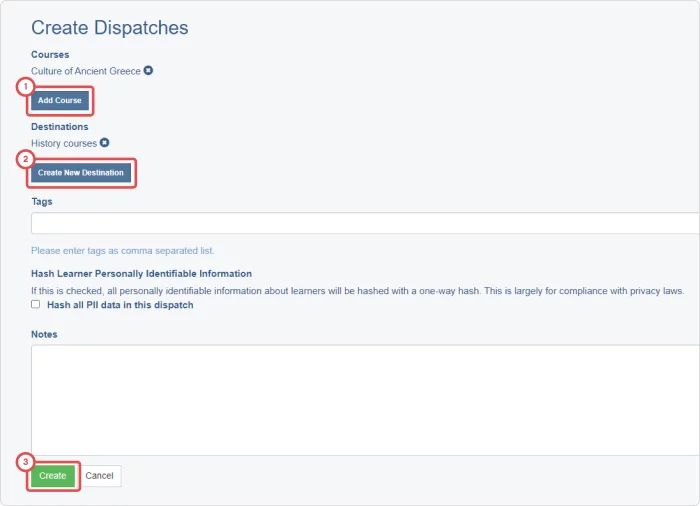
2. Click on Add Course and select your course in the list; then click on Create New Destination to create a destination folder and click on Create.
3. Under the Dispatch tab, choose one of three ways to share your course, depending on your LMS settings. Click on the BLTI button if your LMS is LTI supported or click on the Publish button if it’s PENS supported. You can get more information about BLTI and PENS standards here.
If your LMS supports SCORM 1.2, you can simply click on the Download button to download a proxy file, which you can import directly to your LMS.
A Website (via FTP)
If you have a website that allows you to upload several files at once through file transfer protocol, you can use it to host SCORM courses. We’re going to upload a course with the commonly used free FTP client FileZilla.
Pricing: Free
How to upload a SCORM package to a website
1. Extract your SCORM archive to your local drive.
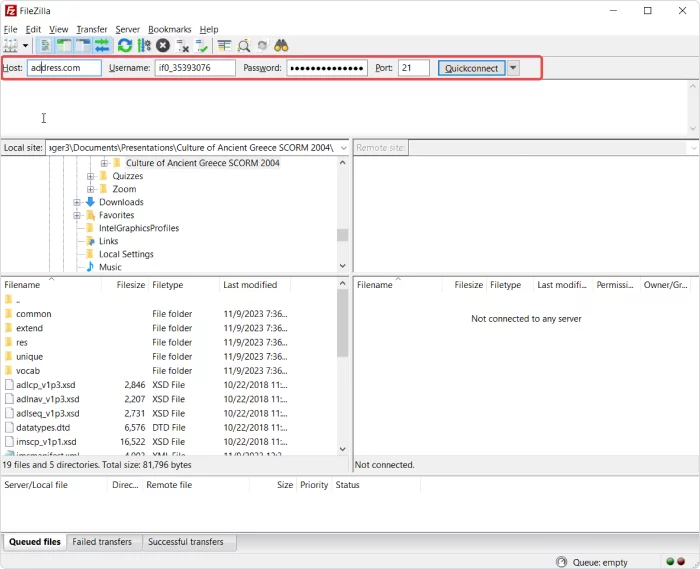
2. Install and launch FileZilla.
3. Fill in the following fields:
- Host (the address of your server)
- Username
- Password
- Port (it’s usually 21 or 22)
Click on Quickconnect.
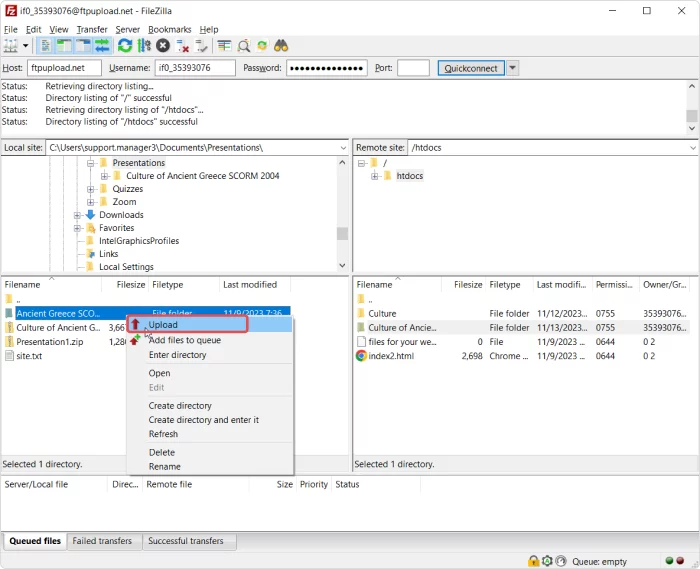
4. You’ll see your computer storage on the left and the files on your server on the right. Open the folder with the extracted course in the bottom left window and the folder, which allows public access on your server in the bottom right window.
Right-click on the name of your course and select Upload.
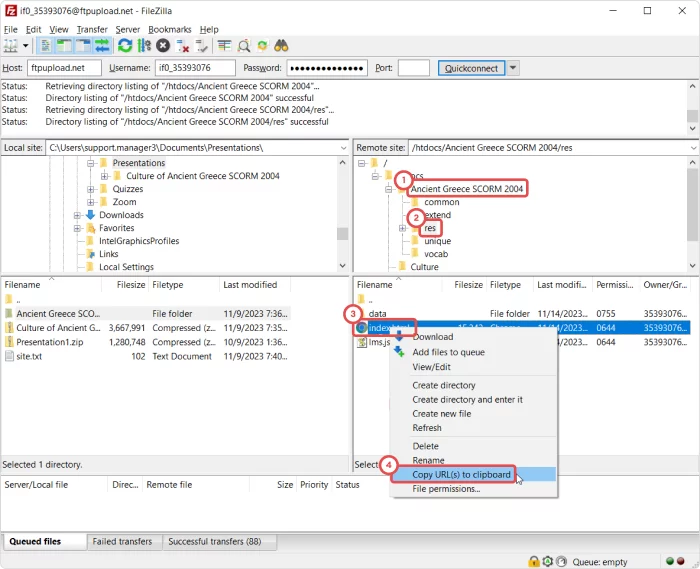
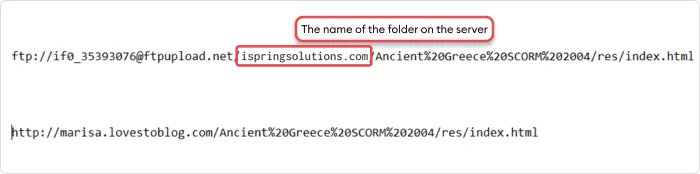
5. Once the course is uploaded, open it in the bottom right window and find the HTML file that launches your course. We’re working with a course created with iSpring Suite, so it’s the index file in the res folder. Right-click on the index file and select Copy URL(s) to clipboard.
6. Paste your link in Notepad to replace some of its parts, so it becomes a typical URL link. Make sure that it starts with “http://” and not “ftp://.”
Add the URL address of your website and delete the part with the name of the folder on your server. You should end up with something like this:
7. Paste this link into the address bar of your browser.
By the way, iSpring Suite has a feature that allows you to upload a course directly to your server as HTML5 content.
GitHub
GitHub is an open-source project. It’s a platform and a cloud-based service that developers around the globe use to host their code, and manage and collaborate on it. You can start hosting your SCORM courses here by creating a free account on GitHub and installing GitHub Desktop on your computer.
Pricing: Starts at $0 for the trial account and up to $231 per year for one author for the Enterprise version.
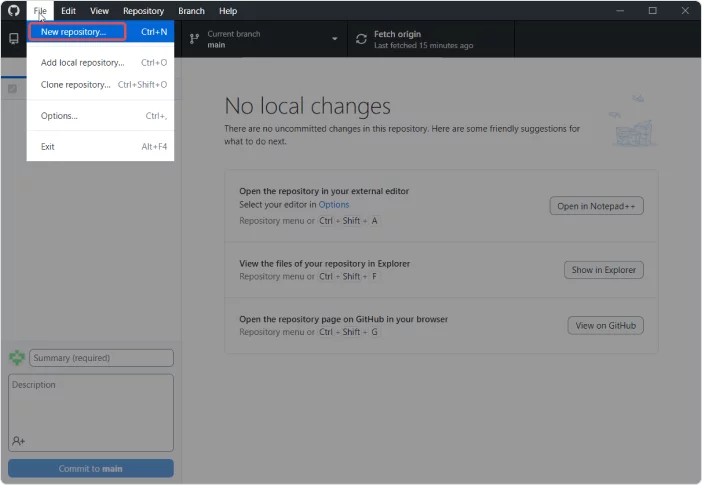
1. Launch GitHub Desktop. Click on File and select New repository to create a folder on your local drive.
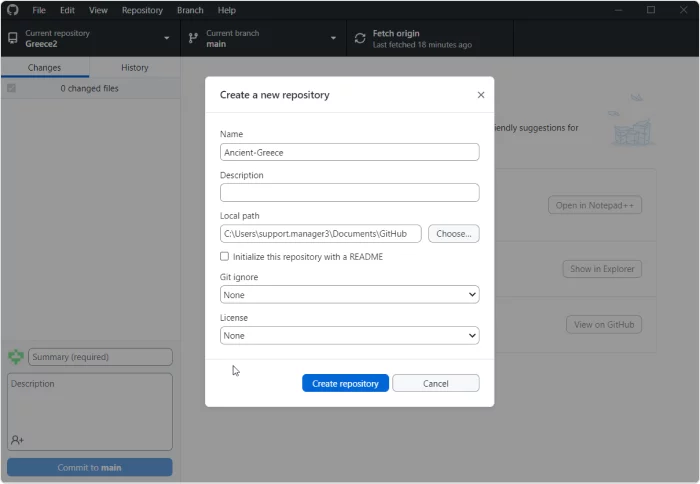
2. Type a name for your repository (without spaces), select the local path (the repository will be created in Documents -> GitHub by default), and click on Create repository.
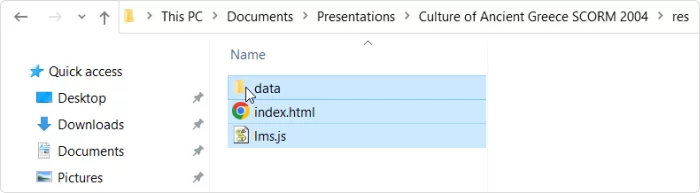
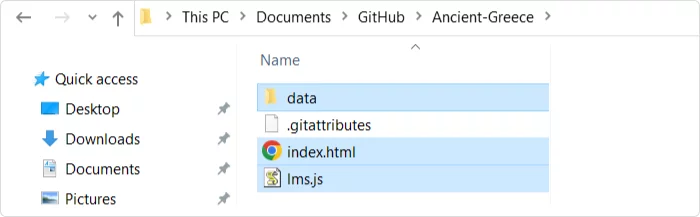
3. Extract your SCORM archive on your local drive. You’ll need to find the HTML file that launches your course. It is usually named “index.” If it has another name, you’ll need to manually rename it to index and then copy all the content inside the archive.
We’re uploading a course created with iSpring Suite here, so there is a small difference. The index file in our SCORM archive is hidden in the res subfolder. So, we need to open the “res” subfolder and copy only the files that are inside it.
4. Open the created repository folder on your local drive and paste the copied files here.
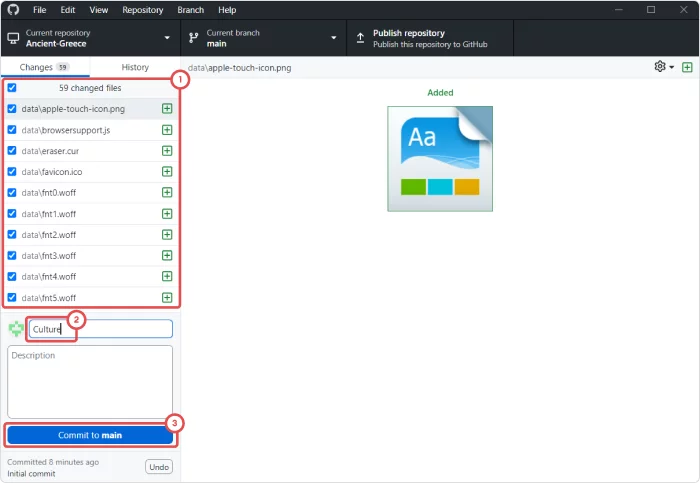
5. Return to GitHub Desktop. You’ll see the copied files on the left. You need to enter a summary and click on Commit to main.
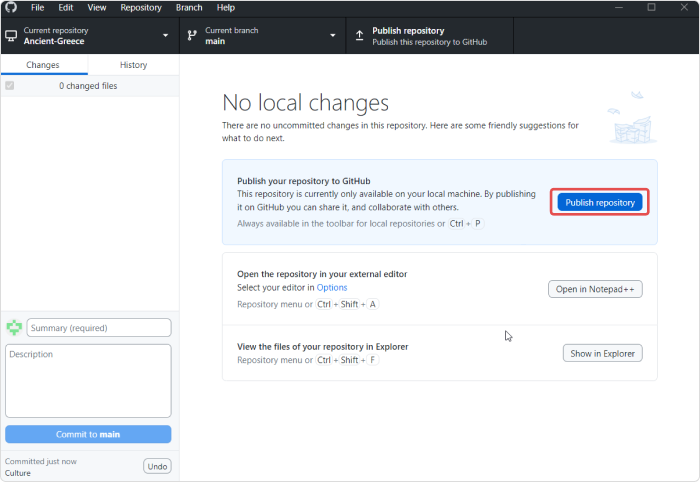
6. Click on Publish repository.
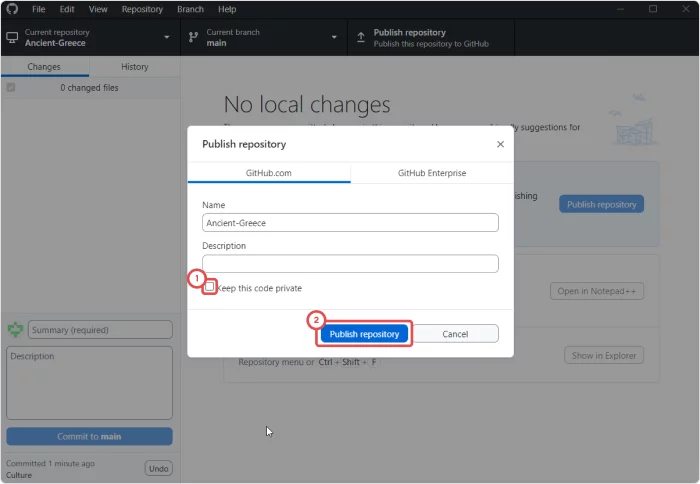
7. Under the GitHub.com tab, deselect the Keep this code private checkbox. Click on Publish repository.
8. Open your GitHub account in the browser. Go to the Repositories tab and select your published repository.
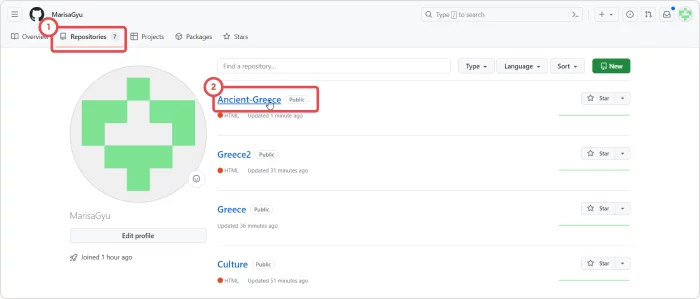
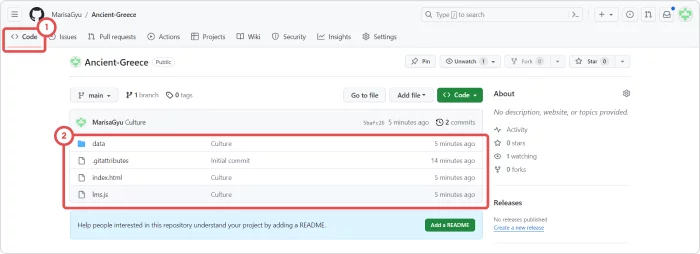
9. You should see your files under the Code tab.
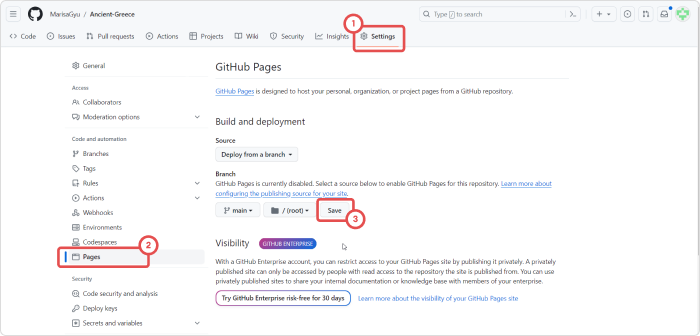
10. Go to the Settings tab and select Pages. You need to select Branch field -> main with the root folder. Click on Save.
11. You may need to wait several minutes and refresh the page a couple of times before the URL link to your course will be generated. You’ll see it at the top of the page.
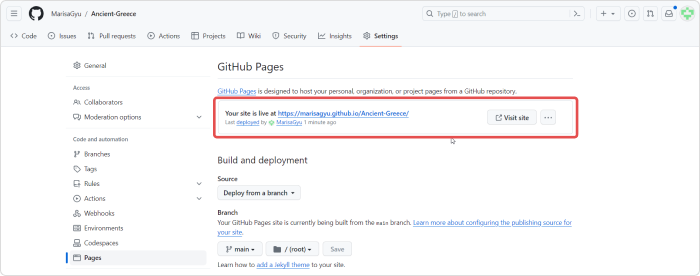
12. Copy this link and paste it into the address bar in a browser. Your course will then be uploaded.
FAQ
What is the difference between SCORM hosting services
and an LMS?
Your SCORM package is hosted and running, so why would you need an LMS at all? Well, it depends on your objectives. How much data can be transferred in a SCORM file? Quite a lot! With reliable SCORM authoring tools and the right LMSs, you can track a user’s progress through the course, run reports, see the user’s answers, set a timer, and so much more.
How can you track user progress when hosting web content?
Honestly, there are not many options on how you can receive data without an LMS, and they’re all indirect. If you host your content on a website, you can use Google Analytics or get data from your server. Some tools have built-in features that can help you track a user’s progress. For example, iSpring QuizMaker allows users to receive reports by email when a user takes a quiz.
Bottom Line
We recommend choosing the service in a way that reflects your objectives. Will it be a free or paid platform? Do you need to protect your content? Is the interface important to you? Weigh the pros and cons, and choose the one that works best for you.
Create online courses and assessments in record time.


How to Test a SCORM Package: The 3 Best SCORM Testing Methods
The 10 Best SCORM Authoring Tools for 2026 [Free and Paid]
How to Create a SCORM File from Course Content