Sharing PowerPoint Online: 4 Ideas Worth Trying


Remember when sharing a presentation meant emailing a massive attached file and hoping it opened correctly on someone else’s computer? Thankfully, those days are gone. Today, there are faster and easier ways to share your PowerPoint slides without losing formatting.
In this article, we’ll explore four smart ways to share PowerPoint presentations — no matter how large they are or who your audience is. Let’s discuss what you can do.
TL;DR
The article explains modern ways to share PowerPoint presentations online beyond sending large email attachments, outlining four key methods. It covers using cloud storage and PowerPoint’s built-in sharing features for easy access and collaboration; leveraging iSpring Cloud to upload and manage presentations with permission controls; embedding or uploading presentations to websites or learning management systems; and exporting files as videos or PDFs for broader distribution. It also briefly mentions traditional presentation platforms. The choice of method depends on your audience’s needs, access requirements, and whether collaboration or interactivity is important.
Method 1. Reach for the Sky with Cloud Services and the Built-In PowerPoint Sharing Feature
The most popular options that support sharing PPTs are Google Drive (Google Slides) and Dropbox (connected to Microsoft Office). OneDrive for personal use or SharePoint for business use are also very popular. All allow you to view presentations online and edit them collaboratively.
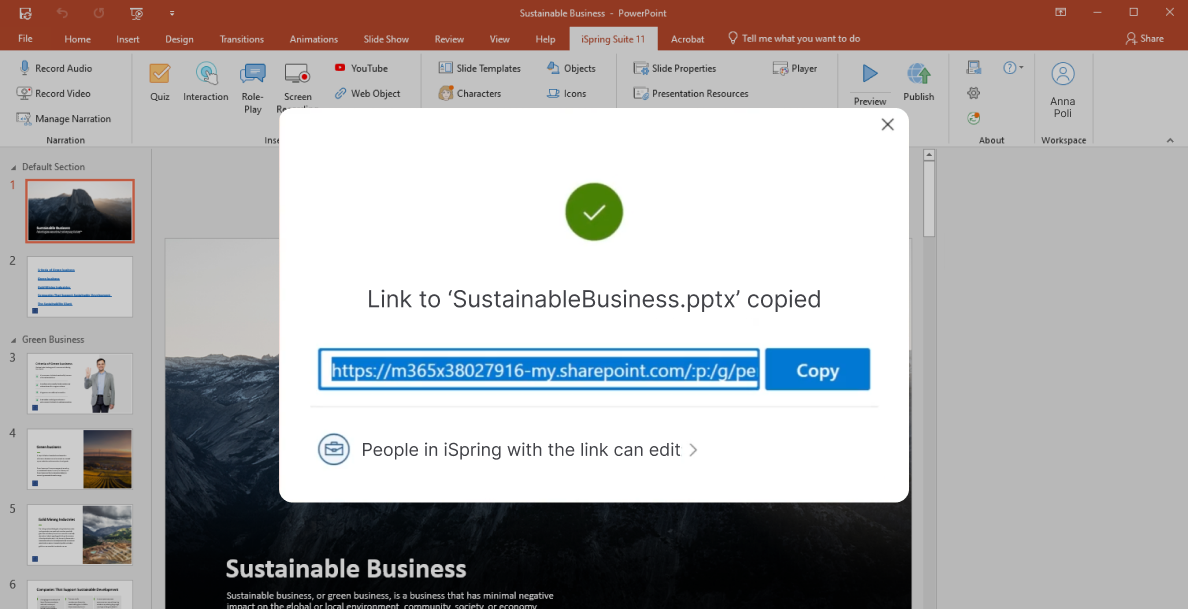
The bright side of using cloud services is that you can easily share the file with multiple people at the same time. Moreover, most cloud services like Google Drive are fast enough to show one file to multiple users simultaneously. Just open your presentation on Google Drive, copy the link, choose the level of access, and share it.
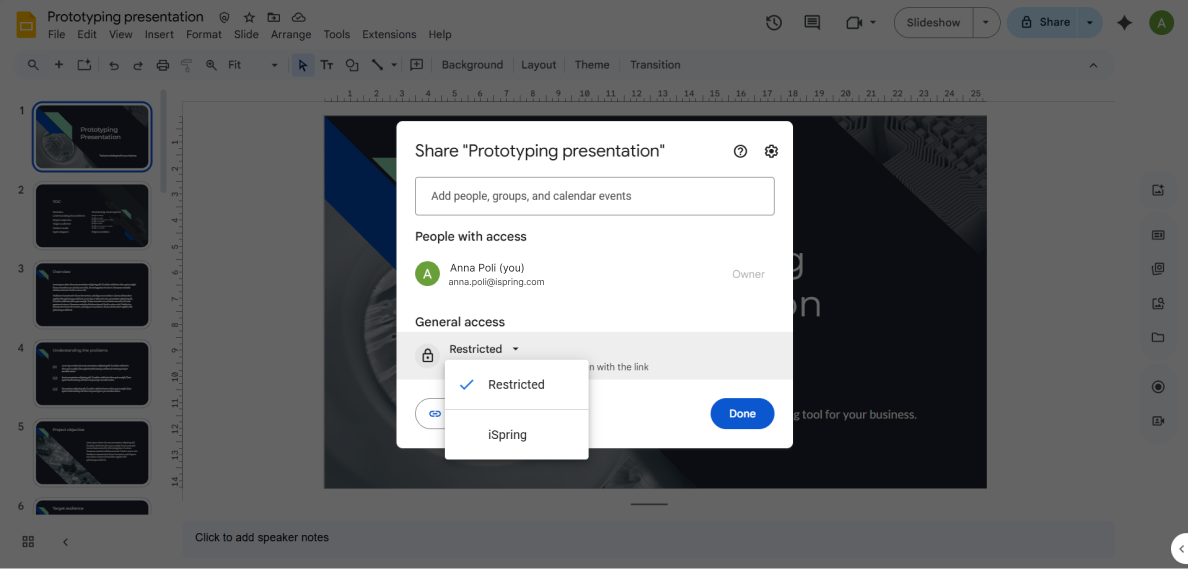
Sharing via PowerPoint
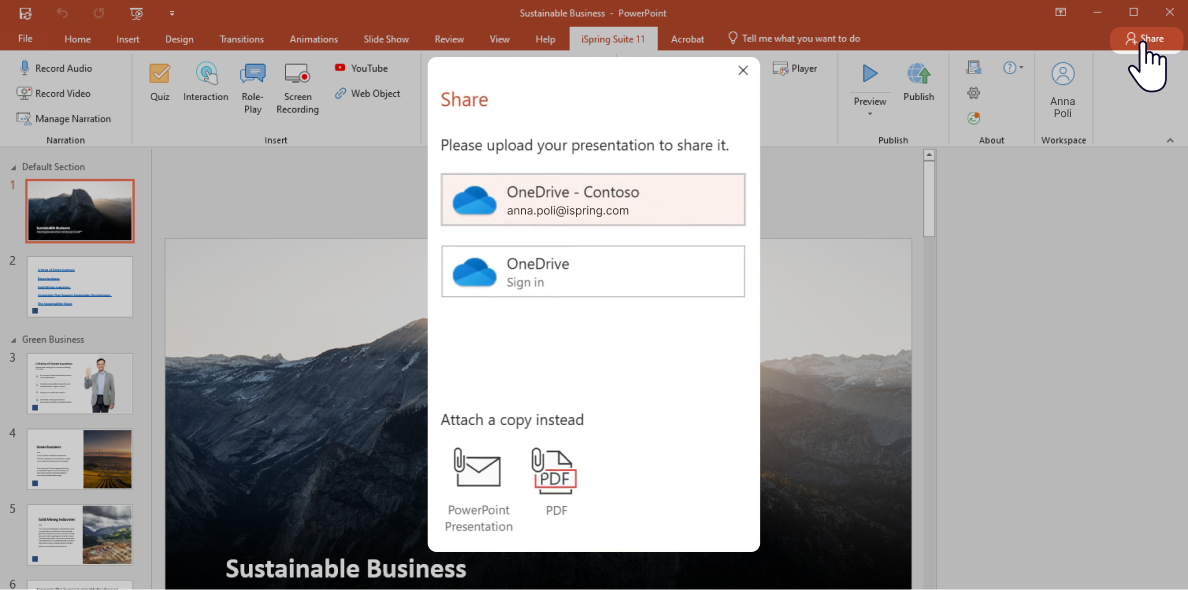
Using PowerPoint’s built-in Share feature, you can upload a file to OneDrive and create a link for online access. Presentations shared this way are perfect for real-time collaboration and co-authoring.
First, your presentation will need to be resident on OneDrive. If you haven’t uploaded it yet, PowerPoint will offer to upload it before sharing. Here’s how it works:
- Open your PowerPoint presentation
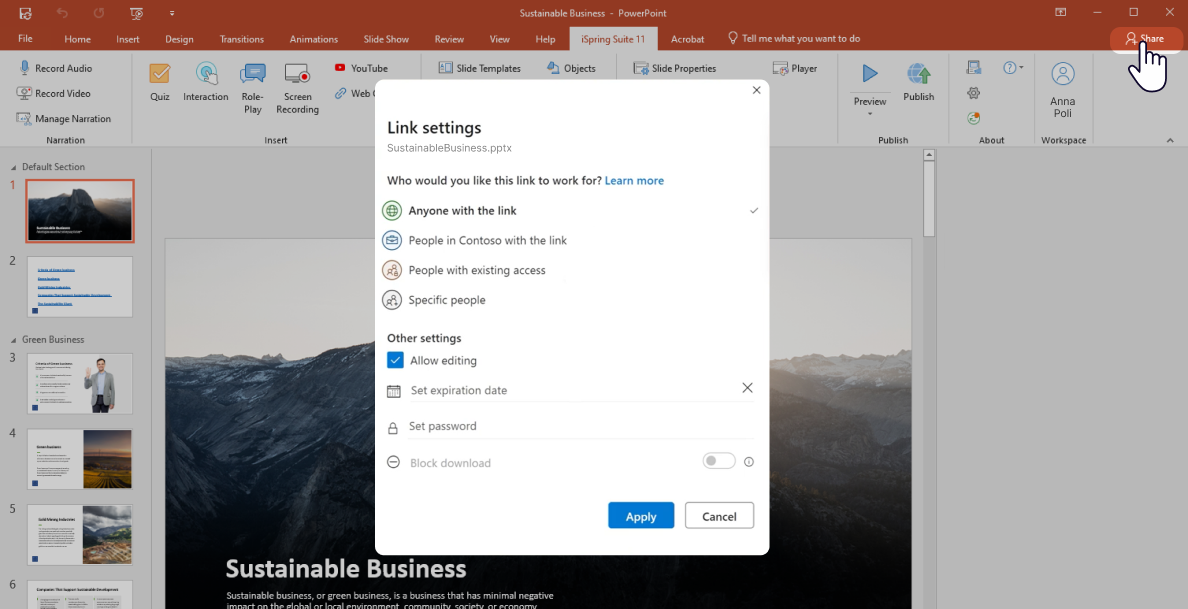
- Click on the Share tab in the top right corner. If you haven’t saved your presentation to OneDrive or SharePoint, choose where you want to save it.

- Choose a permission level and select Apply.

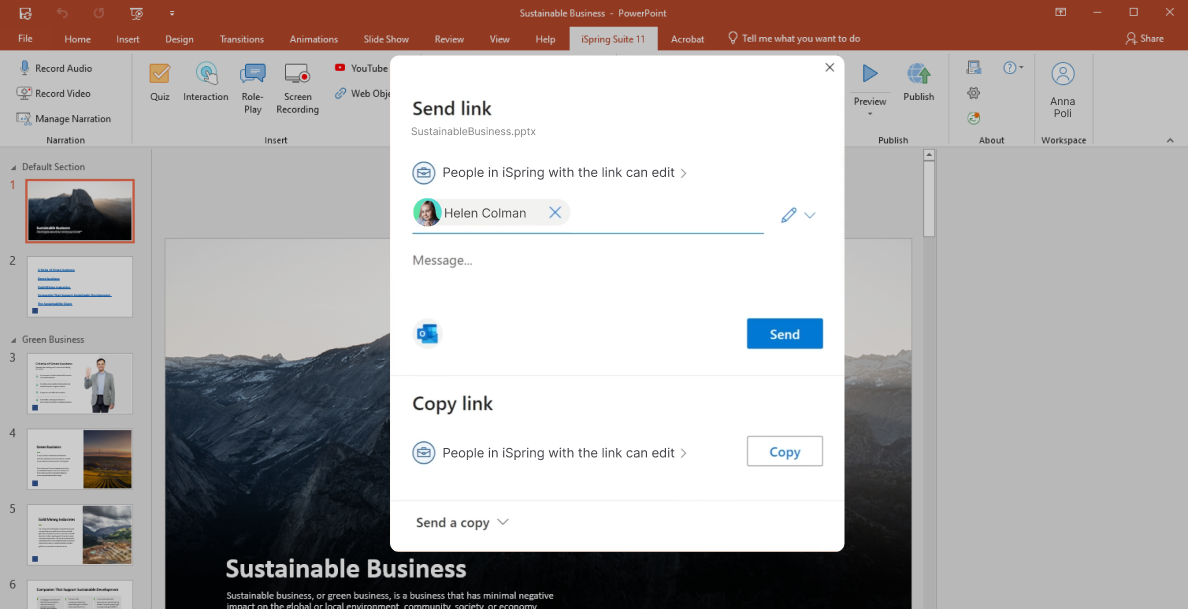
- If you’ve chosen the Share option, invite people you want to share this file with. Then change permissions: View, Comment, or Edit. Then click on the Send button. Each person chosen will get a message.
- If you click on Copy Link, set the access levels and other details, then click on the Copy button. Access to the file will be restricted according to your settings.
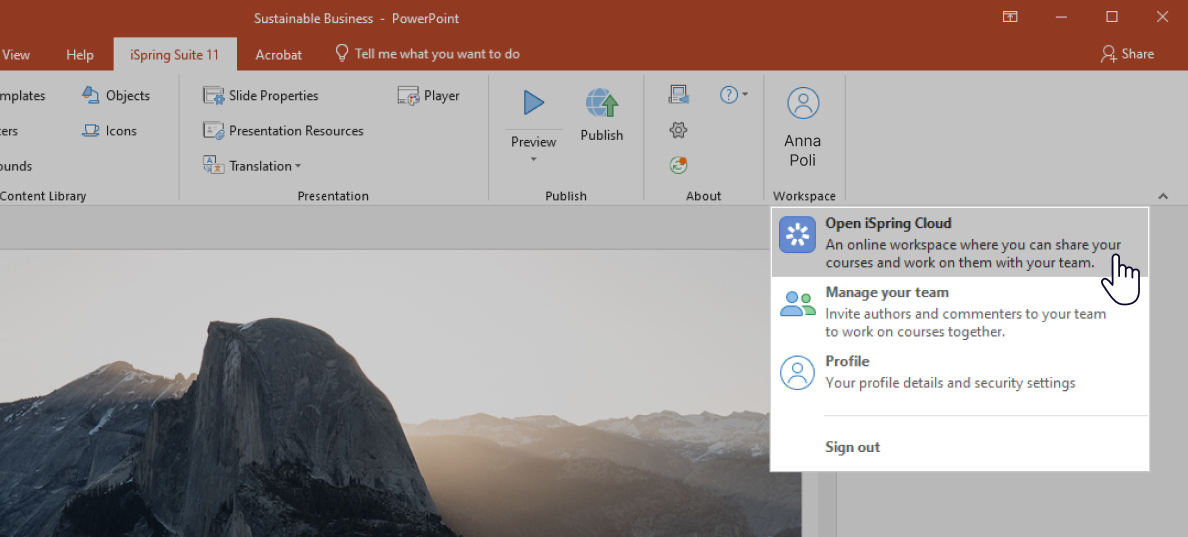
Method 2. Sharing a Presentation via iSpring Cloud AI — the Single Source for All Your Learners
iSpring Cloud AI is an online platform for storing, sharing, tracking, and creating interactive learning content. It is part of the iSpring Suite AI, a PowerPoint-based authoring tool. Let’s see how to use it:
- Sign up for iSpring Suite or activate a free trial to create an account. Whenever you open PowerPoint, the iSpring Suite tab appears, where you can log in to access your iSpring Cloud AI account.

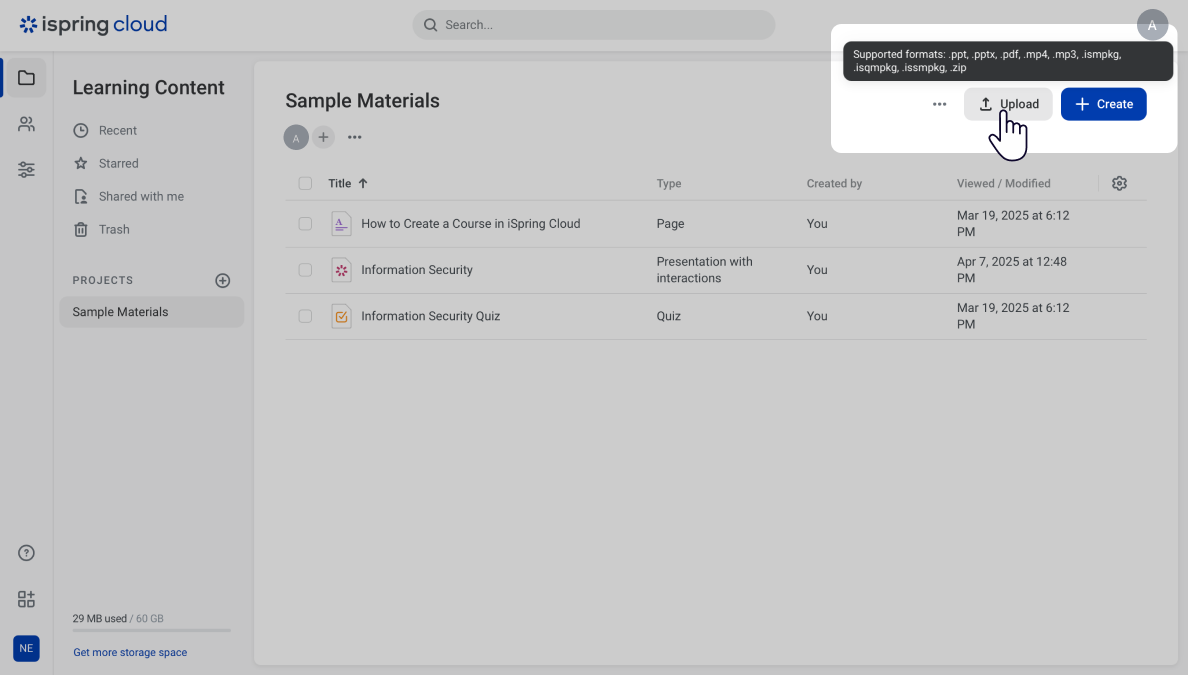
- Go to the Learning Content section, where you’ll find your previously created or uploaded presentations. Upload the new one.

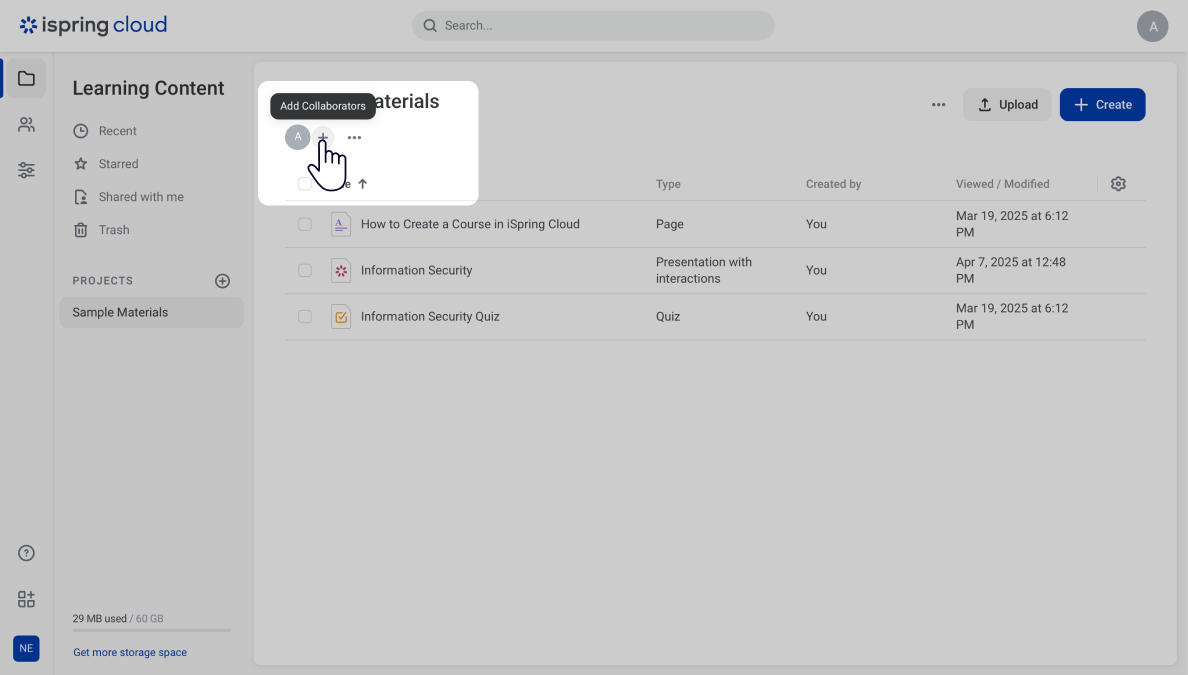
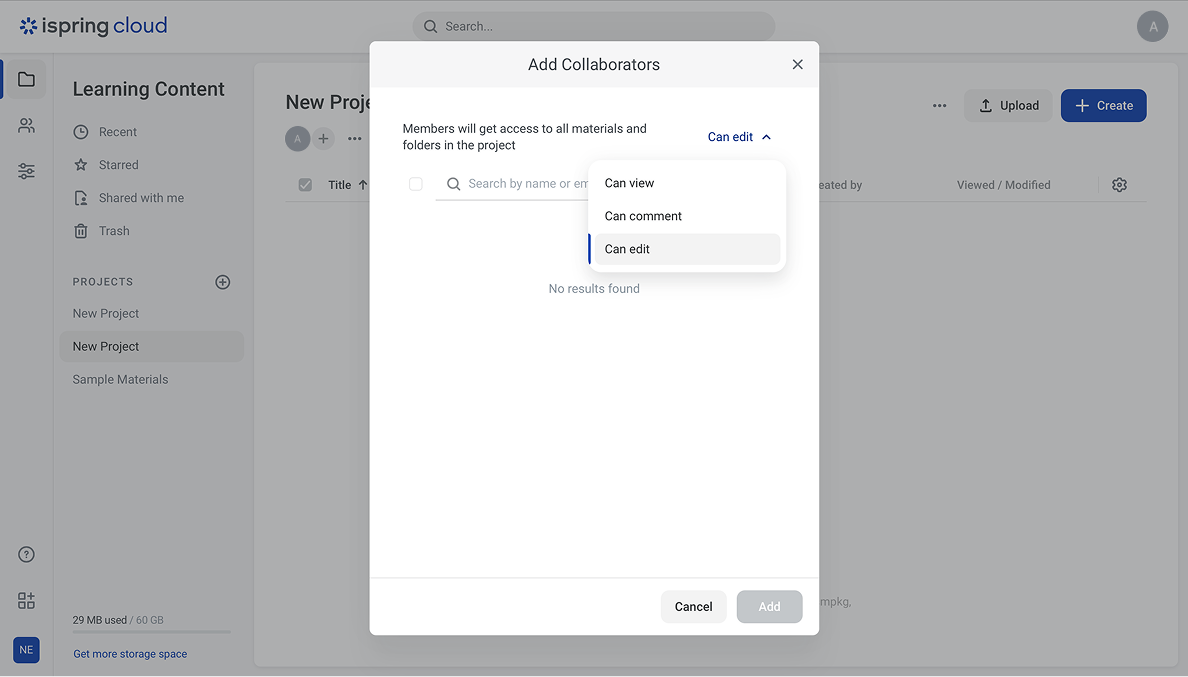
- Use the Add Collaborators tab to allow your team to edit and contribute to your project by searching for their names or email addresses.
- Select the permission level for each participant: “Can view,” “Can comment,” or “Can edit.”

Method 3. Embed It on a Website or Upload It to the LMS
Another way to share a PowerPoint file is by converting it to HTML5 or turning it into a learning course.
Too much to read? Get a summary from AI
Share PowerPoint presentations on the Web
Before uploading the presentation to a website, you’ll need to convert it to HTML. To convert files quickly, you can use online converters like Convertio or HTML5Point. Or go with an easy-to-use iSpring Suite tool: even a free trial would be enough to try. See how easy it is:
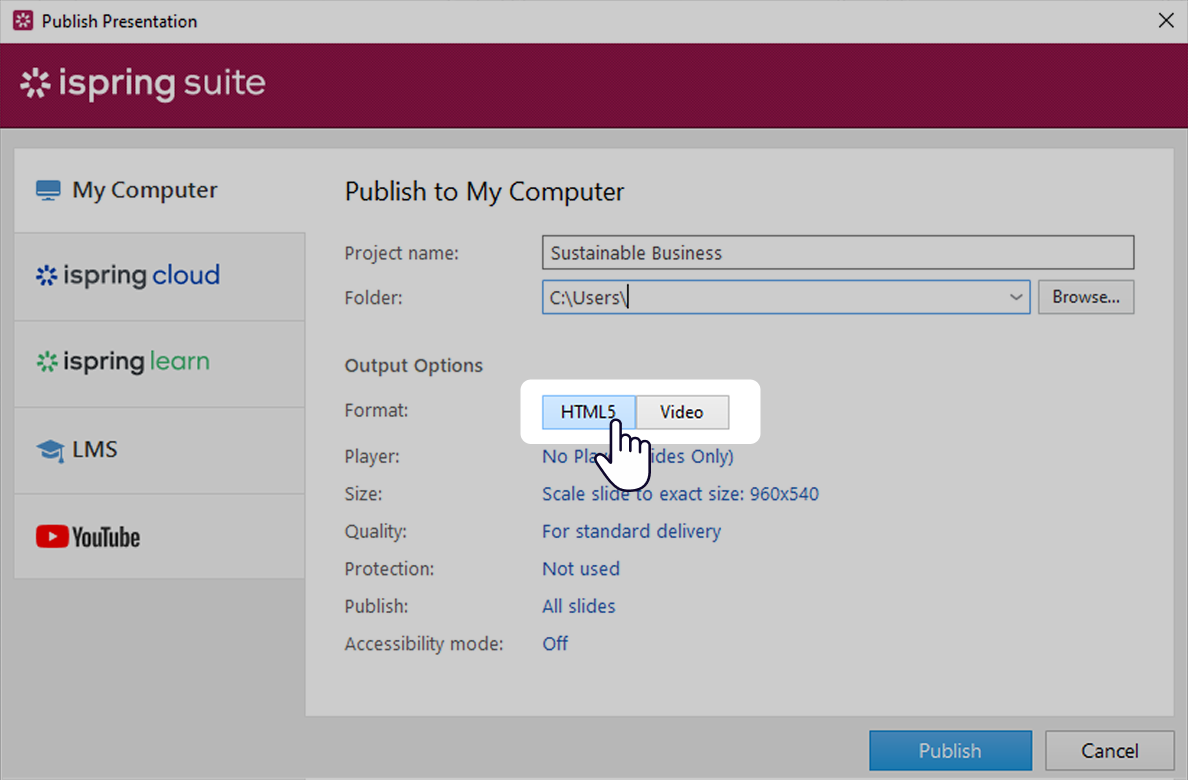
- Click on the iSpring Suite tab in your PowerPoint toolbar and choose Publish.

- In the My Computer section, select the HTML5 format for the conversion.

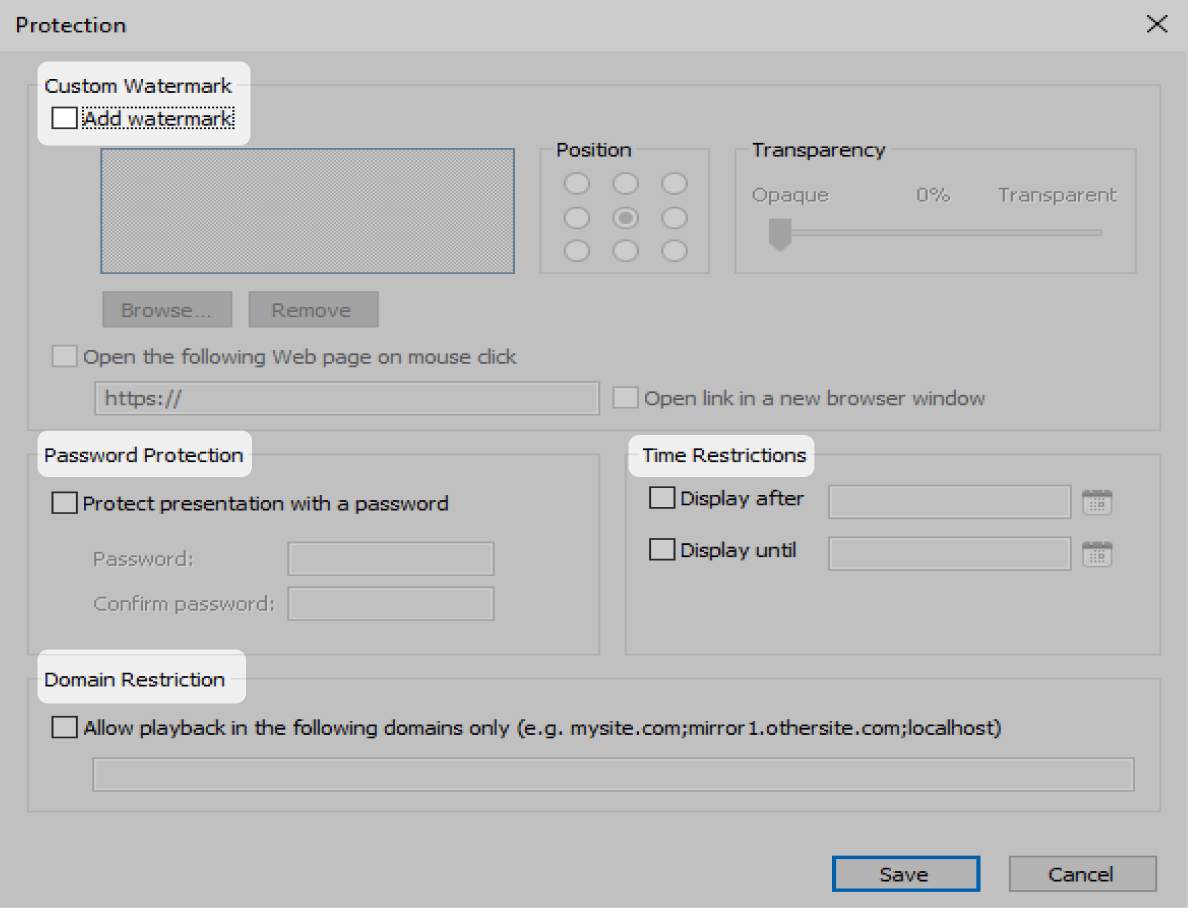
- In the Protection section, set the needed protection method — watermark, password, or time and domain restrictions.

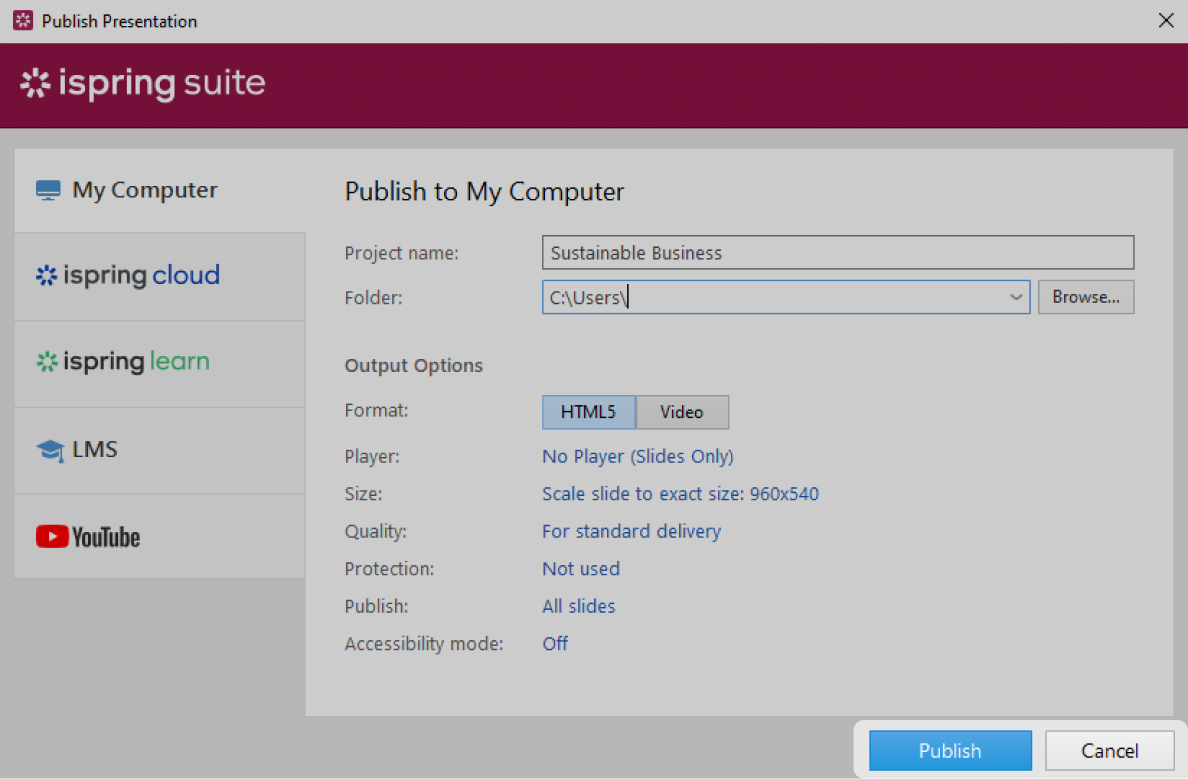
- Save your changes and click on Publish. Now you’re ready to embed your PowerPoint presentation into a website.


Uploading a PowerPoint Presentation to an LMS
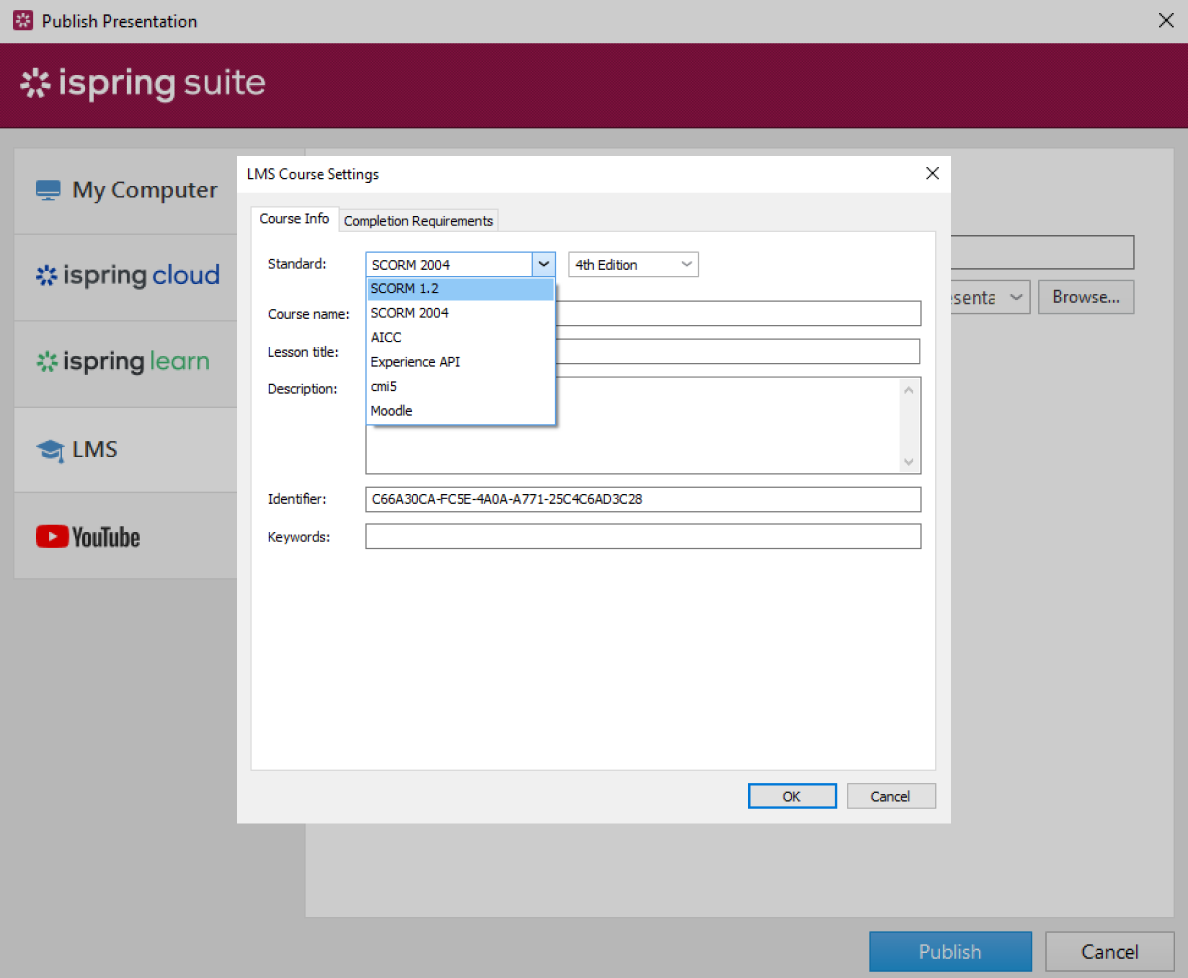
The best way to share training presentations with others is to use a learning management system. Before uploading your PPTs to an LMS, you first need to convert it to SCORM format. Here’s how to do this with iSpring Suite:
- Open your PowerPoint presentation, click on the iSpring Suite tab, and choose Publish.
- In the LMS section, select the correct version of SCORM that your LMS supports.

- Click on Publish. The conversion process will just take a few seconds. You can now upload your presentation files to the LMS.

You can convert a PDF or MP4 presentation to SCORM if you don’t have a PowerPoint presentation.
Method 4. Exporting as a Video or PDF
If you need to share your presentation on video platforms, you’ll need to convert it to a video file.
For online meetings in Microsoft Teams, a PDF version can be handy for quick reference or distribution. With iSpring, you can easily convert your presentation to both formats.
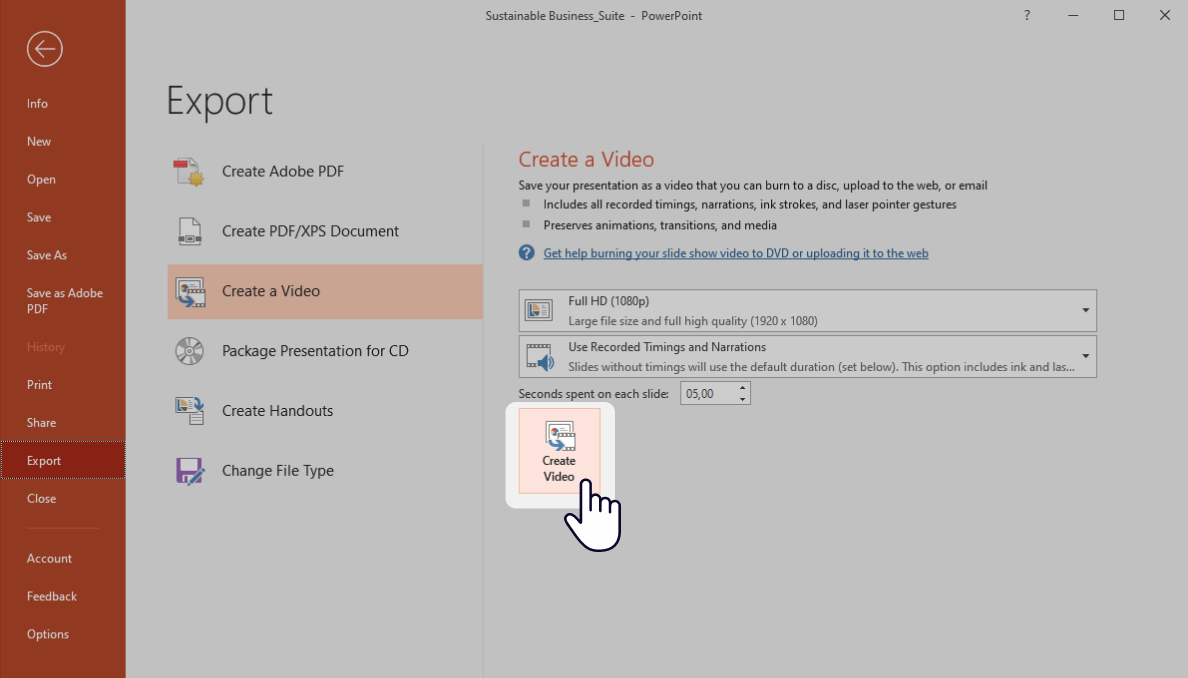
Transforming your presentation to a video right in PowerPoint
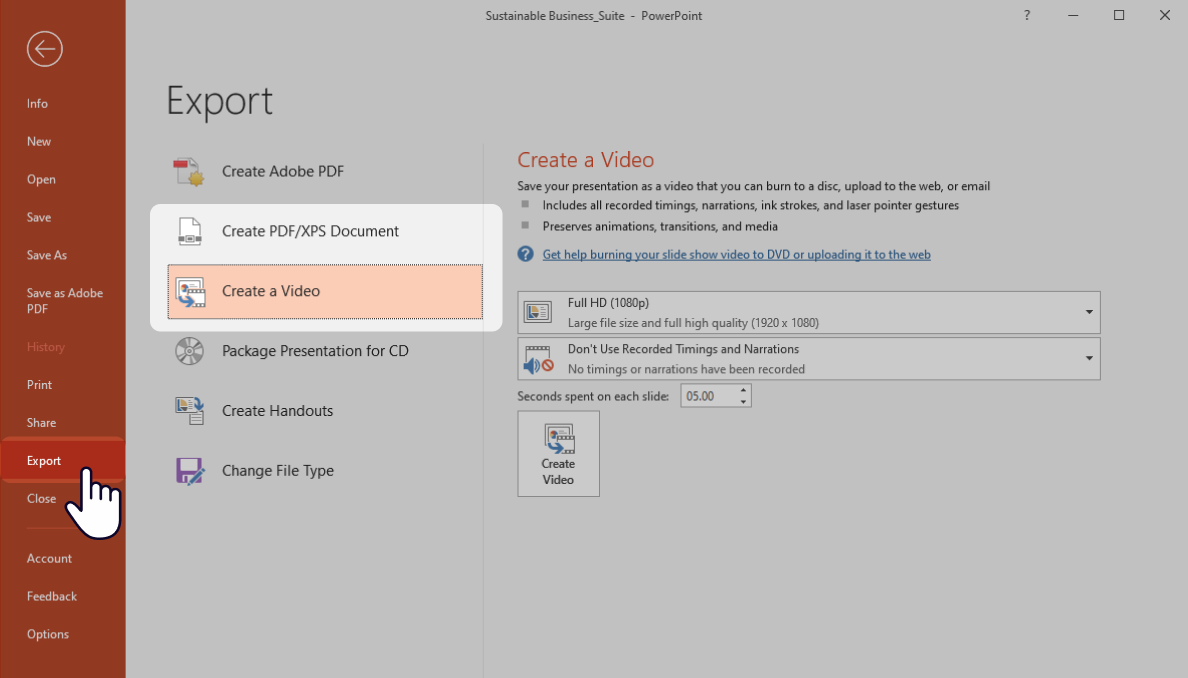
- Go to the File menu in your PowerPoint, and click on Export. You’ll see both options here: Create a PDF/XPS Document and Create a Video. If you’re converting your presentation to a video, select the second option.

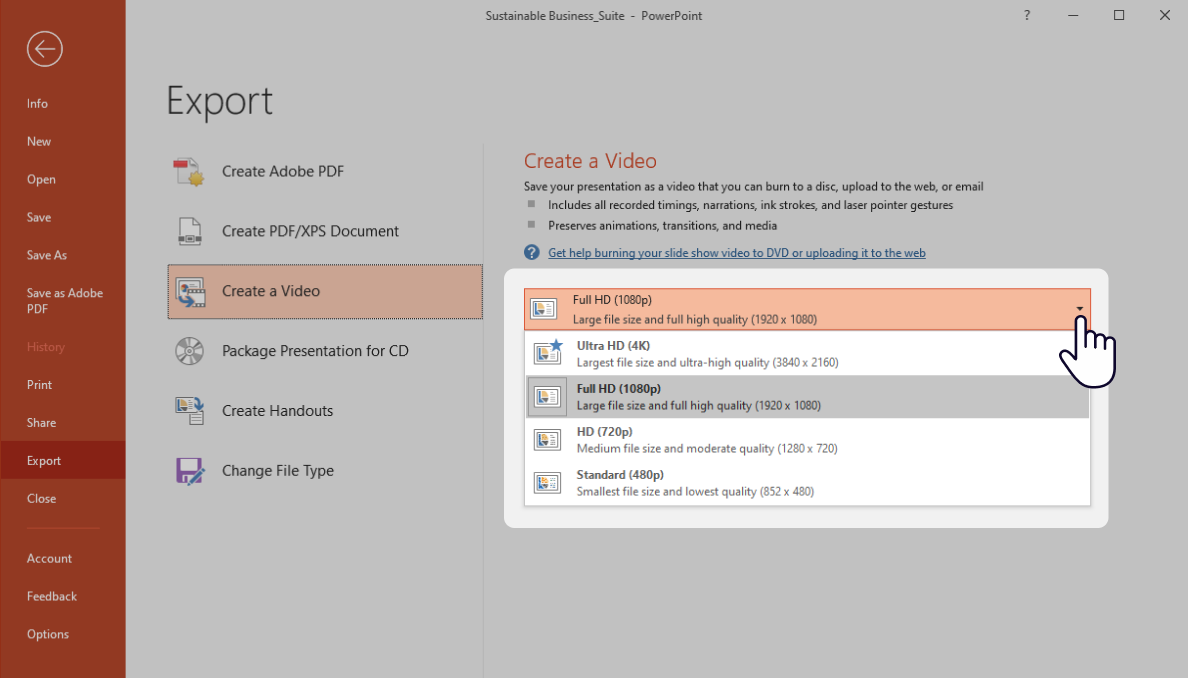
- Select the appropriate resolution. HD works well for large screens, while Full HD is good for YouTube.
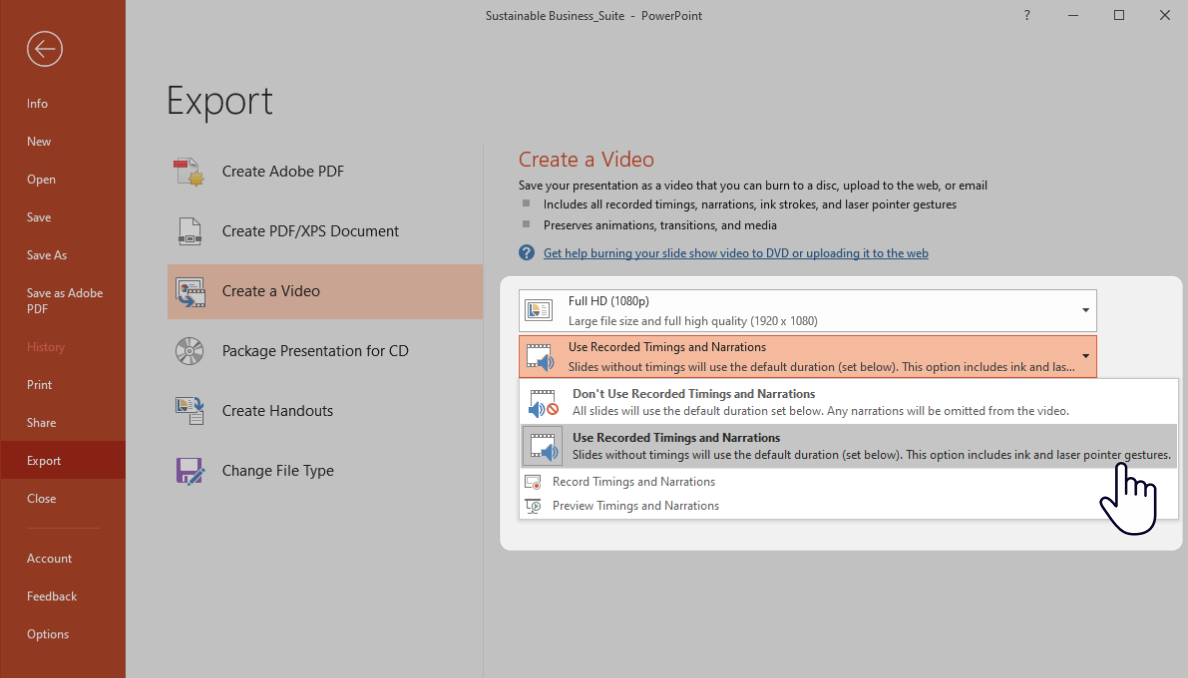
- If you have voice-overs or timed transitions, select Use Recorded Timings and Narrations.
- Click on Create Video. The system will ask you to choose a folder to save to and select the needed video format.
This method works for Windows. If you’re using macOS, see our detailed article, “How to Convert PowerPoint to Video.”
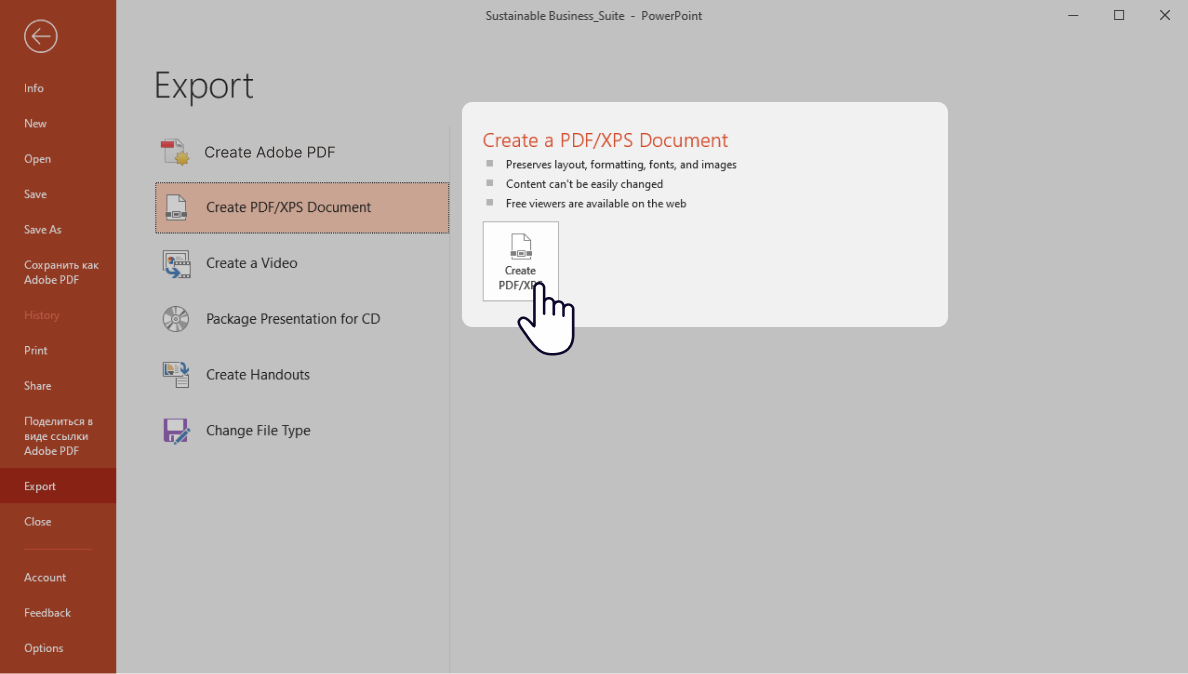
Getting a PDF from your PowerPoint presentation
Creating a PDF from your PowerPoint presentation is even easier:
- Repeat step 1. Go to the File menu in your PowerPoint, and click on Export. Select Create a PDF/XPS.

- Click on the Create PDF/XPS tab and select the needed format in the system window.


Now you’re ready to publish your video presentation on YouTube or share it as a PDF.
Method 5. Using Shared Presentation Platforms
The last, but also useful, option is using specific hosting services and presentation platforms like SlideShare or PowerShow.com. There is no requirement to register for such services; you can simply upload your presentations there. Most of them allow you to share presentations right away.
The main advantage of this method is the simplicity of sharing and built-in slideshow features. The downside is that you can’t edit uploaded presentations and collaborate on them.
Overview of Methods for Sharing a PowerPoint Presentation Online
We’ve examined the best practices and ideas on how you can share your presentations easily. What to choose depends on your goals. Check out this comparison table to help you make the right choice.
Comparison of popular criteria for choosing a presentation sharing method
| Cloud Services | Website/LMS embedding | Video/PDF export | Presentation Platforms | |
|---|---|---|---|---|
| Simplicity | Simple | Medium | Simple | Simple |
| Collaboration options | Depends on the service | No | No | No |
| Access Control | Fine-grained | Depends on the platform | Public only | Limited |
| Privacy Level | High | High | Low | Unclear |
| Offline availability | Limited | Depends on the platform | Yes (stored locally) | No |
To Sum Up
From cloud storage to LMS integration and videos, there are plenty of ways to deliver engaging content at scale today. Choosing the right option depends on who you’ll share your online presentation with and what your audience will do with it.
If you’re looking for an all-in-one solution that combines easy sharing, collaboration, data privacy, and interactivity, iSpring Suite is worth a try. It is a particularly good option if your main goal is to share interactive training materials. Want to try it on your projects right now? Start with the free trial and see how effortless it can be.
Create online courses and assessments in record time.


11 Ways to Make an Interactive Presentation That Engages & Wins
15 PowerPoint Tips to Make Your Slides More Effective
How to Insert a PDF into PowerPoint: A Step-by-Step Guide
How to Create an Interactive Map in PowerPoint [Template Inside]