Section 508 Compliant Content in iSpring Suite

The newest update of iSpring Suite gives eLearning authors a big advantage – now, they can create accessible content for users with visual impairments.
The option to create accessible content helps authors to comply with Section 508 of the Rehabilitation Act of 1973, which requires that electronic information be available for individuals with disabilities. Despite the fact that Section 508 applies only to federal agencies, many other businesses and organizations aim to make their content fully accessible, as they want to make the world a better place for people with impairments and also to reach a larger audience with no exclusions.
That’s why we’ve improved iSpring Suite even further to give course creators more options to create Section 508 compliant content fast and hassle-free. With iSpring Suite, you can build online courses, tests, eLearning interactions, and e-books that users with a visual impairment can easily take.
To create accessible content, you don’t have to make different versions or master a new tool – you just build a course or a quiz in a respective editor as you usually do, and tick a single checkbox. However, you should stick to some simple rules for creating accessible content. (We’re going to discuss them in this post too, just keep reading.)
iSpring Suite creates learning content in accordance with Web Content Accessibility Guidelines (WCAG) 2.0.
iSpring Suite publishes learning modules to a special format that allows learners to switch to accessibility mode by clicking the ? button. The only exception is an interactive flipbook: if you publish it to the accessible format, it won’t feature the other mode.
Here’s how a course slide and a quiz question look in different modes:

And these are two different modes of the Media Catalog interaction. To easily navigate between the interaction steps in accessibility mode, learners can use a list of items.

How is the accessibility mode different?
Here’s what you can expect from the accessibility mode:
Perceivable texts. Clear fonts and high contrast make it easier for a person with a visual impairment to read the text on the screen. In the accessibility mode, courses created with iSpring Suite feature the comfortable sans-serif typeface Segoe UI.
Minimalistic layout. Courses and quizzes include only the most necessary elements, which keeps the interface clear of distractions. If your course slides include animations, transition effects, and elements set to autostart, they won’t appear in the accessibility mode. Such neat and succinct slides are easy to navigate for those who use only a keyboard to work on a computer.
Screen reader-friendly content. Screen readers, as the name suggests, turn text into speech and allow users to navigate with the keyboard, e.g., jump between elements, select checkboxes, and fill in fields. This way, people with visual impairments can use computers without anyone’s assistance.
If digital content isn’t optimized for screen readers, there might be issues. For example, a screen reader might voice content in the wrong order or be unable to activate checkboxes.
Courses created with iSpring Suite are recognized by the most popular screen readers: JAWS, VoiceOver, and NVDA.
We’ve put together simple step-by-step instructions on how to publish a course, a quiz, an interaction, or a flipbook to the accessible format and a few helpful tips for content authors.
How to create an accessible eLearning course in iSpring Suite
1. Open PowerPoint and create a new presentation or open an existing file you’d like to turn into an online course.
2. If you start from a blank slide, add texts and shapes there. Please keep in mind that if a shape doesn’t have a text, it won’t appear on the accessibility mode. The same goes for pictures – be sure to add alternative texts (alt-texts) to them. Just right-click on the image and select Edit Alt Text. The picture without an alt-text will be ignored in the accessibility mode.

Adding alt-text to images is a good rule of thumb when you create content for users with visual impairments. So, if you want to repurpose an existing PowerPoint presentation and turn it into an eLearning course, make sure that all important images have textual clues for those who can’t see well.
The same goes for videos: don’t forget that some of your learners are only able to hear it, not see it.
3. To ensure that a screen reader voices elements in the proper order, set them in the correct sequence using the Selection Pane in PowerPoint.
To open the Selection Pane, go to the Home tab, click on Arrange, and pick Selection Pane.

You can move objects in the Selection Pane simply by dragging and dropping them:

Here’s a helpful video tutorial on working with the Selection Pane in PowerPoint:
How to Use the Selection Pane in PowerPoint
Please note that the accessibility mode currently has some limitations, e.g., it doesn’t show animations, transitions or resources added via Slide Master. The accessibility mode supports audio, video, quizzes, and interactions added in iSpring Suite, but doesn’t support dialog simulations and web objects.
4. When your course is ready, click on the Publish button in the iSpring Suite tab and enable Accessibility mode.

Don’t forget to specify a language: a screen reader pronounces text in the language you set, and if it doesn’t match the language of your course, the screen reader will voice it with a strange accent.
5. After you fine-tune the settings, hit the Publish button.

How to create an accessible test
1. Launch iSpring QuizMaker from the iSpring Suite toolbar or in a standalone mode.

2. In the Form View tab just add a couple of questions to be able to publish the quiz.
Note: Hotspot and Drag-and-drop questions don’t work in accessibility mode. In an LMS, these questions will be reported as unanswered.
Also, I want to share important info with you right now: please keep in mind that if you add content in Slide View, for example, pictures or shapes, they won’t appear in accessibility mode after publishing.

Tip: Rely on text rather than images to convey important info. Include meaningful data in the question wording or, at least, add alt-text to a picture.

3. Click on the Publish button and enable Accessibility mode.
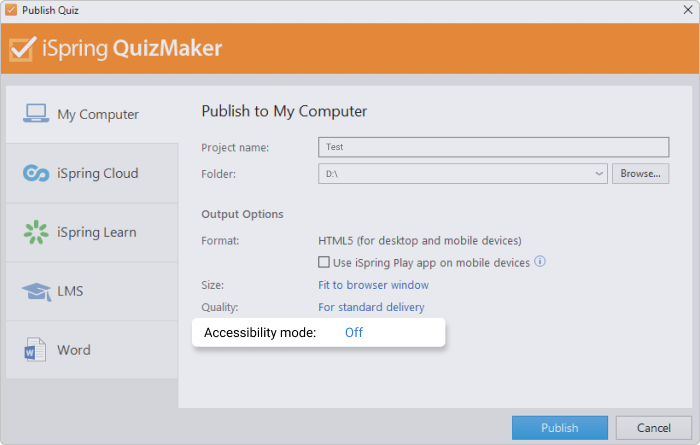
4. Specify a language and click on the Save button. Now, your quiz is ready for publishing.

How to create an accessible interaction
1. Add an interaction to your course by clicking the Interaction button in the iSpring Suite toolbar.

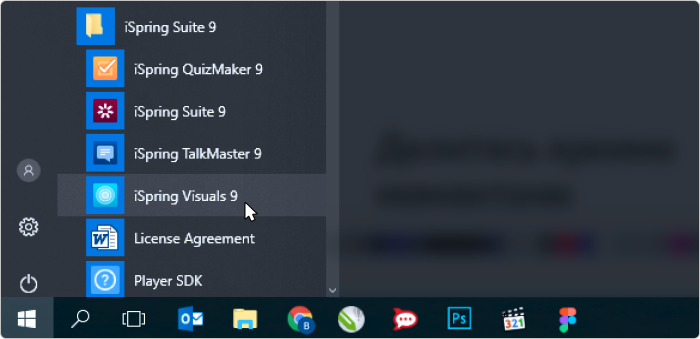
If you want to use an interaction separately, launch the standalone interaction editor (iSpring Visuals). You can do this from the Windows Start menu.
2. From the list of interactions, select the one you’d like to create and click on Create Interaction.

3. We’ve chosen the create the Guided Image interaction, however, for all other modules, the instructions are the same. So, populate the interaction with texts and images and add alt-texts.
Adding alt-texts in interactions is also easy: once you’ve added a picture (via Insert → Picture), the Alternate text field appears, and you can type a description there.

4. When your interaction is ready, just click Publish.

5. In the Publish window, turn on Accessibility mode.

6. Enable Screen reader mode and specify the language for your interaction. Now, you are all set to hit Publish.

How to create an accessible eLearning flipbook
1. Launch iSpring Flip in iSpring Suite by selecting the Books tab or in standalone mode.

2. Next, browse for a PDF, DOC, or PPT file you want to convert into a book and click on the Publish button.

3. In the Publish Window, click Off next to Accessibility to switch it to On.

4. Check Enable screen reader mode and specify a language.

Accessibility mode is now on – just click Publish.
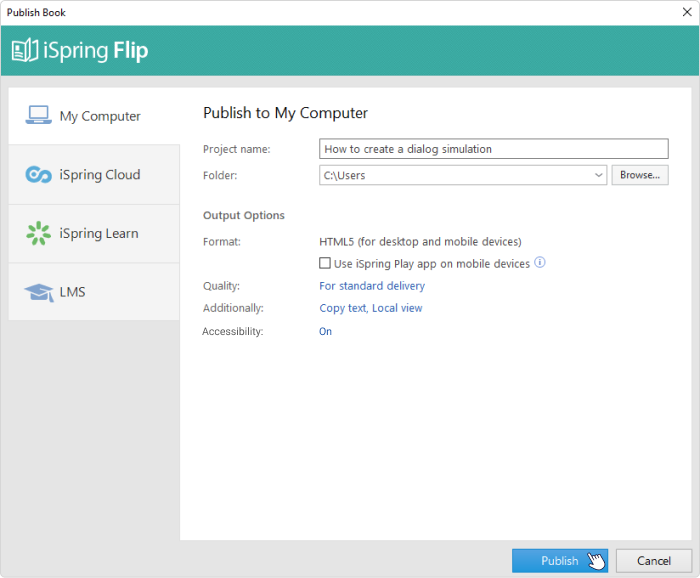
Please note that when publishing a book into accessibility mode, you can’t disable text editing and viewing locally in Additional settings. This option is always set to Copy text, Local view (see the screenshot above) because otherwise, screen readers won’t be able to access and voice the text of the ebook.
As we’ve mentioned, if you publish a flipbook into the accessible format, it will be available only in this format without the option to switch to the mode for sighted users.
For now, the accessibility mode is only available on desktop devices.
We’re working on adding new accessible options to iSpring Suite. Stay tuned!
Create online courses and assessments in record time.


Instructional Design Principles: Keys to Authoring eLearning Content
How to Create a Mobile-Friendly Online Course: 10 Must-Follow Rules
How to Create a Hotspot Question for an Online Quiz