How to Create a Hotspot Question for an Online Quiz

Are you tired of boring multiple choice and true or false tests? Do you want to make your online assessments more interesting and fun? Engage your learners by adding visual hotspot questions to your quizzes.
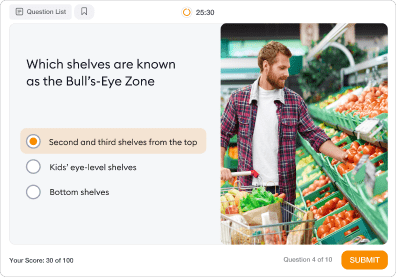
A hotspot question is a cool type of question that lets test takers mark a certain area of an image. When creating the question, you can specify what area of the picture acts as the answer and customize its size. It’s worth using hotspots when you want to find out if your learners can recognize objects or tell one from another.
Key Takeaways
The article explains how to create hotspot questions in online quizzes to make assessments more engaging by having learners click on specific areas of an image. It defines a hotspot question and gives examples of its use across different subjects. It then provides a step-by-step guide to creating them using iSpring QuizMaker: installing the tool, creating a graded quiz, adding a question and image, drawing hotspot shapes, customizing settings like feedback, scoring, the number of attempts, and previewing the quiz on different devices, and finally publishing the quiz. It encourages educators to use iSpring QuizMaker to build visual, interactive quizzes.
Here are a few examples of hotspot questions that will show you how you can use them for different quiz topics:
- In a Geography quiz, you may ask your test-takers to mark a certain location on the map.

Pinpoint Hungary on the map of Europe
- In a medical quiz, you can use hotspot questions to test how well your students know human anatomy.

Mark the supraglottis in the image of the larynx
- In a car maintenance quiz, you can ask your learners to pinpoint specific car parts or identify a certain detail visually.

Find and mark the combustion chamber
You can easily create image-based hotspot quizzes with iSpring QuizMaker. If you still don’t have it, download the quiz authoring tool for free.
Now, let’s delve into how to make a hotspot question with iSpring step by step.
Too much to read? Get a summary from AI
A Step-by-Step Walkthrough
1. Install iSpring QuizMaker on your computer.
2. Open the app in the Graded Quiz mode.

3. Click Question and choose Hotspot.

Great! Now we’re ready to add the content. Let’s make a hotspot question for a course on fire safety.
4. Enter a question/statement in the corresponding field.

5. Add your picture either from a file or from your clipboard.

6. Add a Hotspot shape, for example, a rectangle. All you have to do is choose it and draw the shape over the correct answer.

7. If you want this shape to be a little more precise, use the Draw a Shape Option instead. With this option, you can draw whatever shape you like.

You can create as many hotspot areas as you like, but we only need one for this quiz.
8. After creating a hotspot question, you can customize its options in the menu on the right. You can adjust the question type, decide if your learners will get feedback, and how scoring will work. You can also specify the number of attempts your learners can take to answer correctly, add a time limit to each question, and select whether or not you will accept partially correct answers.
Further down you have Marker Options. Here you can limit the number of areas your students can mark and enable clearing markers that will let your learners erase their answer and try again before submitting. If you allow your student additional attempts, you can choose whether their initial answers will be cleared or not.

9. Now set up feedback. You can adjust your feedback message for correct and wrong answers. You can also set up branching here. Send the learner to the next slide, have them return to the beginning of the group, or make them start the quiz again if they make a mistake. And of course, you can specify your scoring for both correct and incorrect answers.

10. Now it’s time to make sure the quiz looks good. Go to Slide View and adjust the picture and format your question if necessary.

11. When the slide is ready, check to see if it works as it is supposed to for both desktop and mobile. To do this, click on the Preview button.

12. If the slide looks good on all devices, publish your quiz. Click on Publish and select where you want to export your quiz: to your computer, your LMS, iSpring LMS or iSpring Cloud AI.

Congratulations! Your online hotspot quiz is ready to go. It doesn’t get much simpler than that, does it?
Here are basic ways of online assessment that are sure to support learning, engage your audience, and provide teachers with insight into their students’ learning process.
To start creating online quizzes right now, download iSpring QuizMaker with a 14-day free trial. This period will be enough to build a bunch of beautiful interactive quizzes.
Create interactive quizzes for learning, knowledge checks, and skill practice


How to Create a Moodle Quiz: Step-by-Step Guide