Articulate 360 vs. PowerPoint: Which Is Right for You?


When it comes to eLearning development, Articulate 360 is often considered the top-tier choice. However, its premium features come with a steep learning curve and a price tag that may not suit everyone. On the other hand, Microsoft PowerPoint — a tool you likely already know — offers a simpler but more affordable way to build online courses without sacrificing quality.

In this article, I’ll show how these tools compare, when to use each, and how to get the most out of them, so you can make the best choice for your needs.
Quick Overview of Articulate 360
Articulate 360, in my view, is the premium choice for corporate trainers and instructional designers who need highly interactive, professional-grade courses. This all-in-one suite combines powerful authoring tools with collaboration features, making it a favorite among large teams and enterprises.
What’s inside?
- Storyline 360 – The flagship tool, offering deep customization with triggers, variables, and branching scenarios. It’s like PowerPoint’s powerful younger sibling.
- Rise 360 – Enables fast, mobile-friendly course creation with a modular, web-based approach.
- Review 360 – Simplifies team collaboration with centralized feedback.
- Reach 360 – Helps distribute and track training across organizations.
The Catch?
- Steep learning curve – Mastering the advanced features takes time.
- High cost – Priced for enterprises, making it less accessible for freelancers or small teams.
- Overkill for simple courses – Not always the best fit for quick, lightweight projects.
Best for (my take): Organizations that need polished, interactive training with extensive customization. If that’s you, Articulate 360 is a great choice. But if you need simplicity, alternatives like PowerPoint might be a better fit.
Quick Overview of PowerPoint
PowerPoint is the world’s most familiar presentation tool — and with good reason. Its simple, slide-based approach makes it an easy entry point for creating basic training materials, especially when you need quick, no-fuss course development.
What PowerPoint does well
- Familiar interface – Nearly everyone already knows how to use it, which reduces training time.
- Basic multimedia support – It’s easy to add images, videos, and simple animations.
- Visual polish – Built-in templates and design tools help courses look professional.
Where it falls short for eLearning
- No built-in assessments – Can’t create graded quizzes and assessments.
- Limited interactivity – No drag-and-drop, branching scenarios, or advanced triggers.
- No direct LMS integration – Doesn’t export SCORM/xAPI packages on its own.
- Minimal collaboration – Not designed for team-based course development.
The game-changer (my recommendation): iSpring Suite
While PowerPoint alone isn’t a full eLearning solution, I believe iSpring Suite bridges the gap. This is a powerful add-on that turns familiar PowerPoint into a full-fledged authoring tool, maintaining its ease of use. With iSpring Suite, it becomes a compelling alternative to complex tools like Articulate 360, especially for organizations that value rapid course development without a steep learning curve.
Best for (my take): Teams that need to produce effective training quickly, without sacrificing quality or requiring extensive software training.
It’s also the ideal choice for organizations that require an offline authoring tool capable of running in restricted networks with offline activation, all while using the PowerPoint-based workflow their teams are already familiar with. If you’ve ever wondered how to create eLearning courses offline or needed true air-gapped course authoring software, iSpring Suite is the answer.
Further on in the article, I’ll put both Articulate 360 and PowerPoint enhanced with iSpring Suite to the test and show exactly how they compare when building real-world courses.
How to Create a Course in PowerPoint (+ iSpring Suite)
Let’s start with a step-by-step guide on how to build a course using PowerPoint plus iSpring Suite.
1. Design slides
The beauty of using iSpring Suite is that it integrates with PowerPoint’s familiar interface seamlessly. You can start by creating your slides exactly as you would for a standard presentation. Use text boxes, images, and shapes to organize your content. iSpring preserves all PowerPoint animations and transitions, so you can apply slide effects like fades or wipes to make the course more engaging visually.
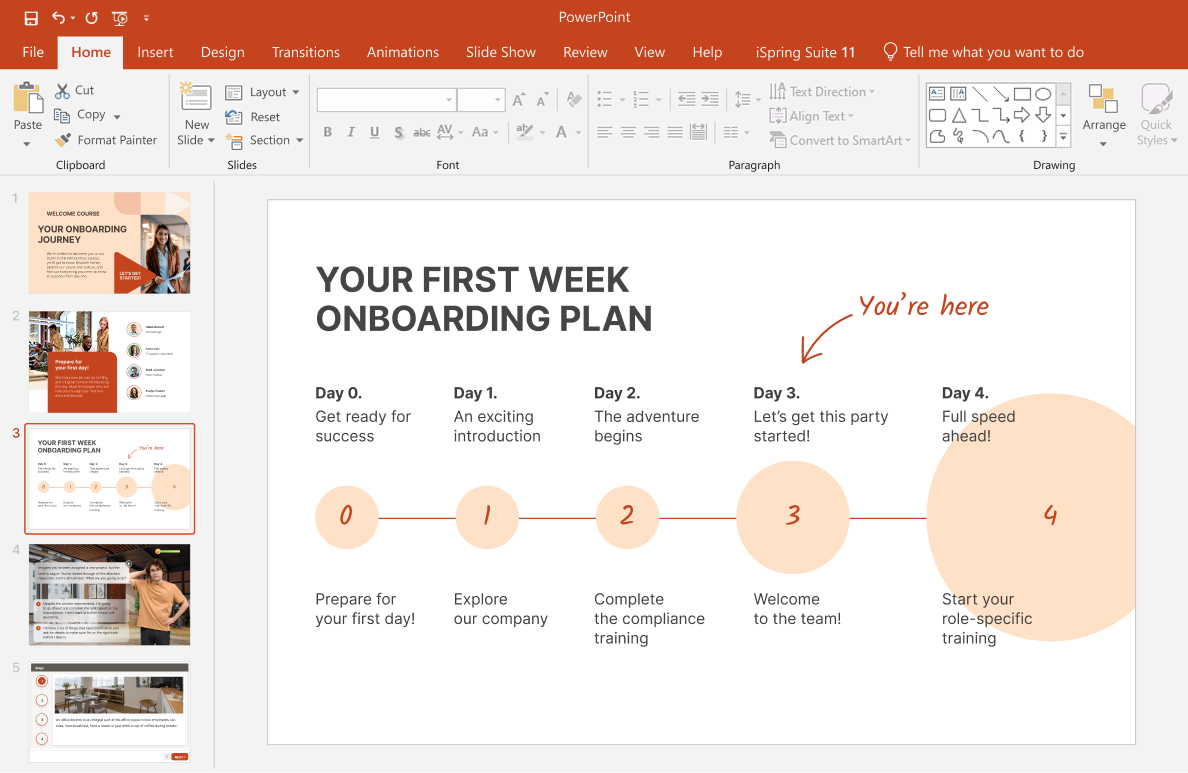
For professional-looking results in minutes, iSpring offers beautifully designed templates. These aren’t just basic layouts, but fully optimized instructional designs with perfectly balanced typography, harmonious color schemes, and smart content placeholders. Simply pick a template, add your materials, and watch as your slides transform into polished eLearning content. What typically takes hours of design work happens instantly, with results that look like they’ve been crafted professionally.

2. Add multimedia
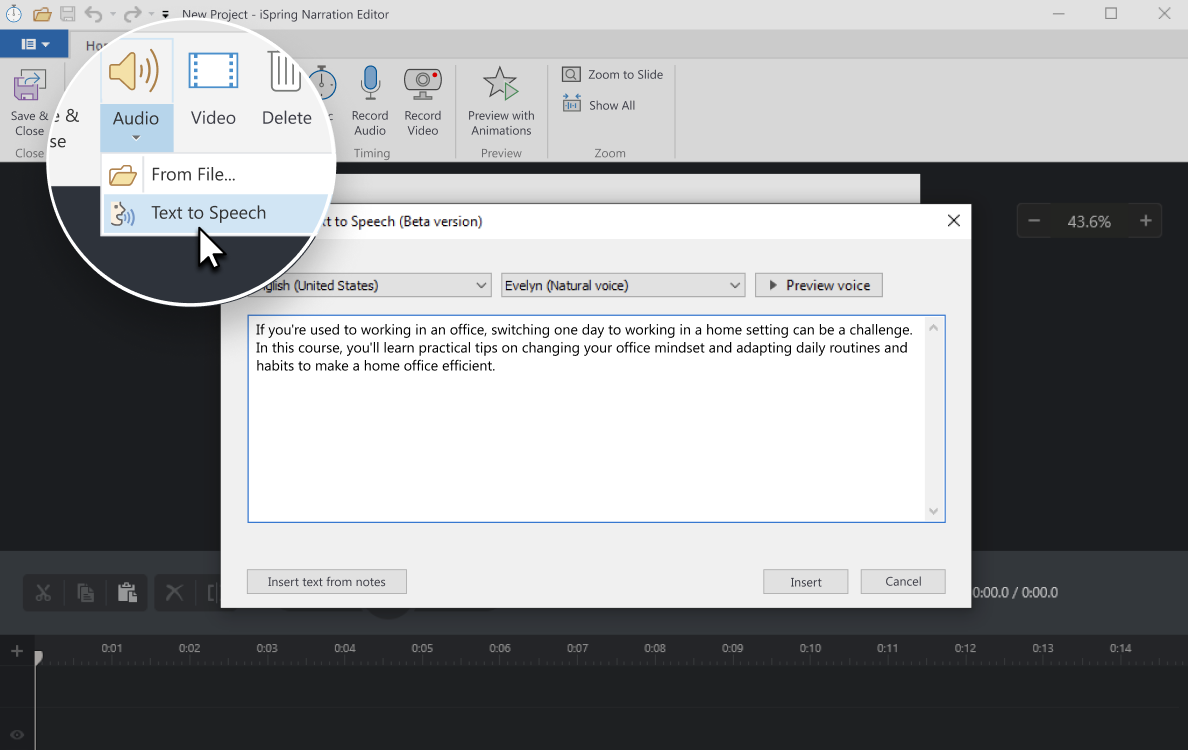
With iSpring Suite, you can easily transform static slides into engaging, dynamic lessons. Add professional narration by recording directly in the app, uploading pre-recorded audio, or using the built-in text-to-speech feature for quick, natural-sounding audio. No complex setups — just simple, effective tools.
Adding video is just as effortless. Insert MP4 files directly into your slides, embed videos from YouTube or Vimeo, or record high-quality screencasts and webcam presentations using iSpring’s built-in video studio. With just a few clicks, your course goes from basic slides to a rich, interactive experience.
3. Create interactions
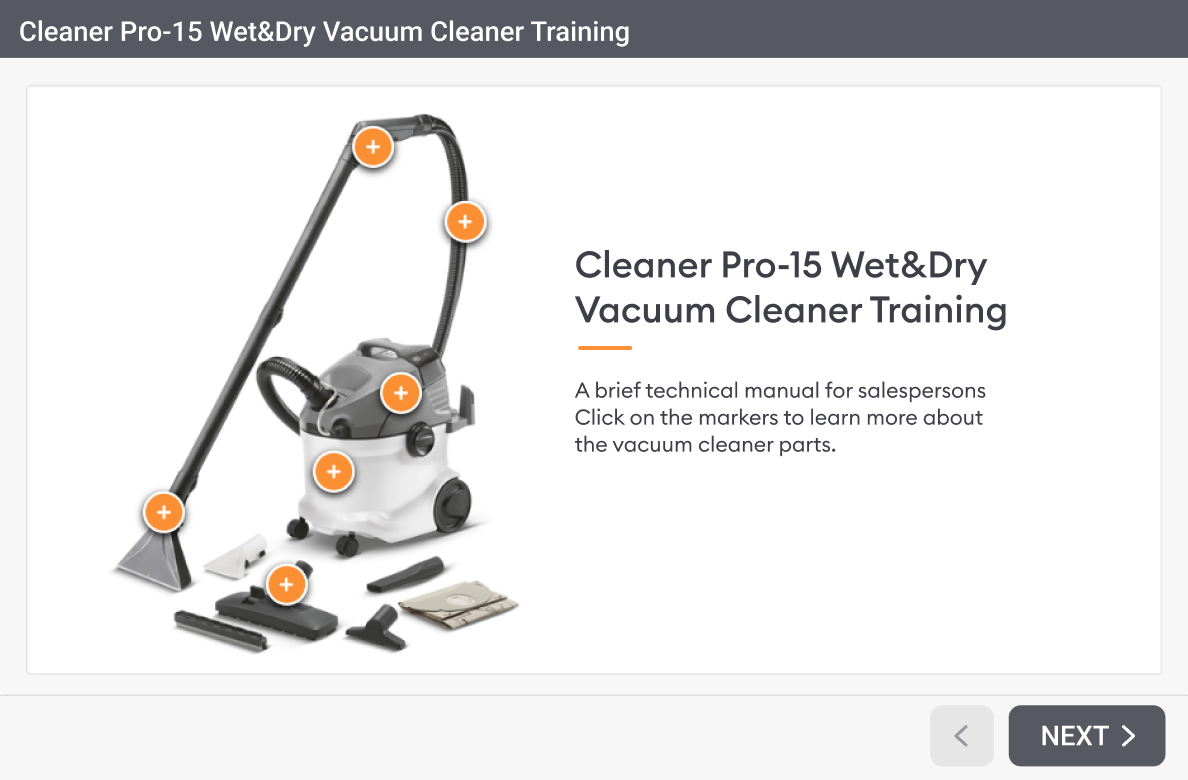
Want to move beyond basic slides? iSpring Suite includes 12 ready-to-use interactive templates that are perfect for creating engaging glossaries, helpful FAQs, visual timelines, and more. No coding is needed — just pick a template, add your content, and watch it come to life.
You can also use hyperlinks and triggers in PowerPoint to create clickable interactions, such as expanding hidden text or jumping to specific slides.
4. Add a quiz
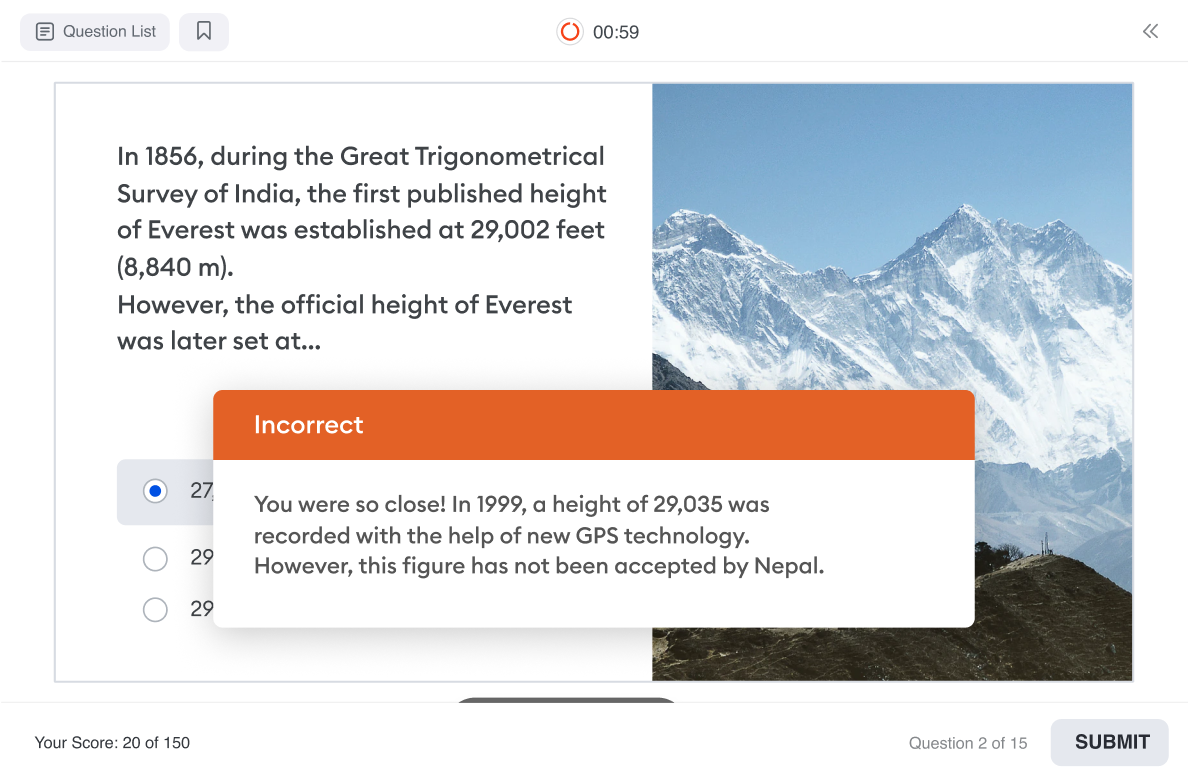
Want to test knowledge and keep learners engaged? iSpring Suite makes it easy with 14 different question types — from classic multiple-choice to fun drag-and-drop activities. Each question can include personalized feedback, so learners understand why their answer was correct or incorrect.
Take it further with branching scenarios and send learners down different paths based on their answers for a more tailored experience. Place your quiz between lessons as a checkpoint or at the end as a final review.
5. Publish a course
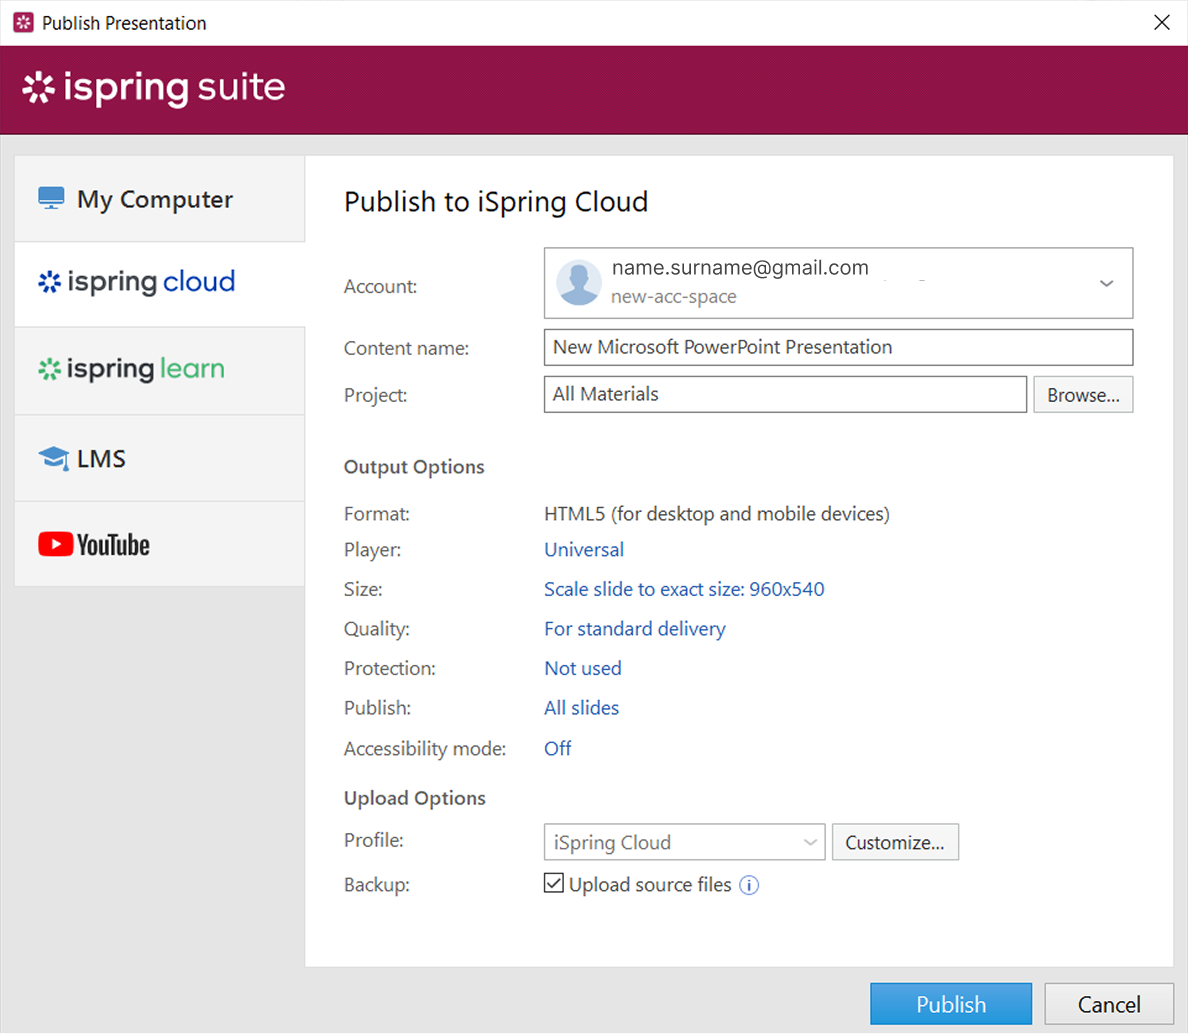
When your course is complete, click on Publish in iSpring Suite. You’ll see multiple output options:
- Web (HTML5) – Great for sharing via email or hosting on your website
- LMS (SCORM/xAPI/cmi5/AICC) – For detailed tracking in your learning management system
- Video (MP4) – Turn your course into a watchable video lecture
- iSpring Cloud – Instantly publish to the cloud for hassle-free sharing
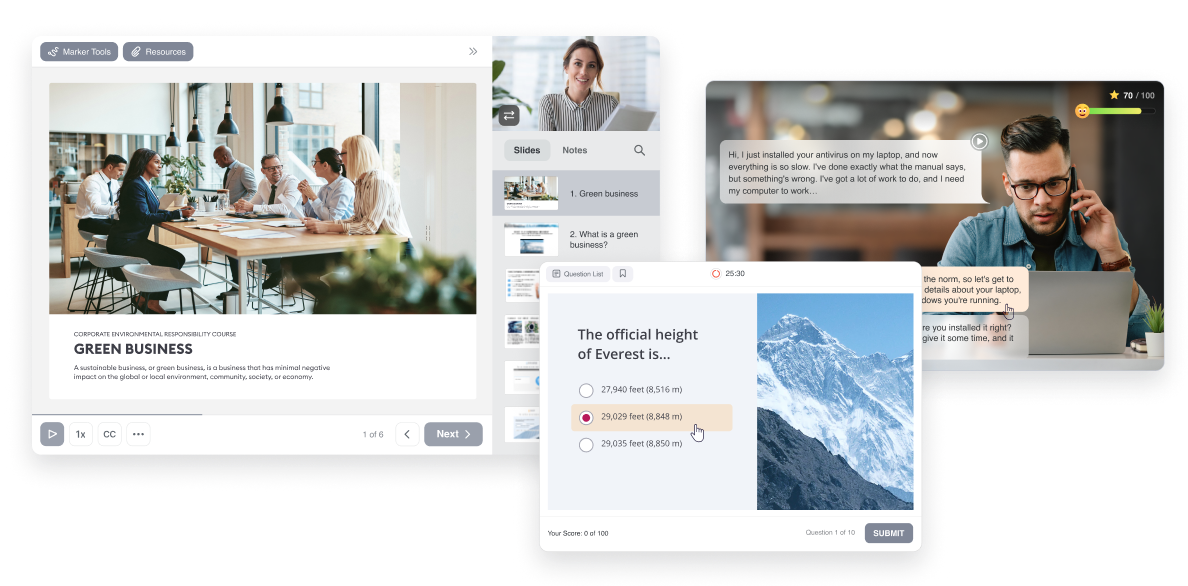
To see what a course built in iSpring Suite looks like, check out this demo course:

Want to test-drive iSpring Suite? Download a 14-day free trial and explore all of its features.
Note: iSpring Suite functions as a true offline authoring tool. You can publish courses directly to your local drive, internal server, or secure LMS without ever connecting to the internet. It’s an authoring tool designed for restricted networks, with offline activation that eliminates the need to phone home.
And because it’s PowerPoint-based, your team can continue working in a familiar workflow while creating content for air-gapped systems. If you’re looking for course authoring software designed for air-gapped environments, iSpring Suite delivers.
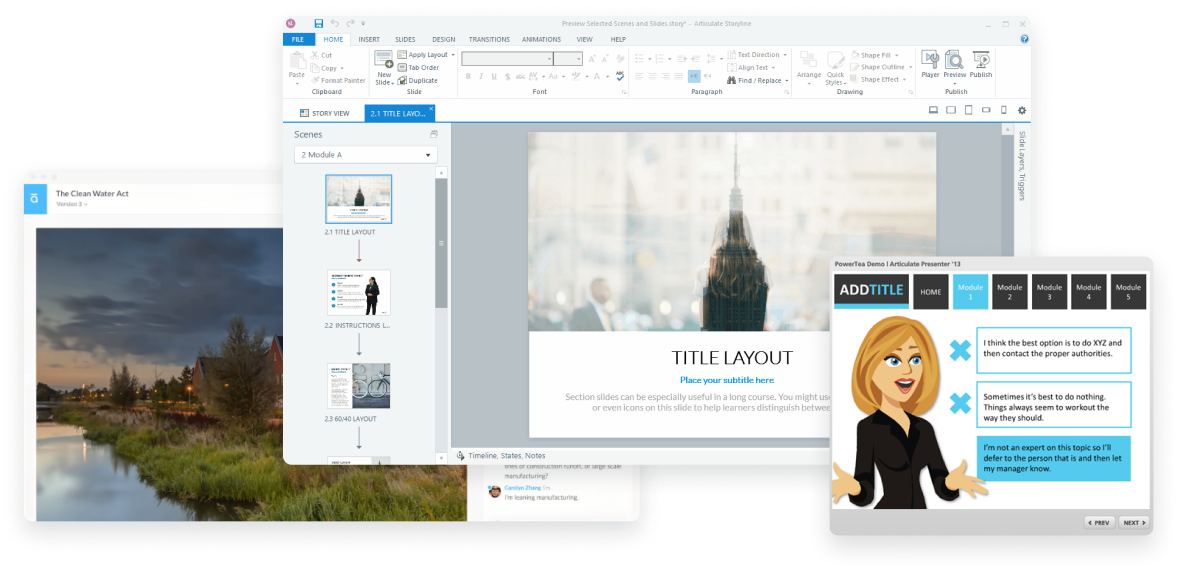
How to Create a Course in Articulate 360
Since PowerPoint shares similarities with Articulate Storyline 360, we’ll look at how to create a course with Storyline 360. While it offers more customization, some tasks that are simple in iSpring Suite may be more complex here. Below, you’ll see my detailed guide that shows key differences and potential challenges.
1. Create a new project
When you launch Storyline 360, you have several options: start fresh with a blank project, use one of their professional templates, or import existing PowerPoint slides to build on.
What makes Storyline 360 unique is the level of control it offers right from the beginning. Before diving into content creation, you’ll need to set up your slide dimensions and configure player settings — the elements that determine how your course will look and function. While this gives you more customization power than iSpring Suite, first-time users might initially find these extra steps a bit overwhelming.
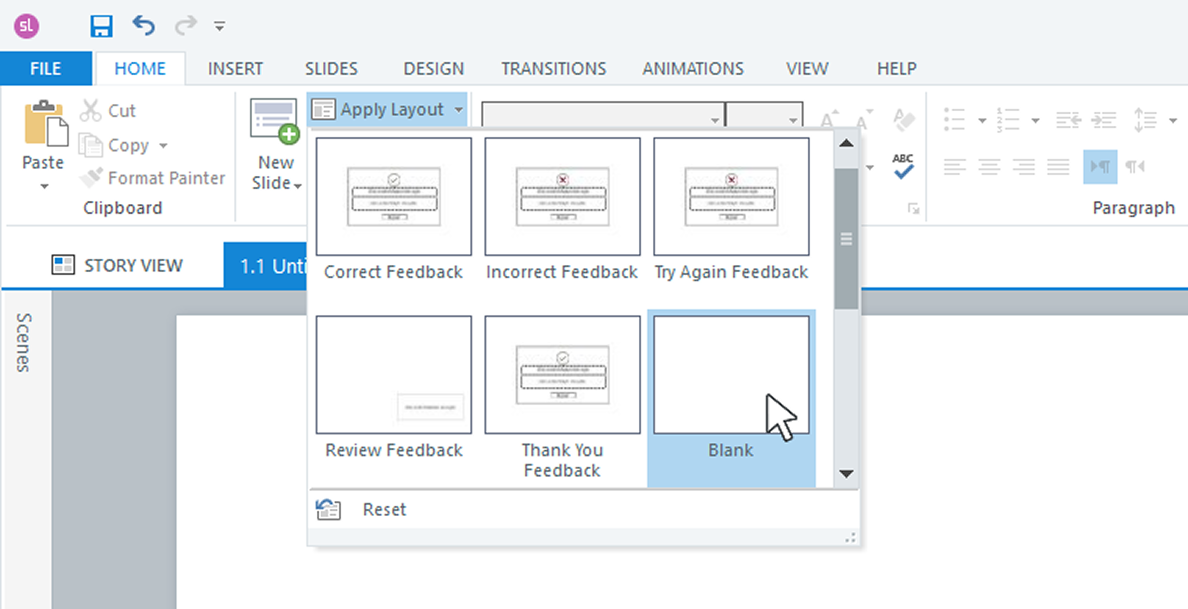
2. Design slides
Each slide is a separate learning module. Adding basic elements like text boxes, images, and shapes works much like PowerPoint — straightforward and simple. But for consistent design, you’ll need to learn how to use Slide Master). iSpring Suite implements this feature more intuitively, while Storyline beginners often miss it, which leads to design inconsistencies.
3. Add multimedia
Adding audio and video in Storyline will feel familiar if you’ve used PowerPoint, but with some powerful extras. While the basic process is similar — click on Insert and select your file — Storyline offers professional-level controls that go much deeper.
You get support for more file formats and precise playback settings, which is fantastic when you need that level of control. But here’s the thing: if you’re just looking to add a simple voice-over or embed a training video, all those extra options might feel like overkill at first.
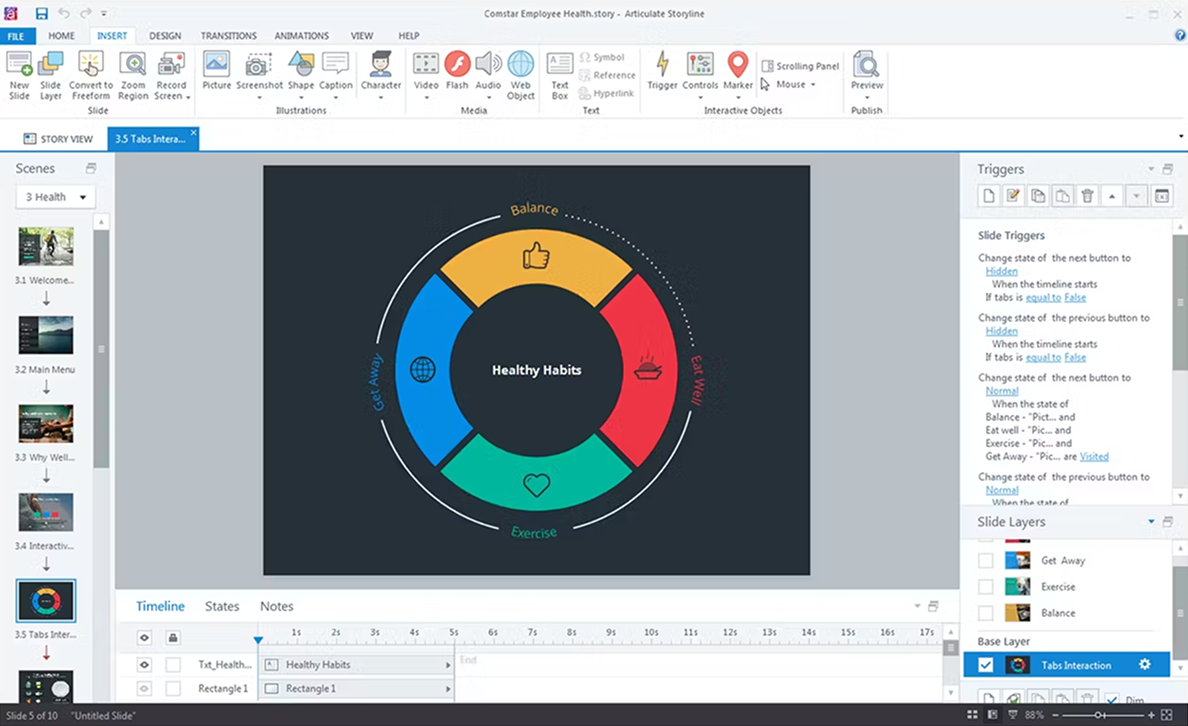
4. Create interactions
This is where Storyline 360 wins in flexibility but loses in simplicity. While iSpring Suite offers handy templates for quick interactions, Storyline 360 opens the door to limitless possibilities with triggers and variables. Want a scenario that changes based on learner choices? Or complex conditional animations?
Storyline can do it. But that power comes with a learning curve. You’ll need to think like a designer, planning out the logic behind each interaction. However, once mastered, these tools let you build truly unique learning experiences that basic templates can’t match.
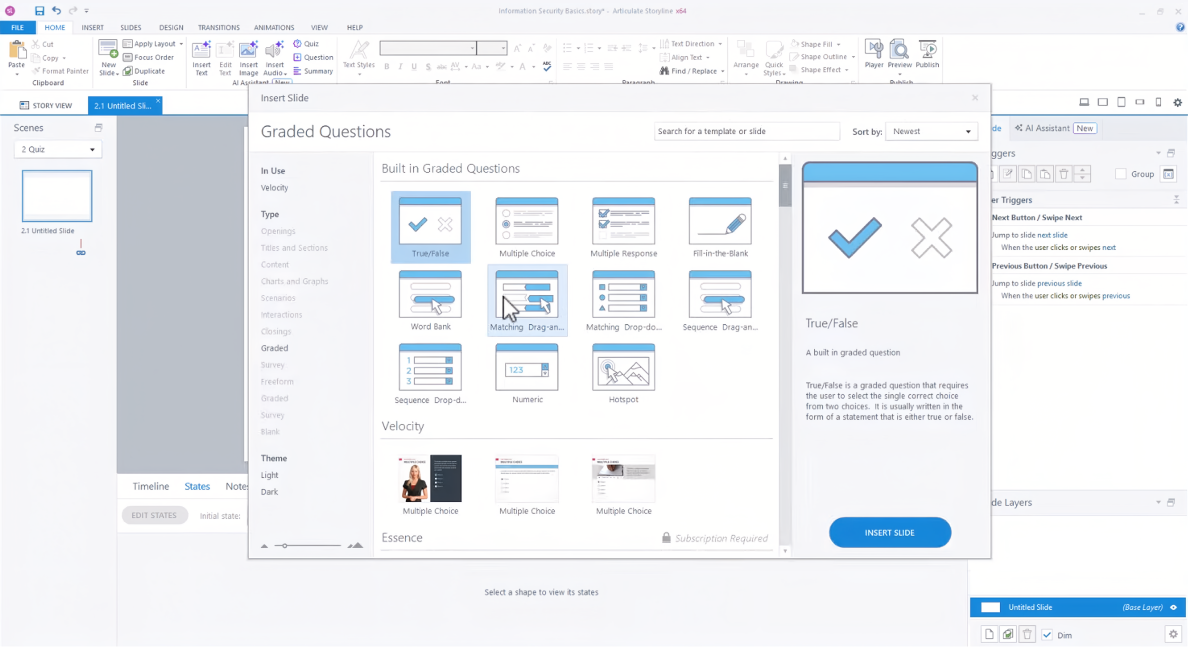
5. Add a quiz
Building quizzes in Storyline 360 follows the same intuitive approach as iSpring Suite. You’ll find a selection of ready-made question templates that make the process quick and simple. Just choose your question type, add your content, and you’re good to go. The software takes care of all the behind-the-scenes work — like scoring and reporting — automatically.
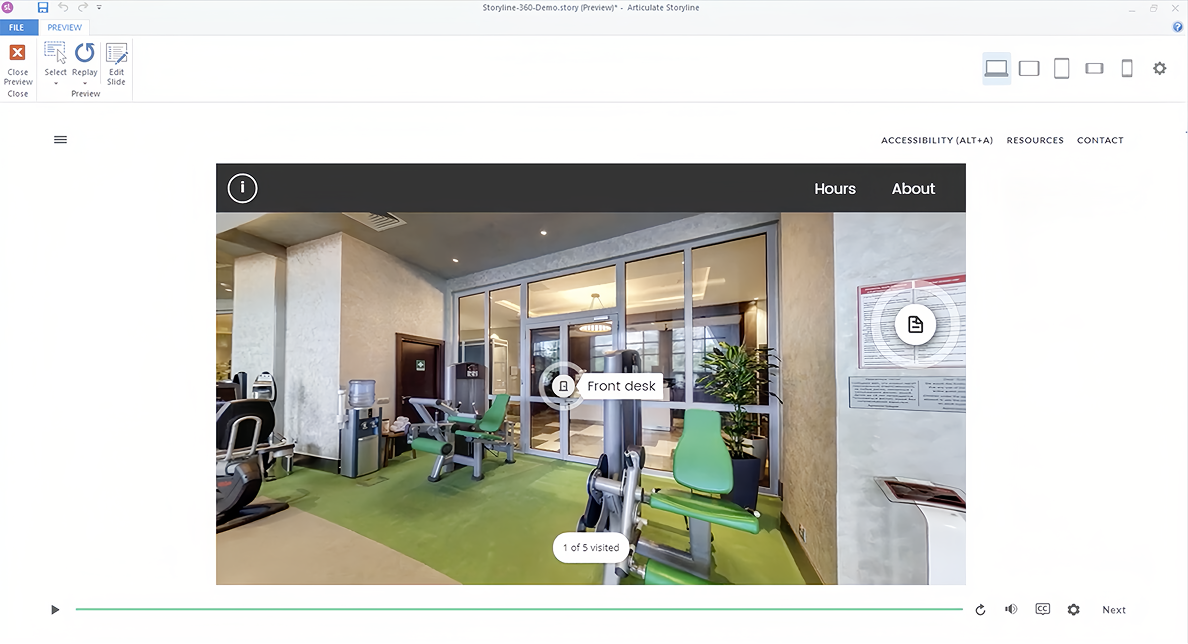
6. Publish a course
Once your course is ready, Storyline provides multiple ways to share it with learners. For team collaboration, Review 360 makes gathering feedback effortless.
Need web-based access without an LMS? The HTML5 output feature ensures that your course works seamlessly across all devices. For offline distribution, you can convert your course to an MP4 video file or export it as a Word document for text reference.
When LMS integration is required, Storyline supports all major standards, including SCORM, xAPI, and AICC. Reach 360 offers a complete hosted solution through Articulate’s platform with built-in tracking and reporting capabilities.
iSpring Suite vs. Articulate 360: Key Feature Comparison
When choosing between iSpring Suite and Articulate 360 for eLearning development, it’s important to compare their core features. Below, I’ve added a detailed breakdown of their capabilities to help you decide which tool fits your needs best.
| iSpring Suite | Articulate Storyline 360 | My winner | |
| Course creation in PowerPoint |
|
| iSpring Suite |
| Ease of use |
|
| iSpring Suite |
| Offline authoring capability |
|
| iSpring Suite |
| Content library |
|
| Articulate 360 (for vast library) / iSpring Suite (for Character builder) |
| Interactivity |
| Allows the creation of complex interactions with triggers and variables but has a steep learning curve | iSpring Suite |
| AI capabilities |
|
| Articulate 360 |
Final Verdict
When choosing between iSpring Suite and Articulate 360, consider your specific needs and expertise level. Articulate 360 stands as a powerful solution for advanced developers who need deep customization and have time to master its advanced features. On the other hand, iSpring Suite is the go-to choice for rapid course development, especially for those who know PowerPoint well.
Want to try the easy way? Get a free trial of iSpring Suite to see how quickly you can create engaging online courses.
Create online courses and assessments in record time.


The 11 Best Instructional Design Courses for 2026
The 25 Best Online Learning Collaboration Tools
The 15 Best Off-the-Shelf eLearning Content Providers
The Complete Guide to eLearning Authoring Tools