4 Easy Gamification Tricks For PowerPoint And iSpring Suite

Mark Simon, an e-Learning developer with 25 years of teaching experience, and a senior consultant with HiMark Solutions, shared his ideas on how to gamify e-Learning content with PowerPoint tools. Here is a summary of his presentation.
In his webinar, Mark Simon demonstrated four gamification examples and explained how to make them with PowerPoint and iSpring Suite. You don’t have to write code to create these games: all you’ll need is the enthusiasm to make something cool, and a few spare minutes.
Jeopardy!
Some games can be made right in PowerPoint without any third-party services. You can easily create a Jeopardy game by using hyperlinks.

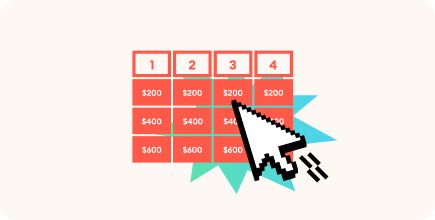
In the screenshot above is a reproduction of a Jeopardy board. Each cell contains ordinary hyperlinks. To create this game, all you need is a board slide, slides with questions, and slides with answers.
This diagram explains the principle of the game: three types of slides connected with hyperlinks.

As an example, we chose “Baseball Food for $200”: The two snacks to buy when you sing “Take me out to the ball game.” Then we click “Answer” and see: “What are peanuts and crackerjacks?”
For more details, see this step-by-step guide on how to create a Jeopardy game. You can also download the pre-made template.
iSpring Suite
Fully-stocked eLearning authoring toolkit for PowerPoint. No training required to start!
Trigger Animations
Trigger is a function that makes a slide element perform a specified action. For example, when you click on a picture, a text box appears. It’s really easy to create triggers, even if you’re new to PowerPoint.
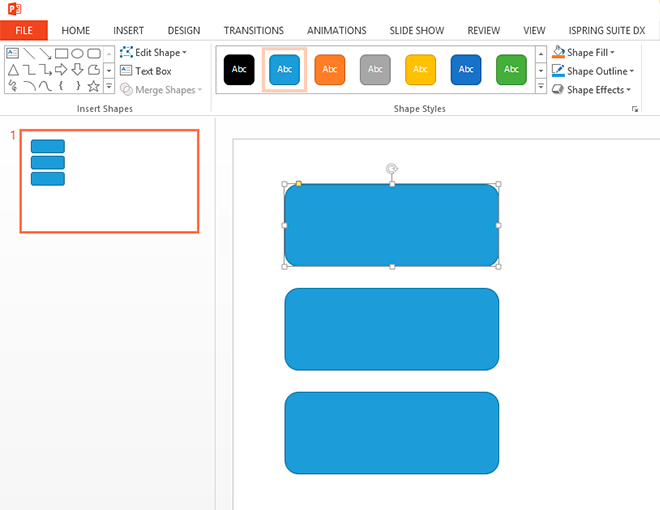
Let’s see an easy example and add some interactive buttons on a slide. In your PowerPoint presentation, go to Insert -> Shapes and choose any shape you like.
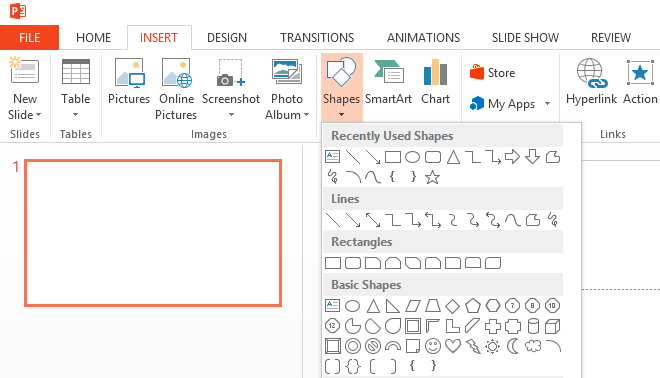
We will create three buttons. The easiest way to do this is via the magic of hotkeys: Ctrl+D.
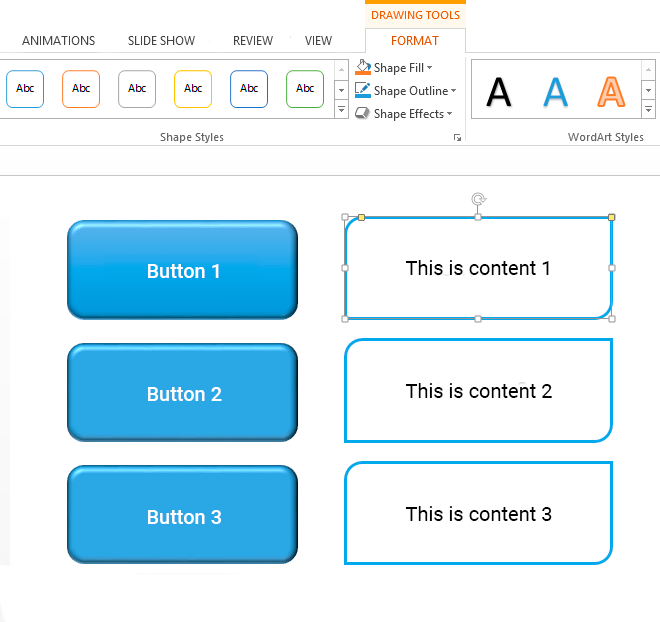
Now let’s make it so that when you click on a button, you see a text note. To do this, go to Insert -> Shapes and choose any shape you like (in this example, we chose a simple rectangle). Select the rectangle and apply the magic of Ctrl+D once again.
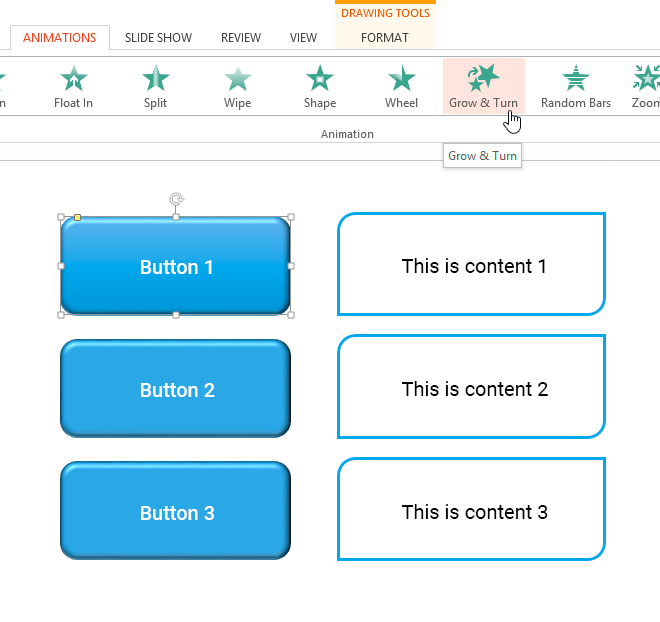
Then we need to add an animation so our rectangles appear on the slide. Go to the Animations tab, select the rectangles and apply any animation effect you like: for example, Grow & Turn.
All animated objects will be listed in the Animation pane. You can set the moment of appearance for each object: start on click, start with previous, or start after previous. In this case, we need these rectangles to appear when we click the buttons on the slide.
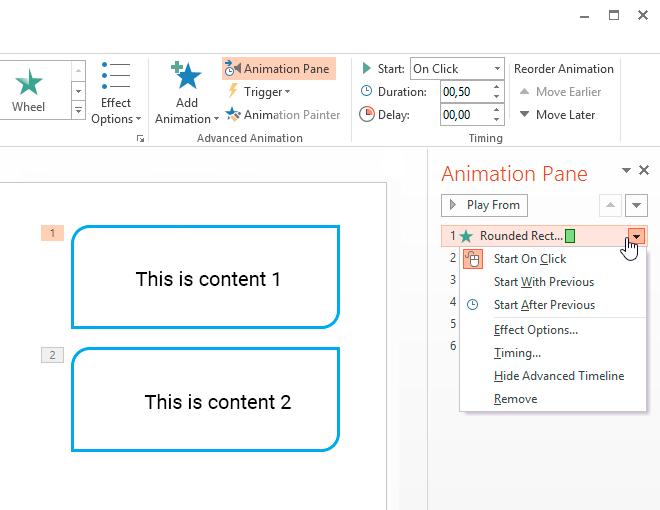
Here’s a trick: click Trigger on the Animation ribbon. From the drop-down menu, select the object you need to click on to see the rectangle.
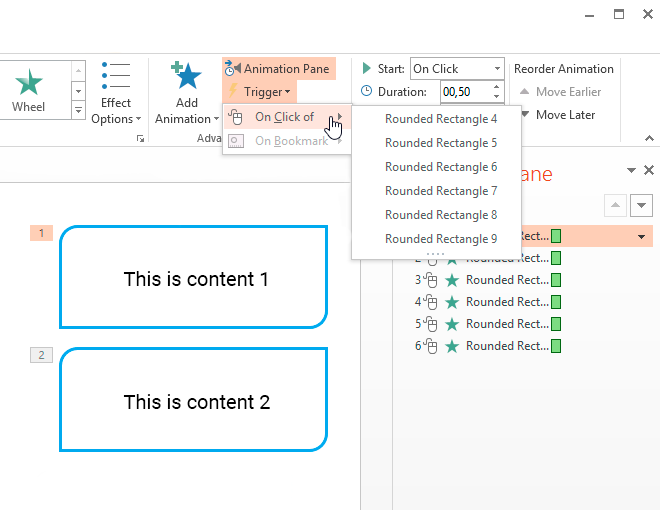
It might get kind of tricky here. The standard names of the objects on the slide may confuse you, so let’s give them identifiable names. Go to Home -> Select -> Selection Pane. You will see the list of all objects on the slide in the right pane. When you click on the name of an object, it will be highlighted on the slide. Rename the objects to something you’ll recognize later.
Here’s another example of what you can do with animations and triggers:
If you need to publish your presentation online in HTML5 format, Mark recommends you use iSpring tools: “One of the reasons why I love iSpring is that all PowerPoint effects are preserved after publishing and play smoothly on any device.”
Here’s a detailed article on how to make flashcards in PowerPoint using trigger animations.
Quizzes
If you use iSpring QuizMaker (one of the components of iSpring Suite), you can implement gamification by branching. This means that the next test question will depend on how a learner answered the previous one.
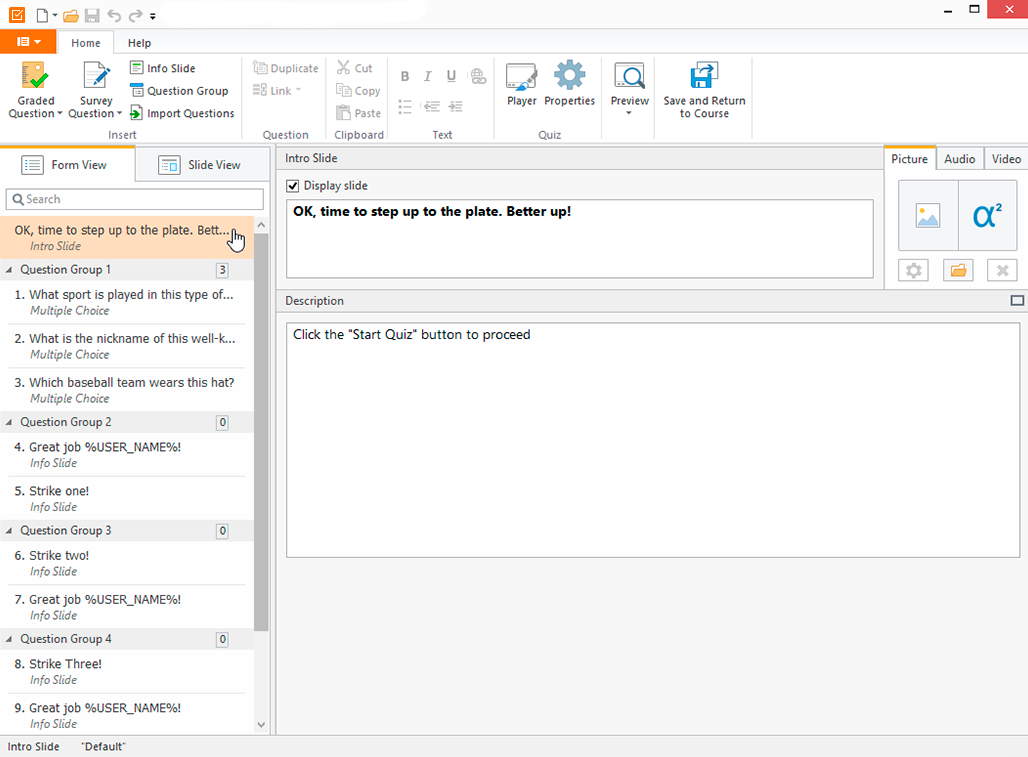
For example, you can create several question groups and set where your learners will be redirected to in the event of a correct or incorrect answer. If a learner gives the right answer, he will answer questions from the second group. If he is wrong, he goes to the third loser group, or you can give him one more shot before redirecting him to the loser group. If the learner gets past the loser questions, he will be returned to the main path. If he doesn’t, perhaps it’s a good idea to ask him to study the lesson once again.
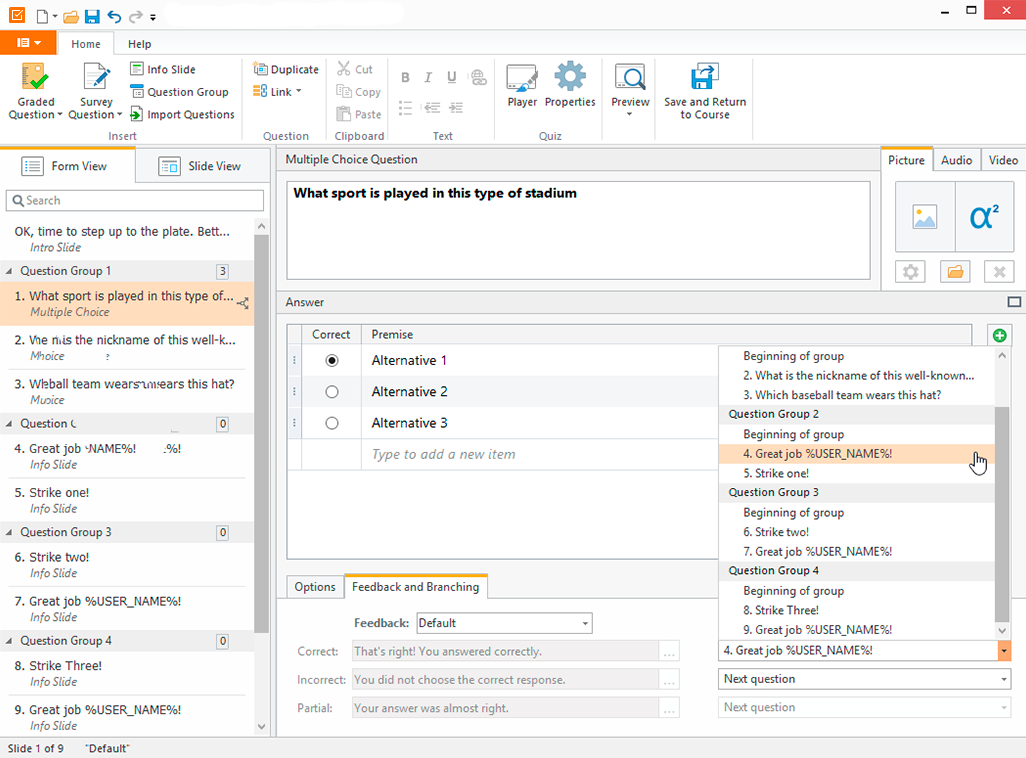
Branching can be configured from the Feedback and Branching tab under each question. Specify which question your learner will go to when the answer is correct or incorrect.
Of course, branching itself isn’t gamification yet; applying the gamification approach can significantly improve results. The tendency is that the lessons become shorter. In the past, they used to be an hour or two long. Now it’s ok when a lesson is only ten minutes long, so it’s a good idea to support learning with a short test.
It can work like this. After another 10-minute lesson, the learner sees a message: “The lesson is over, and now it’s time to answer three questions.” Once a week there could be a competition: “Who is going to climb the star mountain this week?” The only way to get to the top is to make no mistakes and not be redirected to loser questions.
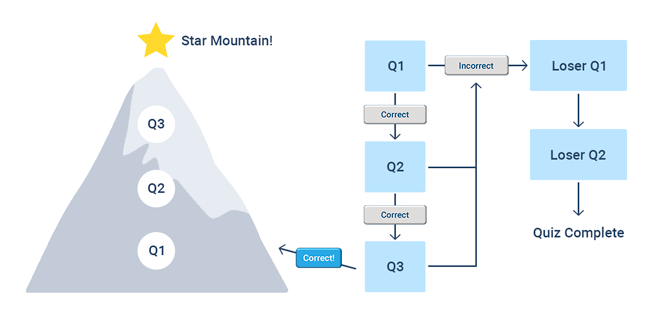
You can track the weekly performance of your learners and how often they get to the star mountain. This way we stretch a usual quiz into a) a game, and b) a trackable game. Both of those things are important.
Learn how to create branching with iSpring Suite. For those who are always eager to learn more
Talk Master
iSpring TalkMaster is a tool for making dialogue and communication simulations, or, in other words, something like a role-playing game. You can use it to train salespeople, managers, or any other employees who work with customers.
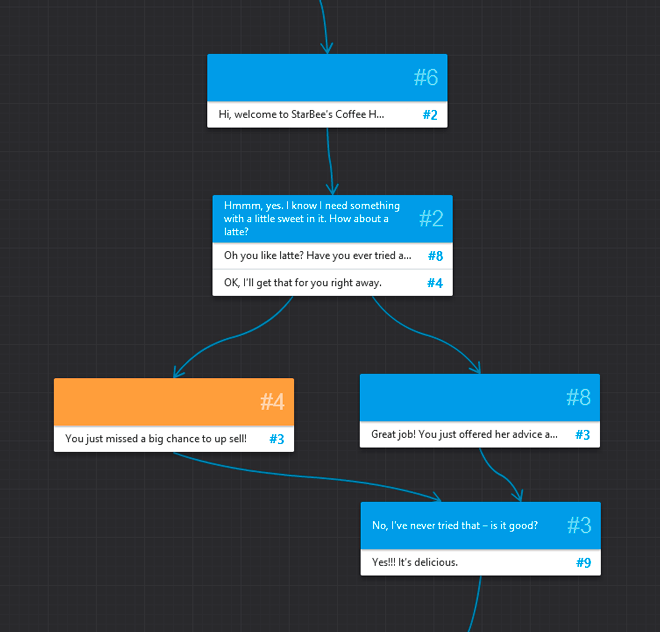
TalkMaster has a simple interface: we create a scene, then select the characters and the situation. In our example, we played a scene in a coffee house. This is a story about barista Jim and his client Julia, who loves lattes, but doesn’t know what she would like today. You can set a passing score and award learners points for each correct answer and penalties for incorrect ones.
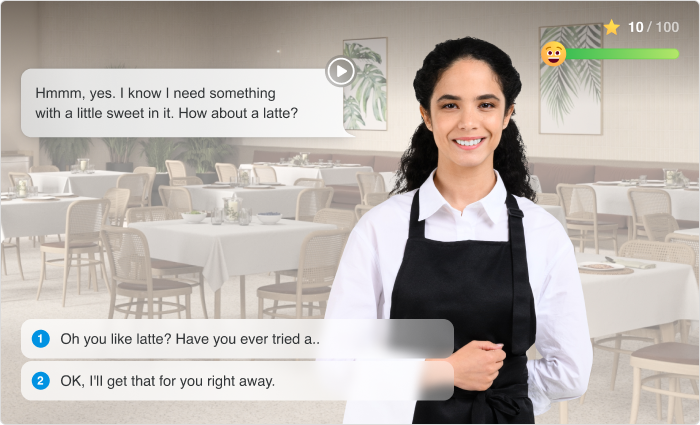
In this interactive simulator you can easily create a realistic game that will help your learners master their communication skills and have fun.
Learn how to create conversation simulations with iSpring TalkMaster.
Now you’re ready to start gamifying your courses, quizzes, and simulations with the help of eLearning authoring tools. Good luck, and have fun!
Create online courses and assessments in record time.


