Create your own iSpring marketplace and jump-start online course sales

As the course selling trend continues to grow, some instructors and course creators are moving to create their own websites. Why bother with the hassle of setting up a payment system, creating a marketplace, and integrating web analytics tools, if all you want is to create and sell courses?!
If you already have a landing page, a blog, or even a social network account, you can start selling online courses by linking your account to iSpring Market. First of all, the platform takes over the entire technical part so you can skip setting up integrations and jump-start sales today. In addition, while you’re investing time and energy in a site, other course creators are using ready-to-go course selling platforms, selling courses to dozens of clients, and earning real money.
In this article, we’ll show you how to start selling courses with your own iSpring Market marketplace, even if you only have a social network page.
Why iSpring Market?

iSpring Market is a cloud-based platform that provides you with all the necessary tools to launch your own online course marketplace that handles everything from attracting new clients to awarding a certificate to those who have completed your course.
Unlike many other platforms, with iSpring Market, you won’t compete with other course creators and instructors in the same field of knowledge. The storefront displays only your courses, and you’ll only have to connect it to your website or blog.
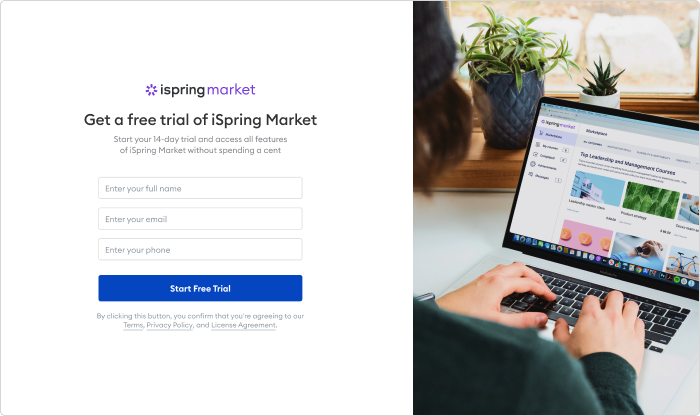
Step 1. Get a Free Trial of iSpring Market
Start by settling up an iSpring Market account. The good news is that you can use iSpring Market for free for 14 days. Just follow the link, fill out the form, and click Start for free.
Now, you have access to all of iSpring Market’s features: a personal account, a payment system, a marketplace, and more.
Tip: You’ll receive an email with your personal account data (login information and a link to your personal account) soon after registering. Bookmark this link to avoid losing it. If you don’t receive this email, check the junk email folder.
Step 2. Configure Your Payment System
When clients visit your iSpring Market storefront, they can choose a course and pay in their preferred manner. iSpring Market supports VISA, MasterCard, PayPal, Stripe, and Authorize.Net, as well as 30 international currencies. iSpring Market doesn’t take transaction fees or a commission, and you receive your payments immediately.
To set up a payment system, just open Settings → E-commerce. Select a Сurrency and a payment system. You’ll be able to set prices for your courses only after configuring these settings. There are step-by-step instructions for configuring each payment system:
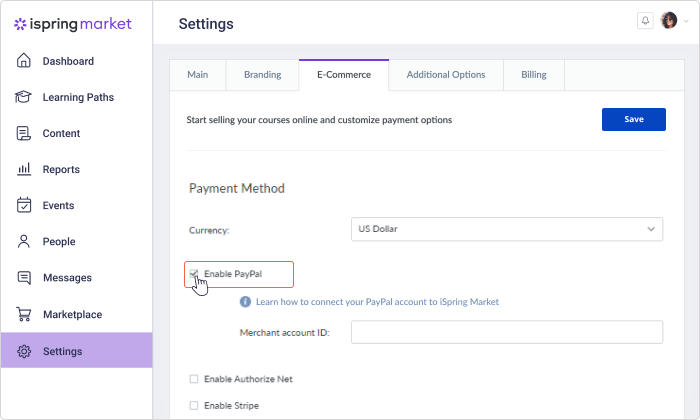
After setting up the payment system, click on Save.
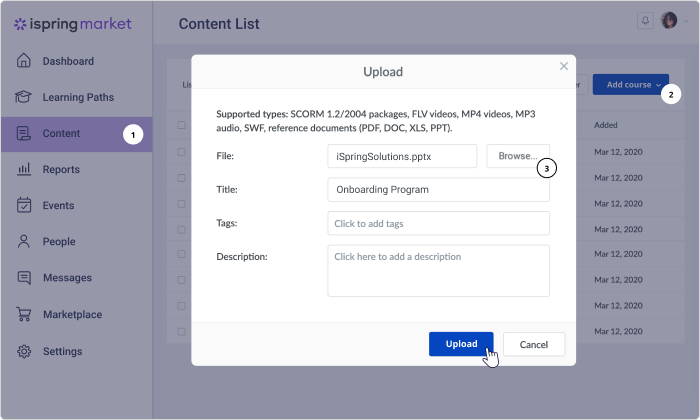
Step 3. Upload the Course and Set the Price
To upload your course, go to Content → Add course. The platform supports SCORM 1.2 / 2004 packages, MP4 videos, FLV videos, MP3 recordings, SWF, and documents in PDF, DOC, XLS, and PPT formats. You can sell standalone courses or create a Learning Path, which is a series of courses.
To start selling a course, click on it, go to the E-commerce tab, and select Add this content item to the marketplace. Click the Paid content toggle, set a price, and click Save.
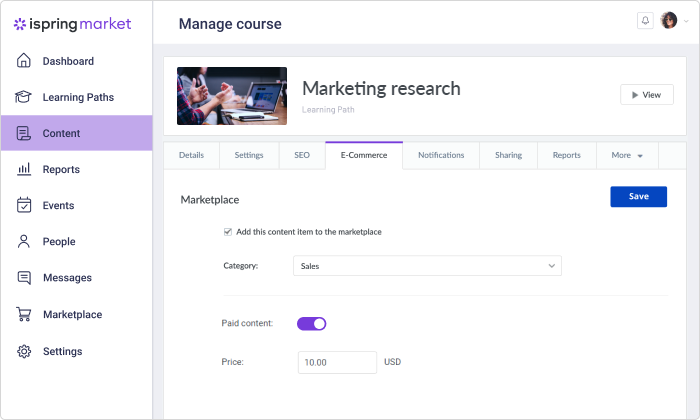
You can offer discounts for your courses to attract new clients and increase existing clients’ loyalty. Just open Marketplace → Coupons → Add New Coupon. Create it and set a discount percentage. Then you can choose the materials and the customers your coupon will work for.
Step 4. Copy a Purchase Link
Your online course marketplace is ready! Now, let’s connect iSpring Market e-commerce options to your website or blog.
Go to Sharing → Purchase URL → Copy. Just paste the copied link into your website. You can add the link to any object on your site.

iSpring Market has a single sign-on system. If a customer already has an account on your website, they can log in to iSpring Market using the same username and password.
If you don’t have a landing page and sell courses through social networks, you can post the link on Facebook or Instagram.
Step 5. Check How the Payment Works
It’s a good idea to check if the link is working correctly. Just set the minimum price for the course and buy it.
Click the icon in the upper-right corner and select User Portal.

Enter the copied link. You’ll be redirected to a shopping cart. Make a payment, and make sure that the purchase goes smoothly. Done!
After the payment is successfully processed, iSpring Market automatically sends an email with account credentials to a user and the course becomes available in the user’s account.
Create online courses and assessments in record time.


