How to Upload a SCORM Course to BlackBoard LMS
Blackboard LMS supports SCORM 1.2, SCORM 2004, and IMS and NLN content. In this article, we’ll guide you step by step on how to add a SCORM course into Blackboard.
Tip: If you need to build an e-course from scratch, you can use iSpring Suite, an easy-to-use authoring toolkit for creating interactive courses, quizzes, and video tutorials. Download and install the iSpring software for free if you still don’t have it.
Now, let’s dive into how to upload a SCORM course into Blackboard.
A Step-by-Step Walkthrough
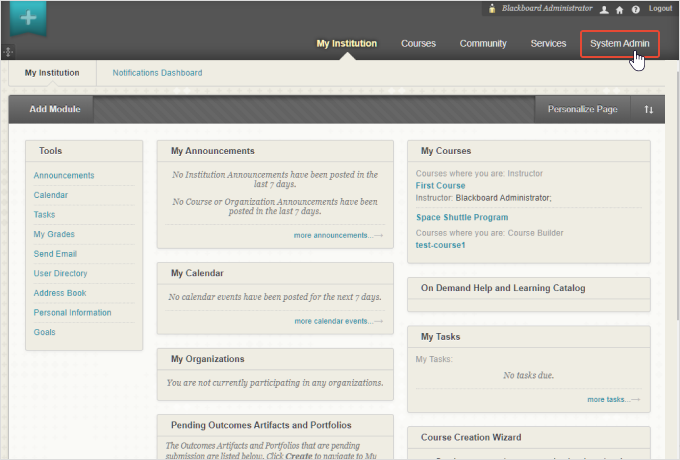
- 1Log in to the LMS as an administrator and go to the System Admin tab.
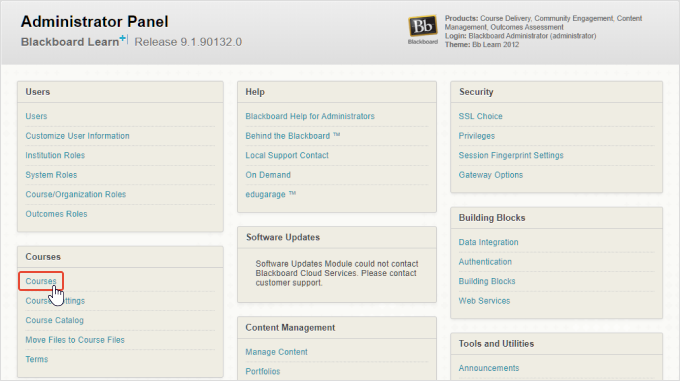
- 2Select Courses in the Administrator Panel.
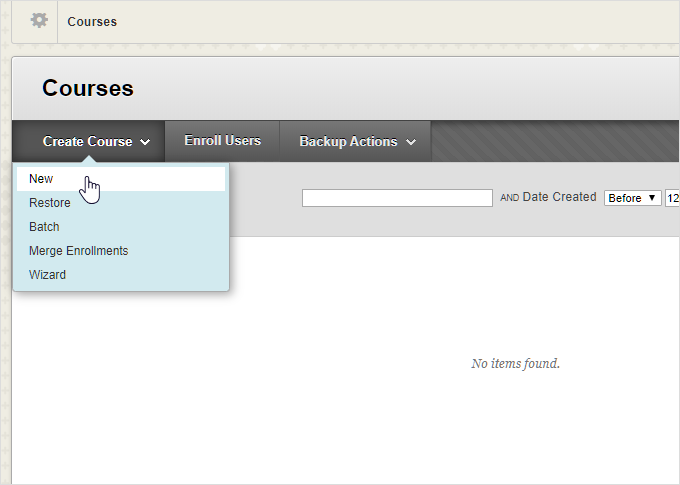
- 3Choose Create Course and click New.
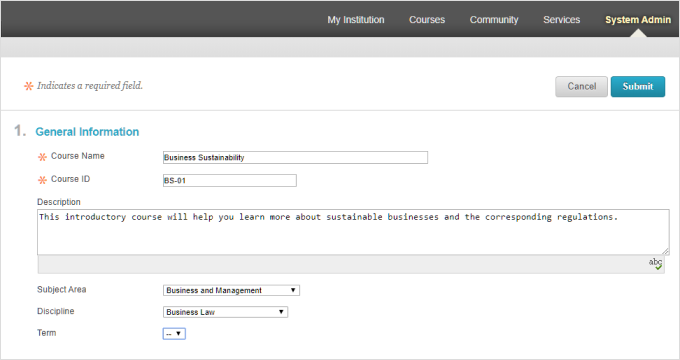
- 4Configure the course properties.Fill out the general course information. The Course Name and the Course ID are required. You can also type in the Description, update the Subject Area and Discipline if necessary, and specify the Term.
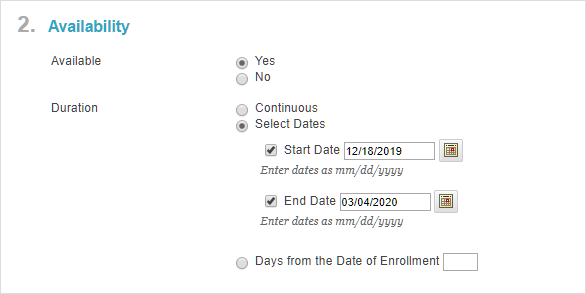
- Set course availability and specify the course duration. Choose Continuous if you want the course to be accessible all the time. If you need to place a time limit on courses, define the dates between which learners will have to take a course or type in the number of days the content will be available for users.
-
Select Guests Permitted if you want your course to be accessible for users under the Guest role.
Note: Guests don’t require a login account for Blackboard. You can share a direct URL to the content with them, but many Blackboard options will be unavailable. For example, they won’t be able to take a test, post on a discussion board, or read a blog. -
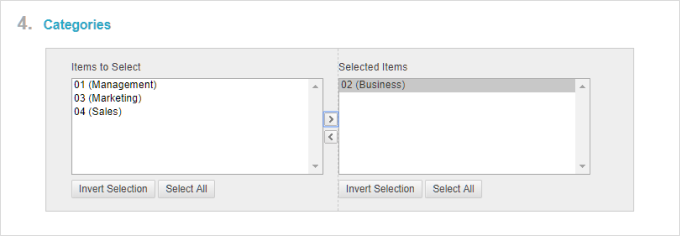
Add your course to one or more categories that appear in the course catalog.
-
Add a banner to personalize your course. To do this, click the Browse button and select the banner image that is stored on your computer.

-
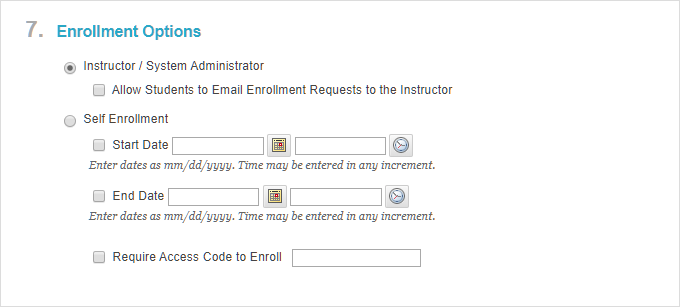
Configure the enrollment options. If you want an instructor or administrator to handle all enrollments, choose Instructor / System Administrator. Check the box below to enable students to email enrollment requests for approval. To let users enroll themselves on the course, select Self Enrollment. You can specify the dates and times between which users can enroll on the course and limit enrollment with an access code.
- Select a language pack from the list. Blackboard learners can set their personal language preferences in their accounts. Check the Enforce Language Pack to override their individual preferences within the course.
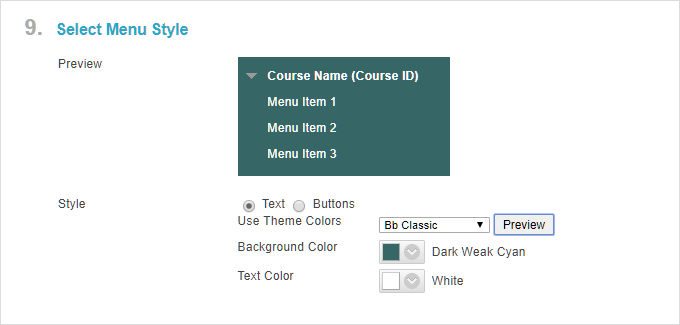
- Choose the course menu style. Define whether it will be shown as plain text with a colored background or as graphical buttons with text on them. Then select the colors. Click on the Preview button to see what the settings will look like once approved.
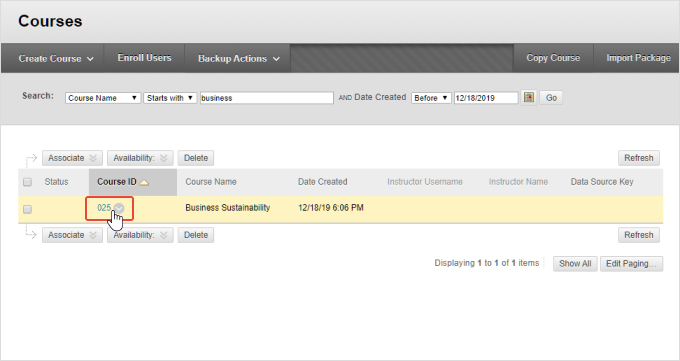
- 5After submission, you’ll appear on the Courses page. To start adding the learning content to your course, type in its name or ID in the Search area, then tap on your course ID.
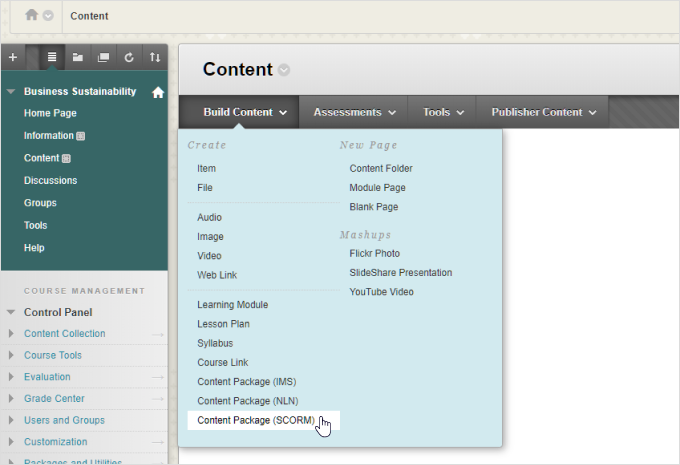
- 6Blackboard allows you to fill in e-courses with a variety of content, including multimedia, text, and attachments. On the course constructor page, click Content and choose the Build Content tab. Since we’re going to upload a SCORM course, select Content Package (SCORM).
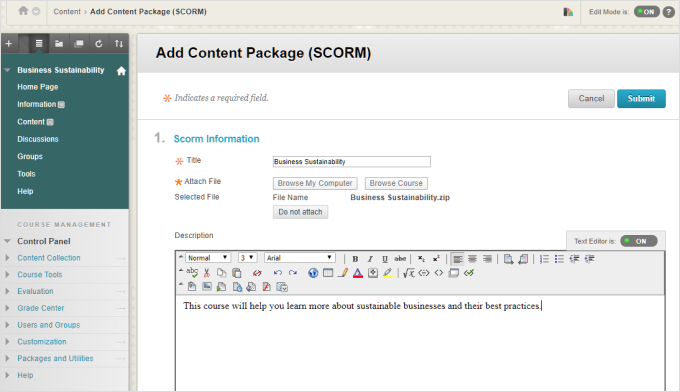
- 7Enter the title of your course and click on Browse My Computer to import your SCORM file. You can also enter the course summary in the Description area.
- 8Go on to configuring the SCORM course settings.
- Determine how a learner will navigate a course. Choose Flow if you need to restrict them to sequential viewing or Choice if you want them to use a navigation menu to select a slide to view.

- Set up the Grade Center options. The Grade Center in Blackboard is a place where instructors can track students’ performance. Click Yes for Add Grade Center Item to add a Grade Center column for this course. Click Yes to Track Attempt Details to get statistics on how users interact with the content, for example, see their viewing time and question responses. Choose Yes for First Attempt Only if you want to see the attempt details only when a user takes a course for the first time.
 Note: All statistics will be available in the Grade Center section.
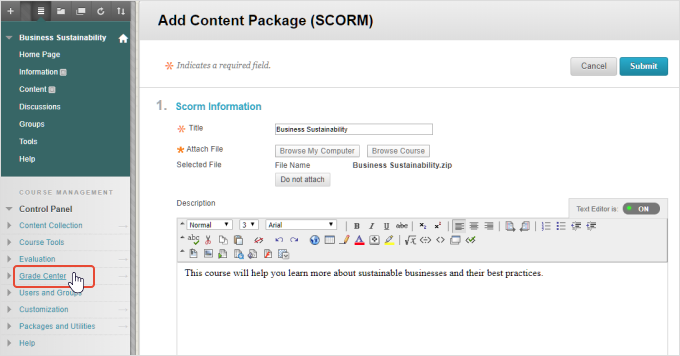
After you finish with the settings, click Submit to save the changes. Now, your SCORM course is ready for further management and enrollment.
- Determine how a learner will navigate a course. Choose Flow if you need to restrict them to sequential viewing or Choice if you want them to use a navigation menu to select a slide to view.
- 9To do a course, tap on Click to Launch.
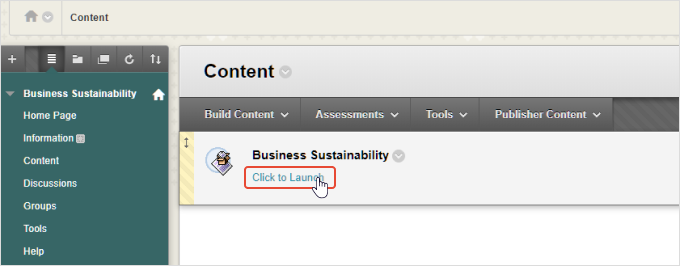
After all the settings are done, click Submit.
We hope this has helped you to upload a SCORM course to Blackboard LMS. If you still have any questions, please contact us.
Related Articles
