VR Made Easy: Create Virtual Reality without Breaking the Bank

Michael Sheyahshe is a developer and technologist at alterNative Media, which is a technology and innovation studio in the US. Michael recently hosted a webinar with iSpring, in which he discussed virtual reality development solutions and how to successfully create them with limited budget. Here’s the digest of his webinar.
What VR is and what VR isn’t
We use technology to create realistic images or some sort of environment that we can simulate or inside which we can recreate a presence. So, just to make sure we’re all on the same page, let’s check out a definition from Wikipedia:
Virtual reality (VR) is a computer technology that uses Virtual reality headsets, sometimes in combination with physical spaces or multi-projected environments, to generate realistic images, sounds and other sensations that simulate a user’s physical presence in a virtual or imaginary environment.
Some people mix up augmented reality (AR) and virtual reality (VR). Augmented reality acts on an existing environment, and virtual reality recreates and immerses your users in a new environment or a totally recreated environment inside of it. So, you can think of AR as layers and VR as a totally immersive reality.
Types of VR
There are two major categories of virtual reality: interactive and passive. The interactive kind is anything where things can be triggered, selected, or pressed inside the VR rather than just panned and scanned up, down, left and right. This includes game simulations created with Unity, and enhanced 2D like Google VR camera.
The passive kind is easier to create and develop, and usually are available free and open-source. In passive VR, there are limited internal triggers within the VR environment. The users or learners are not actively acting inside the VR; they’re just experiencing it.
Hardware
While you may be familiar with Oculus Rift, Sony Playstation VR, and Vibe, there are also some less expensive devices. Google Cardboard and smartphone viewers from $20-$100 are becoming more popular. People are even creating their own cardboard viewers. The web is full of detailed instructions on how to make it from carton.
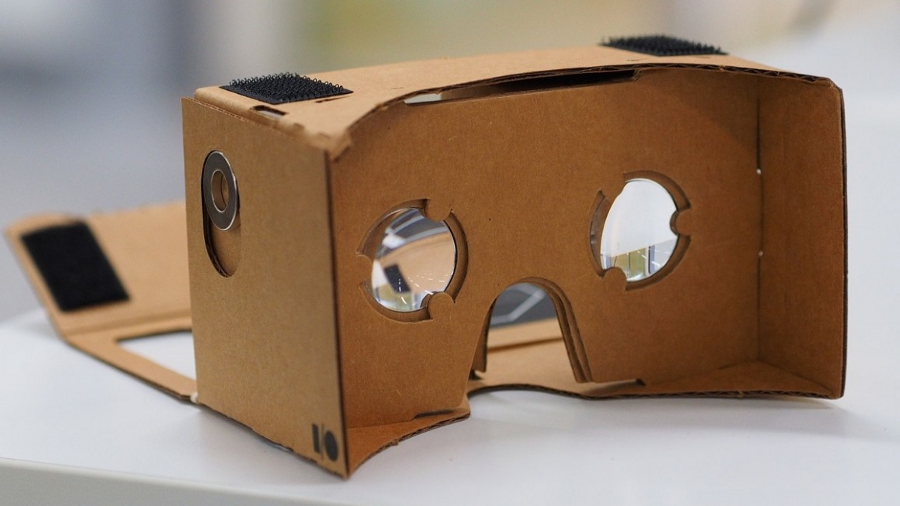
The main difference, aside from price, is whether the hardware is integrated or not. That means whether you need a smartphone or not.
Again, the difference will be similar to the difference between interactive and passive VRs. A VR that is created for integrated systems will be more extensive and immersive; it will have head tracking and additional controls.
360 Videos
There are a few ways to easily develop VR. 360 video is a quite popular method and, maybe for many of us, is the most attainable. Of course, to really get a 360 experience, you’ll need to use Cardboard or another VR viewer. And for the current cardboard viewer, you’ll need an iOS or an Android device.
We can drag the mouse from left to right, and pan it up and down. Although there’s not a whole lot of motion and interaction going on, it’s indeed a video, so we can go all the way around and see the landscape of Mars.
To create videos of this type, you can use simple 3D models and play with them in real-time. The next example was made using SketchFab (a third-party website that allows you to see 3D models).
You can grab this 3D model and rotate it around. In this player, you can also view it in VR and rotate it if you have your cardboard device ready.
The most direct way to create 360 videos is to use the Android Cardboard Camera app, but you can also buy specialized cameras that do all that for you. The price ranges from about $140 to $350 or more, even into the thousands. Of course, you’ll also have to edit the images afterward, and here are some editing programs you can check out:
In order to get your 360 movies on YouTube, you’ll need the Spatial Media Metadata Injector. Basically it’s a Python-based applet, or you can do it via a command line tool that adds metadata to your YouTube video. This allows YouTube to understand that your video is 360, and lets it be panned up and down, left and right.
Browser-based development environment
There are several options for a browser-based development environment. There’s webVR, which is 2D, Chrome experiments for virtual reality, which are 3D, and InstaVR. The latter allows you to create a 360 environment that you can publish to many platforms, including ones that are made for both cardboard viewers and high-end devices like Gear VR or Oculus Rift.
Advanced ways to create VR
If you’re an experienced developer, you can use the Unity game engine. There are some requirements, which are listed in the documentation. You’ll need at least Unity 5.6 and Google Cardboard SDK. In the editing mode, you see your scene in a single view, but when you go into preview mode, you’ll see a split screen, like what you’d see in a Cardboard.
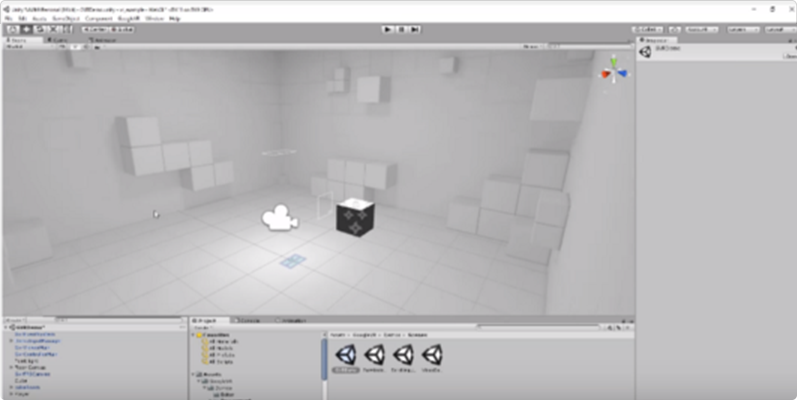
Scene editing mode
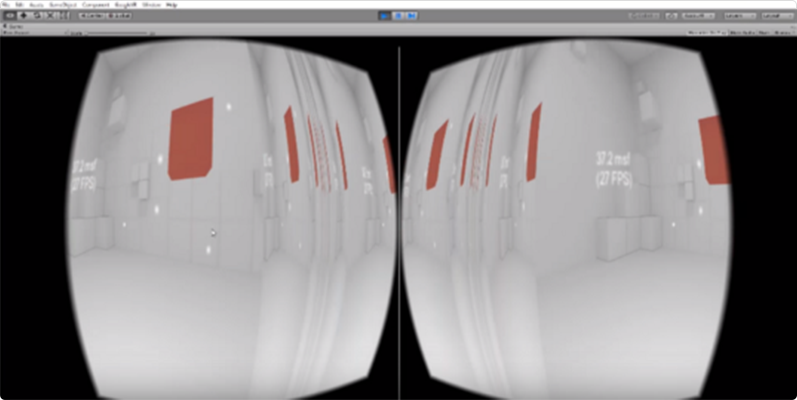
Scene preview mode
How to create VR on the cheap
The joke is that nothing is free, and although the options described here are either open source, free, or very inexpensive, none of them are totally free, because they still take time and resources to develop.
If you create VR and need some 3D models for your environment, you can use stuff like Turbosquid or Adobe Fuse. In any case, no matter what you use (backgrounds, music, models, etc), pay attention to the license agreement. In order to represent things as your own creation, you need to make sure you have the right to do so.
How to get VR content into iSpring
One of the most obvious ways to get VR content in your e-course made with iSpring is adding web objects. Or if you have a specialized app, you could link to Google Play or iTunes, so anything you can link to can be added in your iSpring environment. You can also create and add Unity-based content for WebGL (which allows you to use HTML5 technology to view games, simulations, or intense graphics in 3D).
Let’s quickly look at how we can add some of these things in iSpring.
Example 1:
We will add the Sketchfab 360 3D model that we saw earlier.
- Click on Embed below the model.
- Copy the embed code.
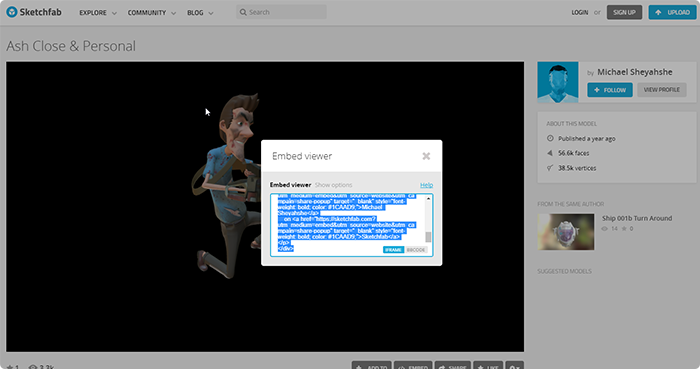
- Open up a blank slide in PowerPoint and go to the iSpring Suite tab.
- Click Web Object.
- Select Embed Code from the dropdown list, and insert the code.
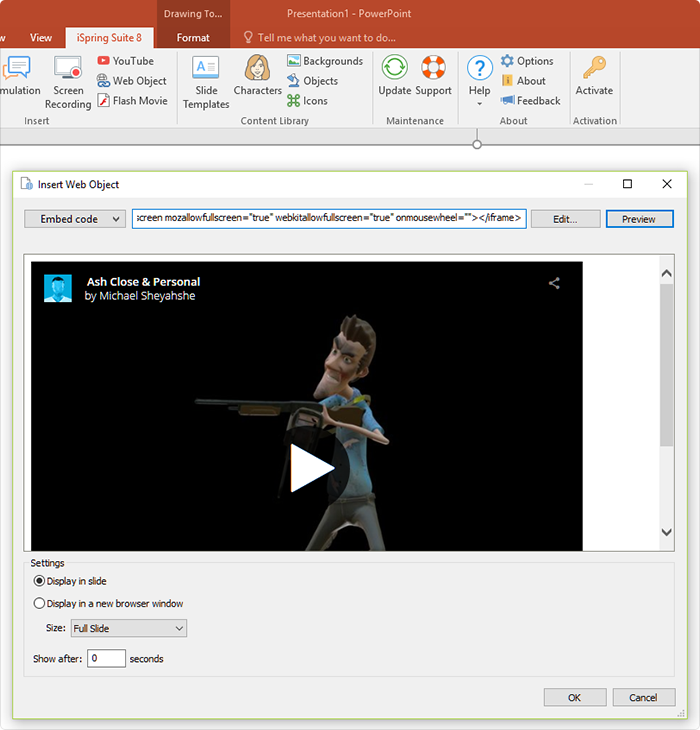
- Click OK.
Example 2:
Let’s have a quick look at how we can add a 360 video inside iSpring via YouTube.
- Open a 360 video at YouTube and click Share.
- Select the HTML code and copy it.
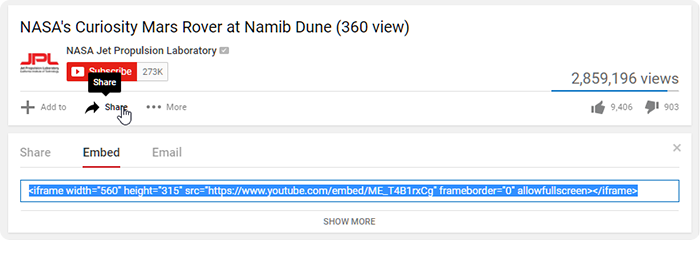
- Again, open up a blank slide in PowerPoint and go to the iSpring Suite tab.
- Click Web Object.
- Select Embed Code from the dropdown list, and insert the code.
- Click OK.
