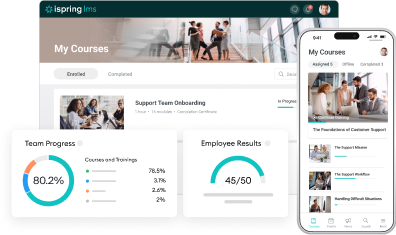
Salesforce Integration with iSpring LMS: Sync Employee Data Automatically

Our new integration with Salesforce is here! Now you can connect Salesforce and iSpring LMS to sync employee data within seconds. This integration will empower you to synchronize individuals, departments, and groups in a click, or schedule the synchronization to run automatically.
Go on reading to learn the benefits of this integration for your company and see how to activate it step by step.
Benefits of the Salesforce Integration
Salesforce is one of the most popular customer relationship management (CRM) platforms that help businesses keep track of customer interactions and sales data and allows your marketing, sales, commerce, service, and IT teams to work as one.
You probably already use it. And now, you can integrate it with iSpring LMS. This integration will help you:
Save time on routine tasks
Simply select individuals or whole departments and groups in Salesforce and sync them with iSpring LMS. No more manual transfer of your employee info from the CRM to the LMS.
Automate workflow
With integration, your organizational chart data in iSpring LMS will be updated automatically. Admins select or add fields that need to be synchronized once and don’t have to think about it again – truly “set it and forget it.”
Eliminate human error and data loss
No more spelling names incorrectly or losing data due to manual transfers. With automatic synchronization, you’ll never lose a thing.
How to Activate the Salesforce Integration
Activating the Salesforce integration is quite easy, but please note that this is a paid service and you’ll need Salesforce Lightning Professional Edition or higher in order to integrate it with iSpring LMS.
1. Download the iSpring app.
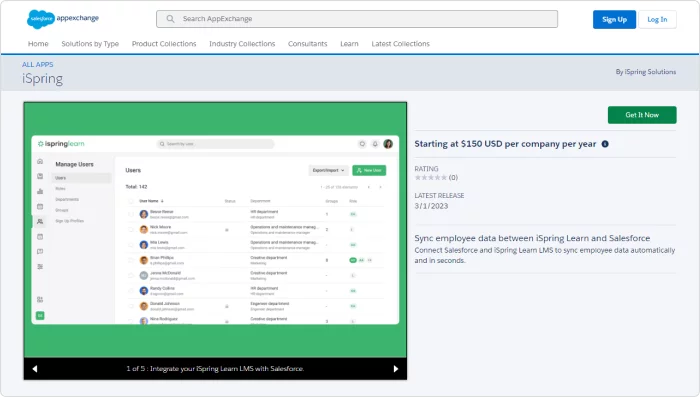
2. Go to Salesforce Lightning and open the iSpring app.

3. Under the iSpring Control Panel tab, select Authorization Settings and click Edit.

4. Enter an iSpring LMS administrator’s login and password. Then, paste your iSpring LMS client company’s URL into the Endpoint field and add a Salesforce admin email. Click Save.
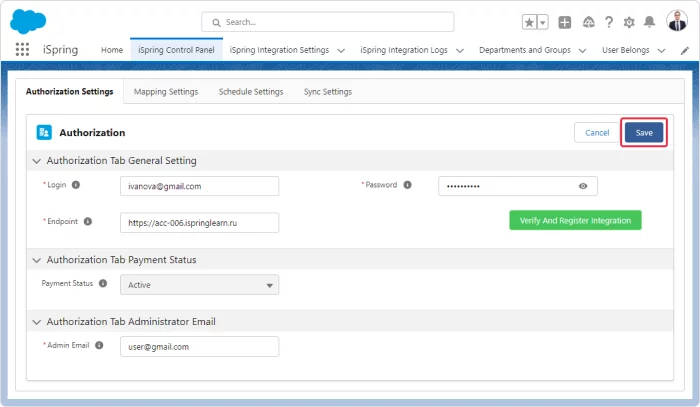
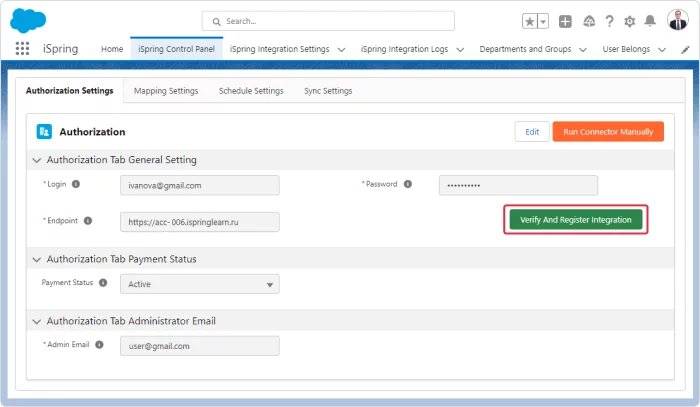
If you’re changing the password for the integration that had previously been activated, first click Verify and Register Integration and then Save.
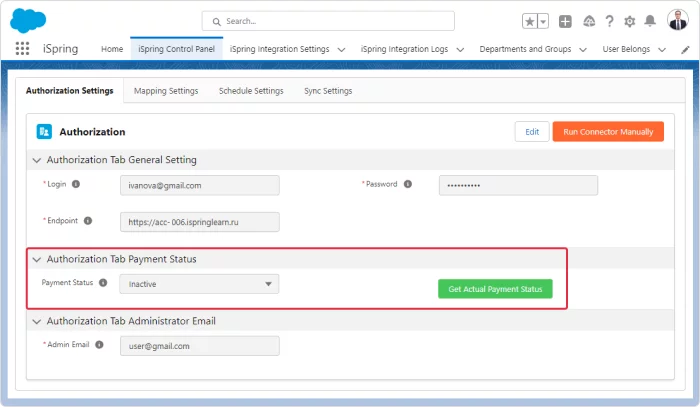
5. After that, click on Get Actual Payment Status. Once you’ve paid for your integration, the status will change to Active.
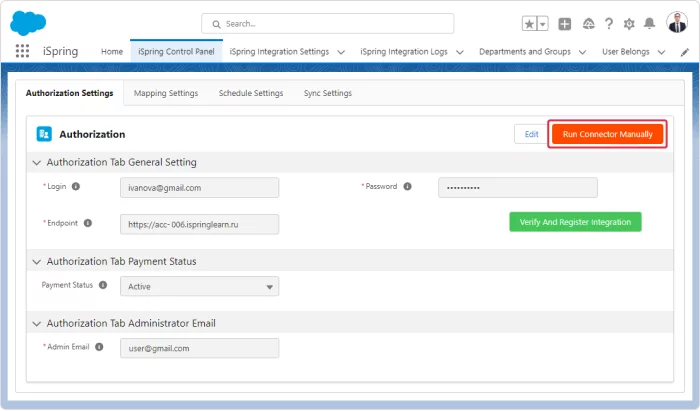
6. Click Run Connector Manually to launch the integration manually. To set up the synchronization schedule, go to the Schedule Setting tab.
And that’s it! Your Salesforce integration is activated.
Learn how to set up the fields and choose users, departments, or groups for synchronization in our Help Docs.
Don’t Have iSpring LMS Yet?
iSpring LMS is among the world’s best online training platforms and is acknowledged by industry experts from Forbes, Brandon Hall, eLearning Industry, and others.
Our platform is designed to help you leave old-fashioned training behind and achieve your business goals with quality training and social learning.
See how iSpring LMS tackles your tasks during a brief personalized demo. It’s entirely free.
for your mission-critical project