How to Upgrade iSpring Suite to iSpring Suite Max
iSpring Suite Max is the new release of the iSpring Suite eLearning authoring toolkit. It includes the desktop iSpring Suite authoring tool, a library of templates and characters, and iSpring Space for teamwork on courses.
In this article, we’ll show you, step by step, how to upgrade your iSpring Suite to iSpring Suite Max.
-
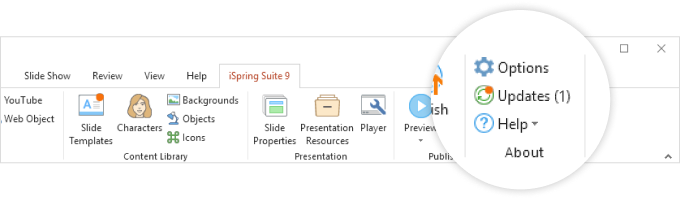
To install the update, open the iSpring Suite tab in PowerPoint and click on the Updates button.
-
In the opened window, click on Install. The new version of iSpring Suite Max will be downloaded to your computer. Run the downloaded file and follow the instructions in the installation wizard.
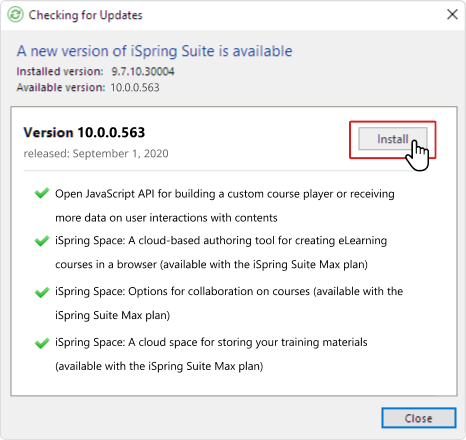
Note: If you are a current iSpring Suite user wanting to install the update on a new computer, you will first need to activate iSpring Suite Max with your License Key.
-
After iSpring Suite Max is installed, you’ll need to create an iSpring Space account. iSpring Space is a new service – an online space for course authoring and collaboration. Click on Upgrade to Suite Max.
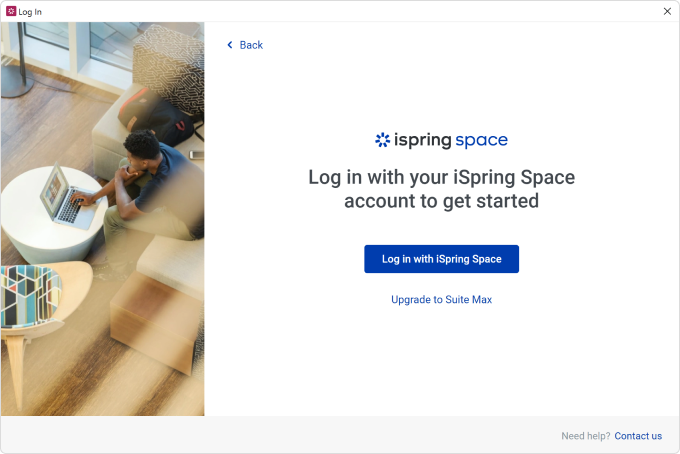
Note: You can create your space by opening iSpring Suite or by clicking the Log in button on the iSpring Suite tab in PowerPoint.
-
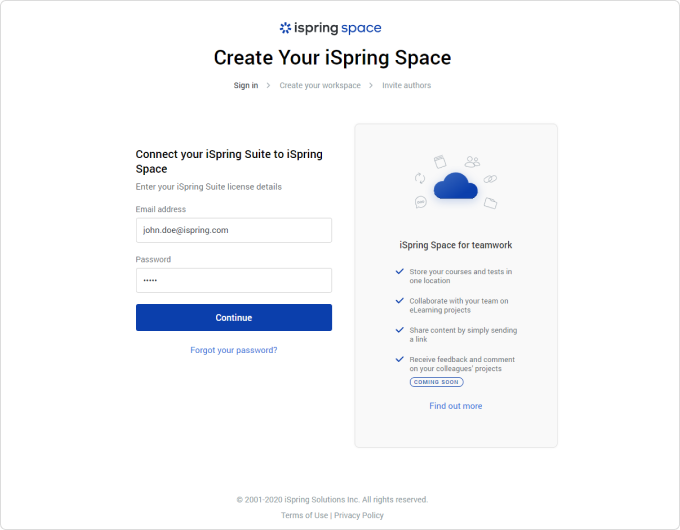
Enter your personal account information on the iSpring website.
Note: If you don't know your password, restore it by clicking the Forgot your password? button, or email us at [email protected].
-
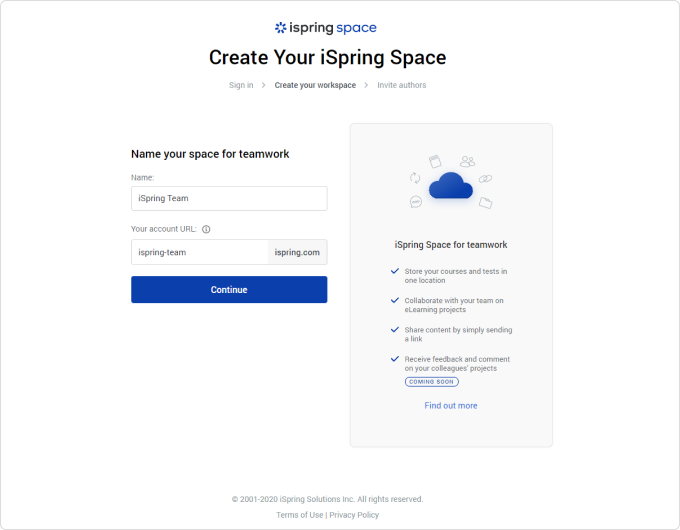
Create a name and address for your iSpring Space:
-
Name – This is the name of your account, for example: “iSpring Team”
-
Your account URL – This is where you and other authors on your team can log in to the iSpring Space account, create courses in the browser, and share them with colleagues
For example, we named this account ispring-team — so the URL of our account will be ispring-team.ispring.com
Enter the account name and click Continue.
-
-
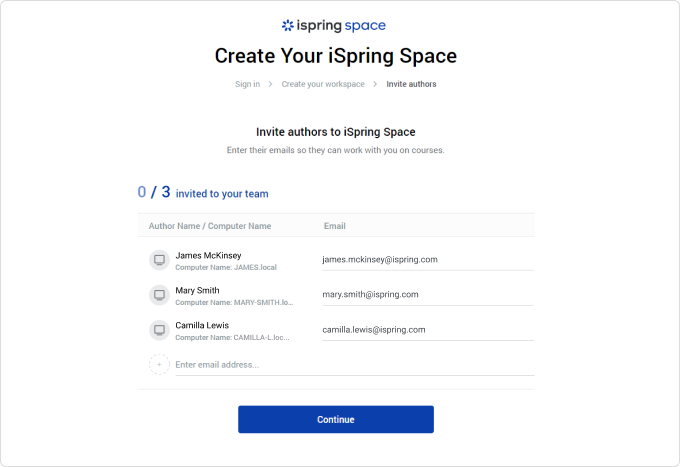
Next, you’ll see the current activations of your iSpring Suite license. Specify the email addresses of the authors who will be creating courses in the new iSpring Suite Max.
-
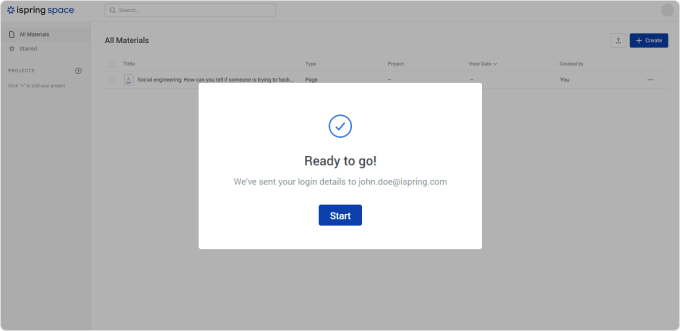
Your space is ready. You will receive a username and password by email, and the authors you specified will receive an email with a self-registration link.
The number of authors is limited to the number of users of your current iSpring subscription. For example, if you have a license for one user, add your email address. If you purchased a license for three users, you can enter the emails of up to three authors – those users of your subscription. Please note that licenses for users without confirmed emails will be deactivated.
Note: If you are going to author courses in iSpring Suite Max, you need to add your email address to the list of authors. If you don’t add your email, you’ll be able to access iSpring Space and manage the list of authors, but you will not be able to create courses.
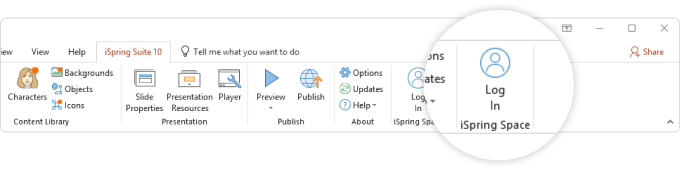
Now, to start working in iSpring Suite, you need to log in to your iSpring Space account. Launch iSpring Suite and click on the Log in icon:
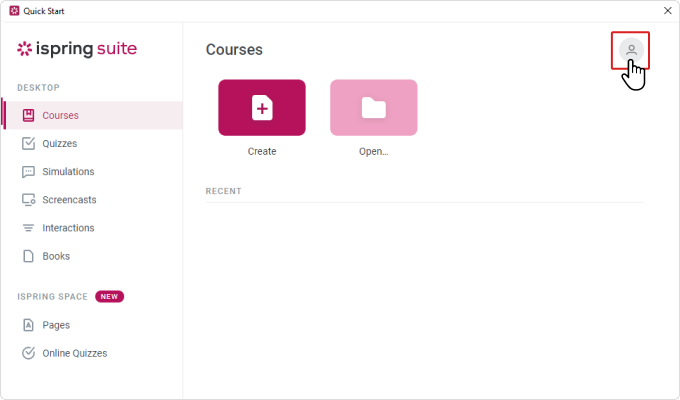
Note: You can also sign in to your account from PowerPoint. Open the iSpring Suite tab in PowerPoint and click Log in iSpring Space.
Congratulations! Now you can start creating your courses! To learn how to get started, watch this video tutorial.
Related Articles