How to Add a SCORM Course into DigitalChalk LMS
DigitalChalk supports SCORM 1.2 standard as a third-party course package. We went through compliance tests of DigitalChalk LMS with iSpring courses and confirmed that learning data is reported correctly. Before we start, prepare a zipped learning module with iSpring.
Here is a tutorial on how to upload a course to DigitalChalk:
-
1
Log into your LMS account as an administrator or course author.
-
2
Go to the Manage Courses tab.
-
3
Click Create a New Course on the left-hand side.

-
4
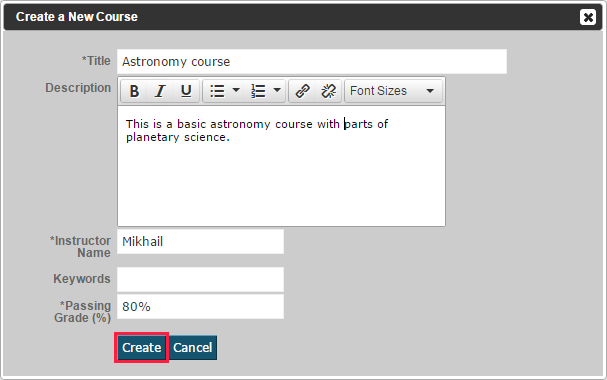
Give your course a name by filling in the Title field. Fill in Instructor Name and Passing Grade (%) because these fields are mandatory. Write a Description and put in some Keywords if you like. Click Create.
-
5
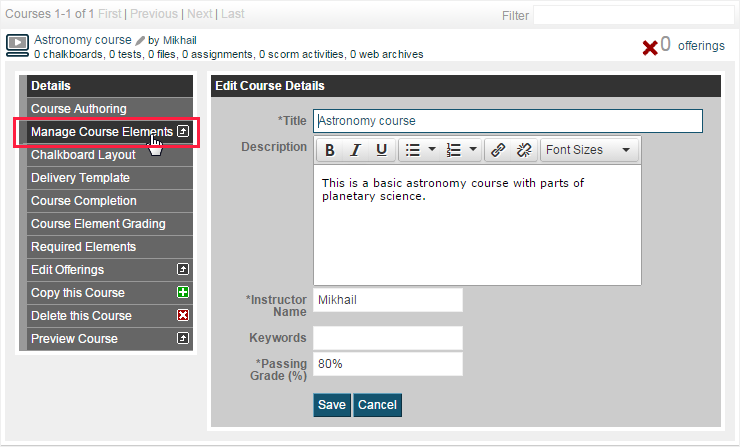
On the left pane, click Manage Course Elements.
-
6
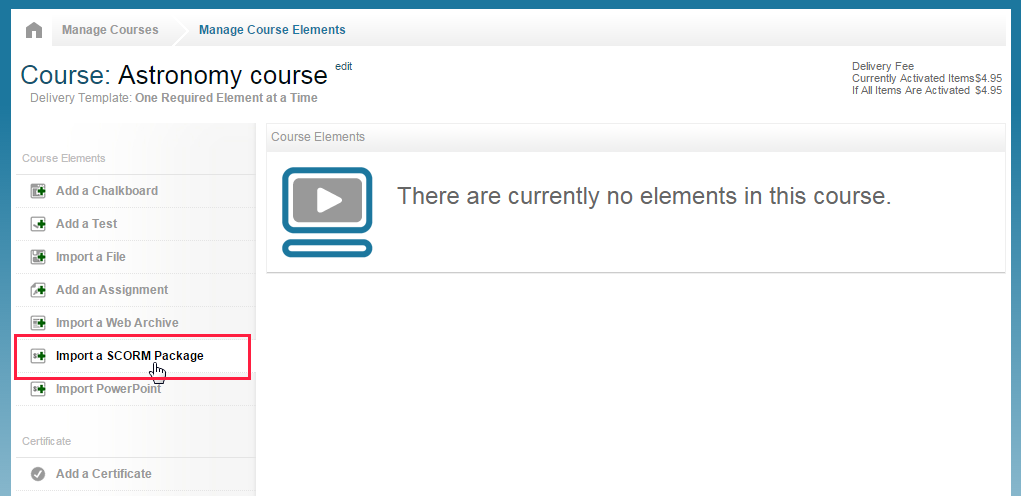
You will see a Course editing page. Click Import a SCORM Package.
-
7
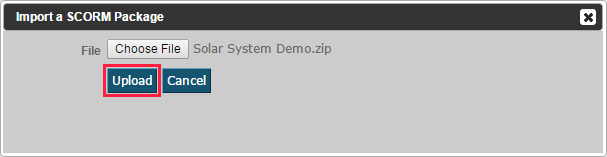
Browse for your SCORM package by clicking the Choose File button and then hit Upload.
-
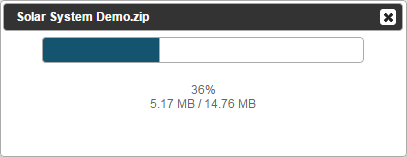
8
It will take a few moments to upload, depending on the file size and your Internet connection speed.
-
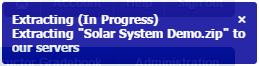
9
After upload is completed, the .zip file will be automatically extracted. A notification about this procedure will float in.
-
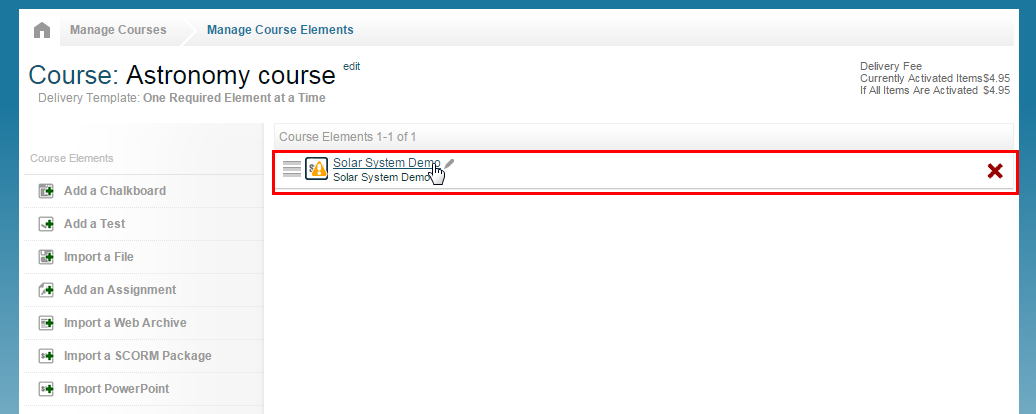
10
After that you will see your SCORM module in the Course Elements list. Click on its title.
-
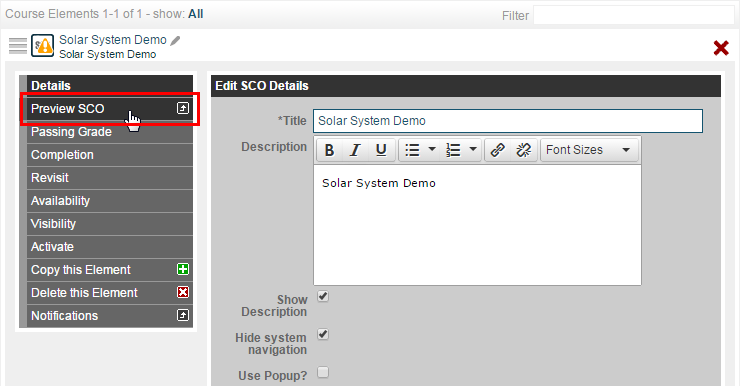
11
The Course Element properties toolbox will be expanded below. Click on the Preview SCO menu item on the left.
-
12
Here we go! The SCORM course that you have created with iSpring is playing back in the DigitalChalk environment!

Adjust other settings, like grading, e-commerce, etc. Then assign it to your students to start their education.
Related Articles