The iSpring Content Library’s 1st Year: 50,000 useful eLearning assets and growing!
One year ago, iSpring released a new service for eLearning course authors: the iSpring Content Library. To celebrate its birthday, we’ll tell you how the Content Library has changed and grown during this year, why there is always a need for plenty of eLearning characters, and how we at iSpring develop them.
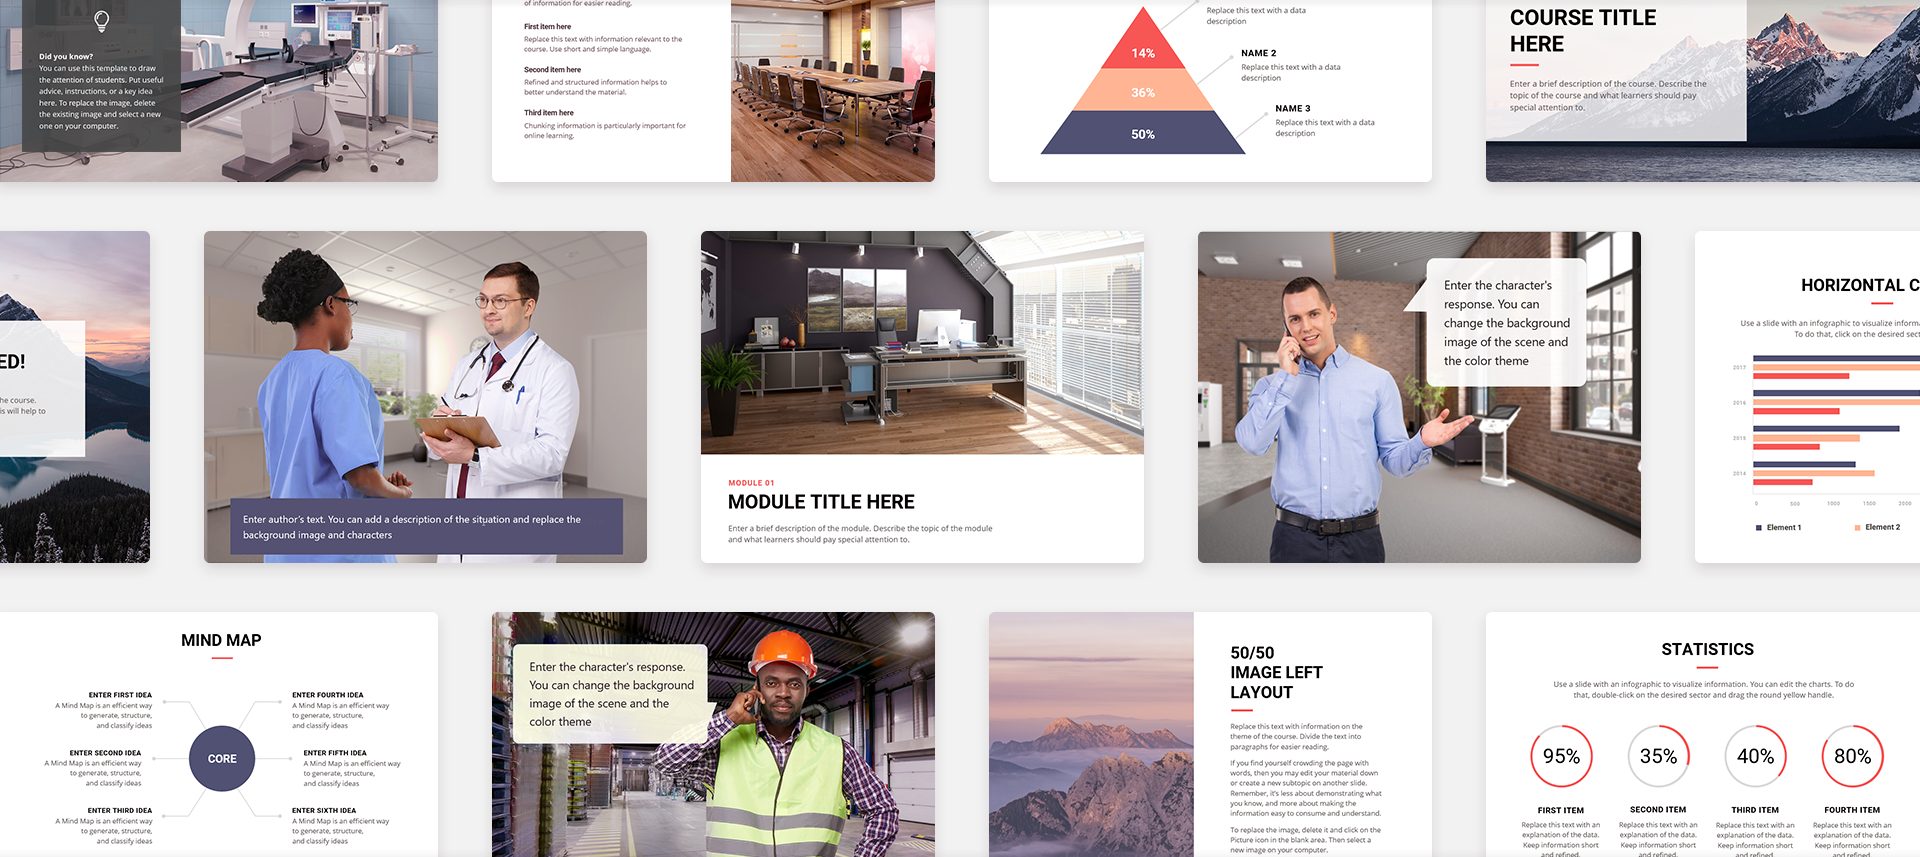
The iSpring Content Library is a vast collection of templates, assets, and objects, which allows you to create courses and assessments in record time. The huge library of eLearning assets comes with iSpring Suite authoring tool by subscription and boosts your eLearning content development facilities. If your eLearning authoring team doesn’t have a designer or an illustrator — or they’re snowed under with work — you can make a professional-looking course by yourself. You’ll only need your PowerPoint, and then you can import templates, icons, and cutout characters into your eLearning courses. All iSpring Suite users can access a basic set of assets for free.
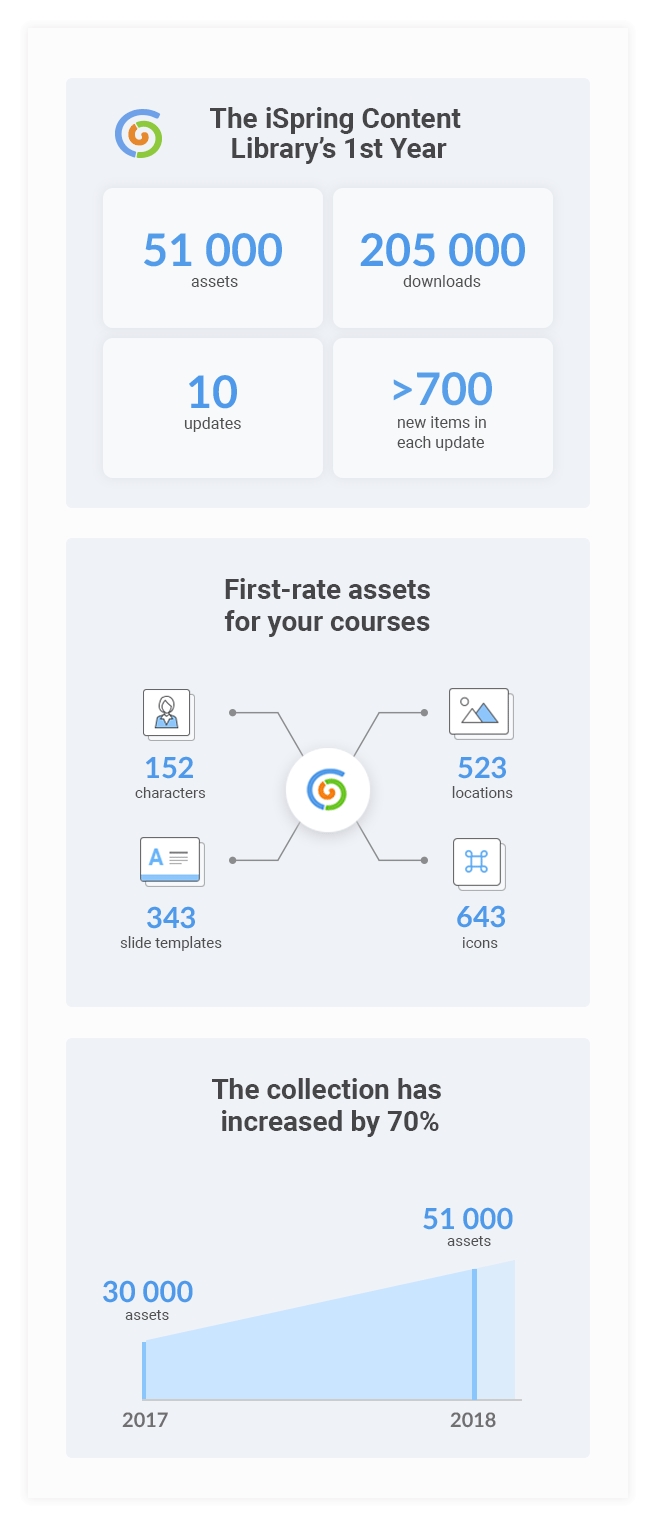
Like all happy and healthy babies, the iSpring Content Library has been steadily growing through these 12 months. Every 4-6 weeks, we’ve added dozens of new locations, objects, templates, and characters to it, which has amounted to over 20,000 assets during the course of the year.
We’ve summed up some figures in these infographics:
Develop courses twice as fast
There are a number of reasons why our customers love to use the Content Library, and the first one is that it allows them to develop eLearning content 2 times faster. Instead of creating a training course from scratch, content developers select a ready-to-go template, add the relevant texts and charts, import characters, and enjoy a stylish and polished result. The color scheme is easy to customize, so it takes just 10 minutes to fine-tune a template to reflect your corporate colors.
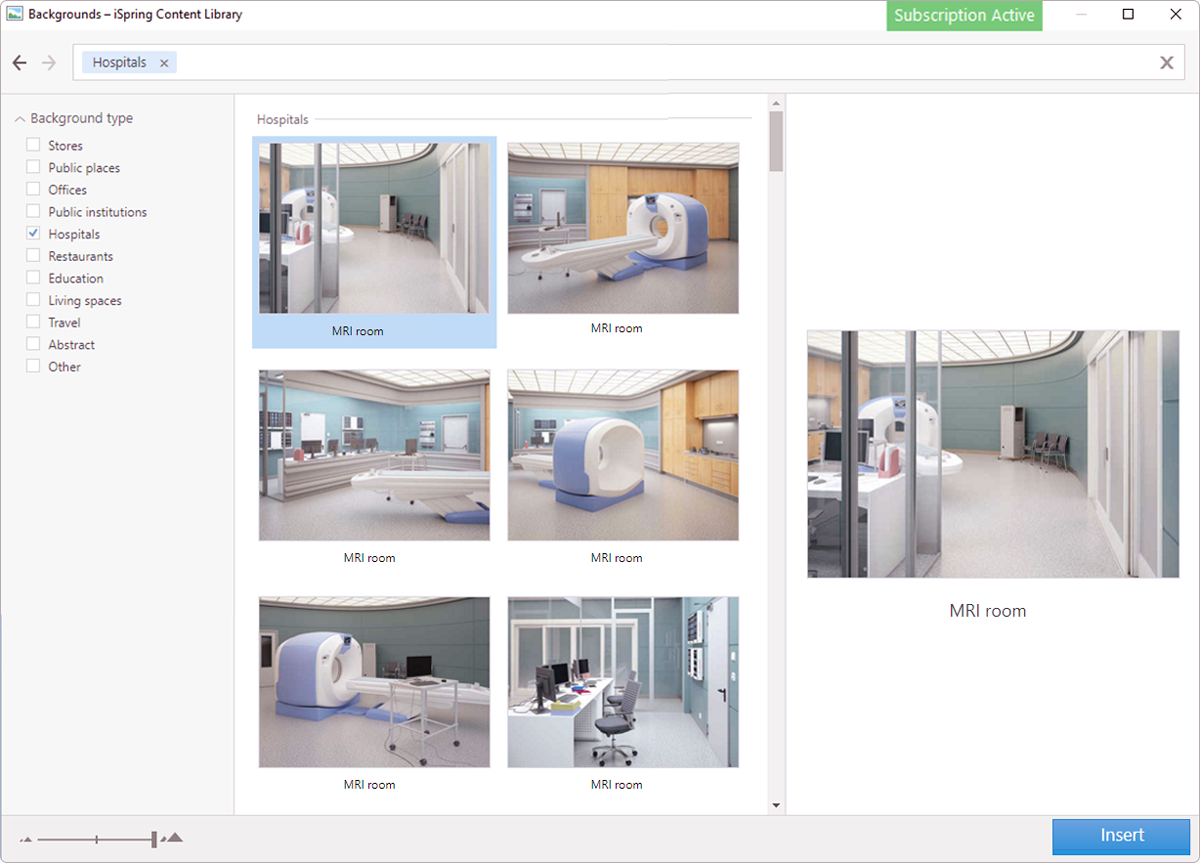
The selection of locations is yet another productivity booster. For example, to make a life-like dialogue simulation, you’ll need several photos of, let’s say, an MRI scanning room or a bank vault taken from different angles to reflect the POV change during a conversation. Just try to estimate the chances of finding a high-quality set of stock photos, and how many hours you’re going to spend looking for them!
There are 523 locations in the Content Library, and they are neatly organized with tags. Just select “education” or “stores” to see all relevant pictures.
The Content Library has been a huge help for us. The main thing that I like to use it for is different backgrounds for eLearning courses. We usually search Shutterstock and other libraries, but it’s really hard to find backgrounds that are made specifically for eLearning courses that have a suitable foreground and an area for texts or questions.

Christopher Porfido, an e‑Learning developer at Pharma Digital
We can find a million pictures of doctor’s offices on the Internet, but it seems we can only find one or two that actually work with the eLearning we’re using.
So, there are a lot of medical images, and tons of offices and generic places that are perfect for eLearning. It’s also great that we don’t have to worry about licensing or anything; we just pay a yearly fee and get access to the whole Content Library.
Using cohesive sets of icons, controls, and buttons speeds up content development too: they match one another perfectly, and all you have to do is just place them on the slides where you need them.
Fast content development is a great advantage, but only when it goes hand-in-hand with quality. A good course meets training objectives, and it’s immersive, convenient, and easy to understand for your audience. Any educator will agree that grabbing the learners’ attention and motivating them is one of the most challenging tasks. Sometimes, it’s not easy even when you work face-to-face with your learners, and it gets tougher when it comes to eLearning.
The lack of emotional contact is a known shortcoming of eLearning, and there are some proven ways to get around it.
How to add emotions to your course
The Content Library can help you! The secret ingredient for your training course is characters (avatars). They can enhance even the most boring content with a personal touch.
Here’s some ideas how you can use eLearning characters in your courses:
- Use a character as a guide who walks learners through the course or learning path.
- Give cutout people roles in your course if you using real-life cases as examples. If you’re teaching how to recognize conflict of interests at your workplace or how to communicate with different types of customers, you can cast actors in just 5 minutes right in your PowerPoint.
- Create a conversation simulation where your learners can practice how to negotiate, sell, or deal with an irate client.
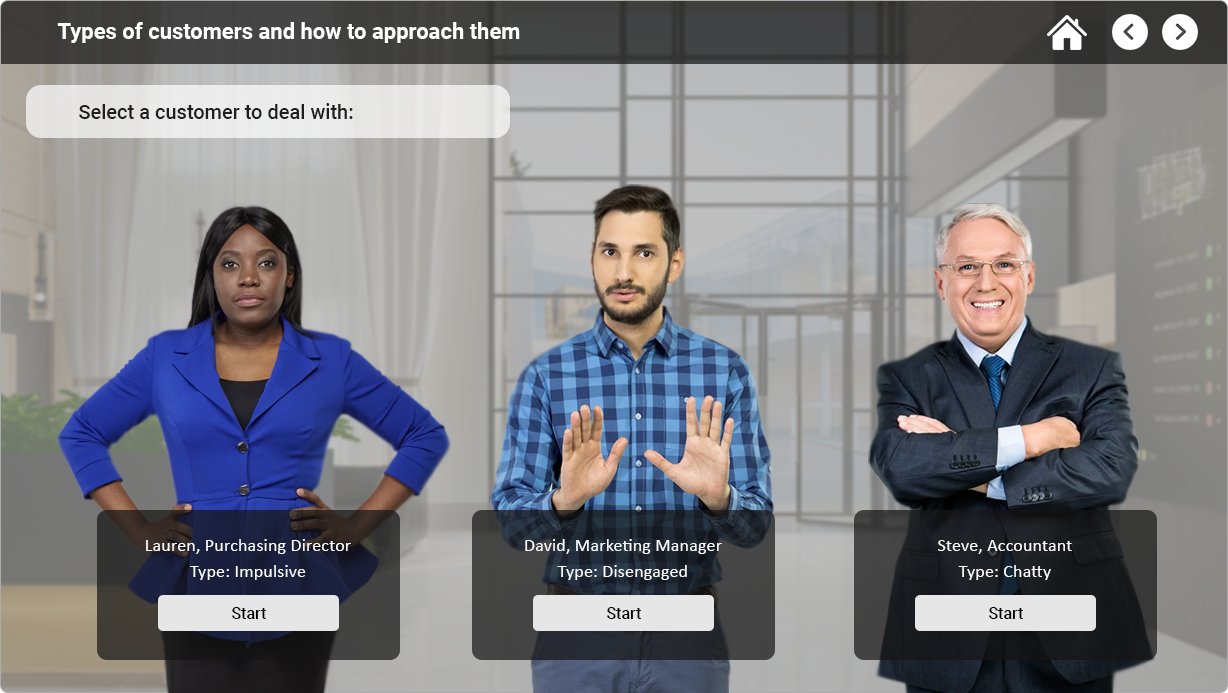
- Make characters the learner’s opponents in a assessment or a trivia game.
- Use characters to stage a conversation. To practice working with objections, use a scenario with changing points of view.

- Connect to your target audience by using a relevant character. If you’re creating a course on work safety for workers who operate high-voltage electrical equipment, let an electrician wearing a special uniform be the learners’ guide.
- Highlight some important information with the help of a character; for example, place a phrase inside a speech balloon or make a character hold a plate. However, don’t overuse this trick; it works great when used rarely.
Here, you might ask: “Why should I use some premium characters? I can find photos on the web, or just take pictures of my colleagues instead!”
The point is, it’s not that simple, especially when you work remotely or develop courses for your customer from another country. And it can take hours of your time to find suitable photos on the web if you need an exact appearance, expression, and angle.
Start creating professional eLearning courses with iSpring Suite
Even if you can take photos of bank clerks, salespeople, or nurses, you’ll have to have some extra equipment to get high-quality content: a pro camera, some basic lights, and a white background. At the end of this post we’ll tell you the stages for creating a pro eLearning character. For now, we’ll share just one fact: a photoshoot in a studio requires 5 hours of work for the whole team: a photographer, an assistant, and a director.
If you’re all set with a studio, a team, and photo and lighting equipment, your next step will be approaching a model and working with him or her.
The average character package includes 300-400 pictures of the same person in various poses and – most importantly! – with various expressions.
You might have found a doctor, a shop assistant, or a construction worker who is a very confident in front of a camera, can come out of their shell and pull any look at will, but in most cases, those who are not pro models are not very good at posing and can only produce a limited set of emotions. That’s why for our eLearning characters, we select subjects which are not only good choices for their parts, but can also express any emotion naturally and compelling.
How we create eLearning characters
As promised, here are the details of how we at iSpring produce photo characters for the Content Library.
Stage 1.Getting insights.
At this stage, we just figure out what content creators need. We learn a lot from download statistics, of course, and also collect customer feedback. Recently, we’ve received a number of requests from clinics, physical rehabilitation centers, and non-profits to add photos of people with disabilities for their courses and tests. In the next update, such a character will appear.
Stage 2. Casting.
As soon as we have a concept, we start looking for a model of the required age, ethnicity, physique, and overall personality.
Stage 3. Test shooting.
We need this step to make sure the models can identify themselves with their parts, offer the desired expressions, and build a rapport with the team.
Stage 4. Choosing an outfit.
If a character is going to wear an uniform, the task is simple: we just have to pick up garments of the correct size and fit. For a office employee or a client, we do dozens of photoshoots in different outfits until we find the good match.
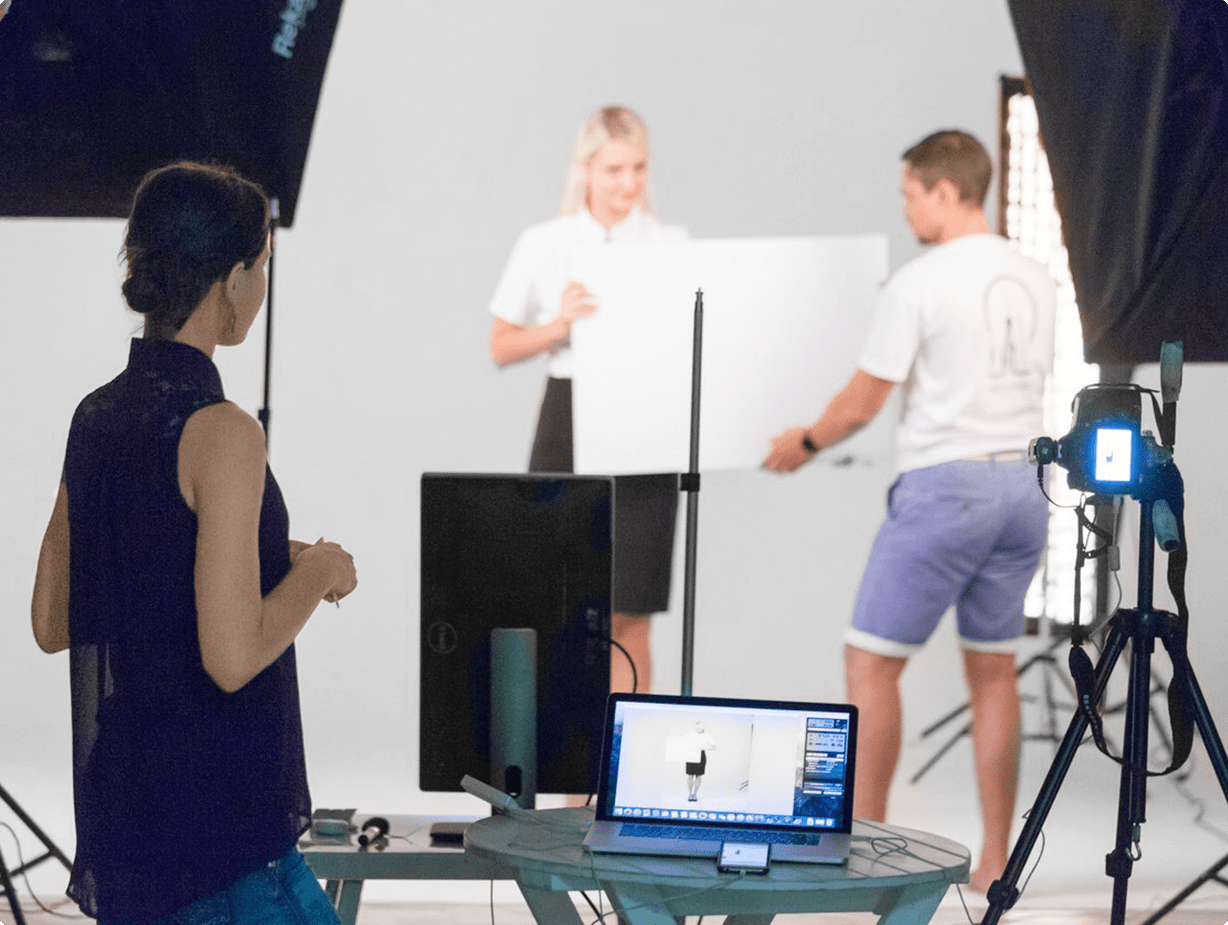
Stage 5. Shooting.
This starts with some preparations while a makeup artist and a hairstylist make the model ready for the camera, and then the actual shooting begins.
Stage 6. Selection.
We shoot over 2,000 frames for each model, and then pick out the best photos. As a result, we get a set of no less than 300 high-quality pictures.
Stage 7. Pre-release polishing.
At this stage, we accurately cut out the characters, so they can smoothly merge with any background and you can be sure your slides don’t look like a Cut & Paste craft project made by a preschooler.
We release new characters regularly: there were 10 updates during the Content Library’s first year. If you have a subscription, new items appear in your iSpring Suite automatically. The next update will feature manufacturing facilities, an open-space office, and several characters: clients, office employees, and a patient.
Let us know which new characters or backgrounds you’d like to see in one of our future releases: share your opinions in the comments below, or send us an email at support@ispringsolutions.com. We aren’t just saying that; we really want to hear from you and carefully collect feedback to make the iSpring Content Library meet your needs.
