How to Create a Course Portfolio with iSpring Page
In this article, we’ll show how a course designer can create a portfolio and share it with prospective customers using iSpring Page. Here's what your portfolio might look like.

To create a portfolio in iSpring Page, just upload your courses and add information about yourself.
A portfolio is a valuable tool that can help you land a job or apply for a new project. It allows course designers to demonstrate their skills and stand out from the competition, while helping employers evaluate candidates’ experience and see if they’re a good fit.
What Is iSpring Page?
iSpring Page is an easy-to-use authoring tool for creating online courses with images, videos, and quizzes. It’s a cloud-based tool that works right in a browser, so you don’t need to download and install it on your computer.
Here’s what you can do with iSpring Page:
Create a course portfolio. iSpring Page allows eLearning designers to showcase their work by adding course samples in SCORM or HTML5 format. Prospective clients can explore your samples on any device.
Build online courses in minutes. iSpring Page allows you to create interactive page-like courses extremely quickly. Just copy and paste a text, ins ert pictures and videos, and add a quiz.
Let learners view your courses on any device. Content created with iSpring Page automatically adapts to any type of screen and displays beautifully on all computers, tablets, and smartphones. There’s no need to tweak the course for different devices manually.
Collaborate on courses. To get your course completed in less time, you can involve your team. While your colleagues are editing texts and polishing the course’s appearance, SMEs and customers can review the content and leave comments.
Share SCORM courses online. You can post a link to your course on social media or send the link to your learners by email or messenger. Anyone will be able to view the content just by clicking the link.
Step 1. Get a Free Subscription to iSpring Page
iSpring Page is a web-based tool, so you don't need to install anything on your computer to get started. You only need to register on the site. Just fill in your name, email, and phone. Payment details are not required.
How to get started with iSpring Page
The tool has a free 14-day trial. You can save all the materials you’ve created with iSpring Page to your computer during this time. They’ll function perfectly even after your free trial expires.
After 14 days, access to the tool and the content you’ve shared will no longer be available, but you can restore both at any time by paying the subscription fee.
Step 2. Upload Your Courses
A portfolio starts with content. You can upload ready-made courses to iSpring Page or create new content right in the tool.
To upload your course, click on the Upload button and select the required SCORM package on your computer.

And that’s it! Your file is now in iSpring Page and can be added to your portfolio.
Step 3. Create a Portfolio
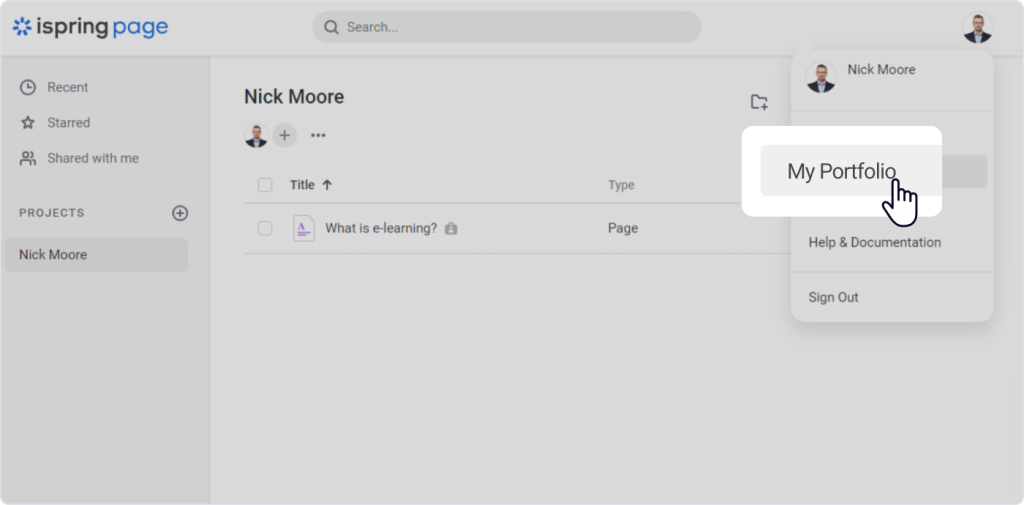
To create a portfolio, click on the photo in the top right corner and select My Portfolio.
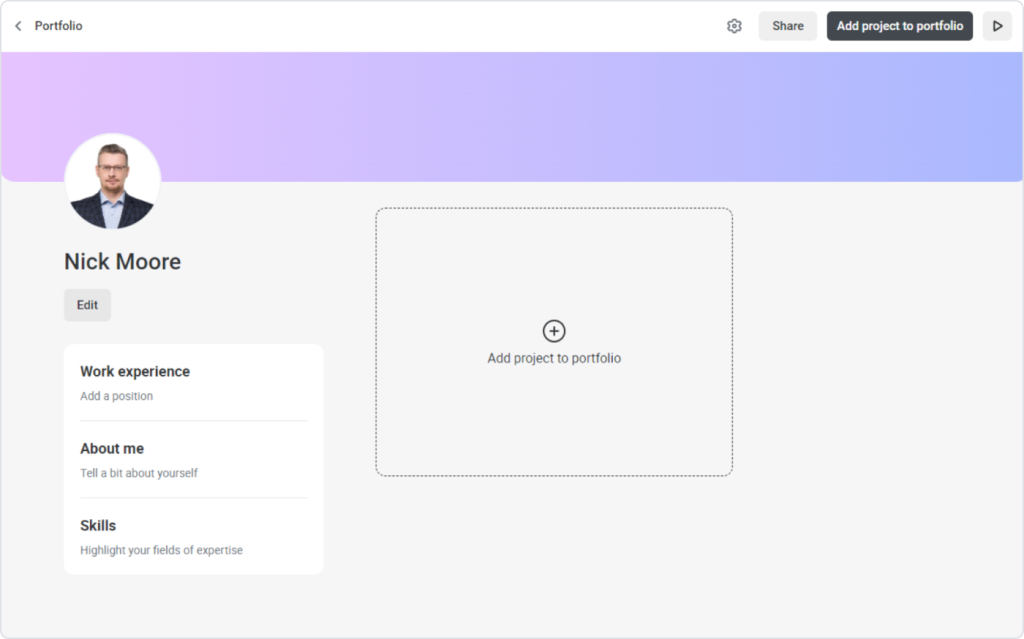
At this point, you can add information about yourself, a profile pic, and your projects.
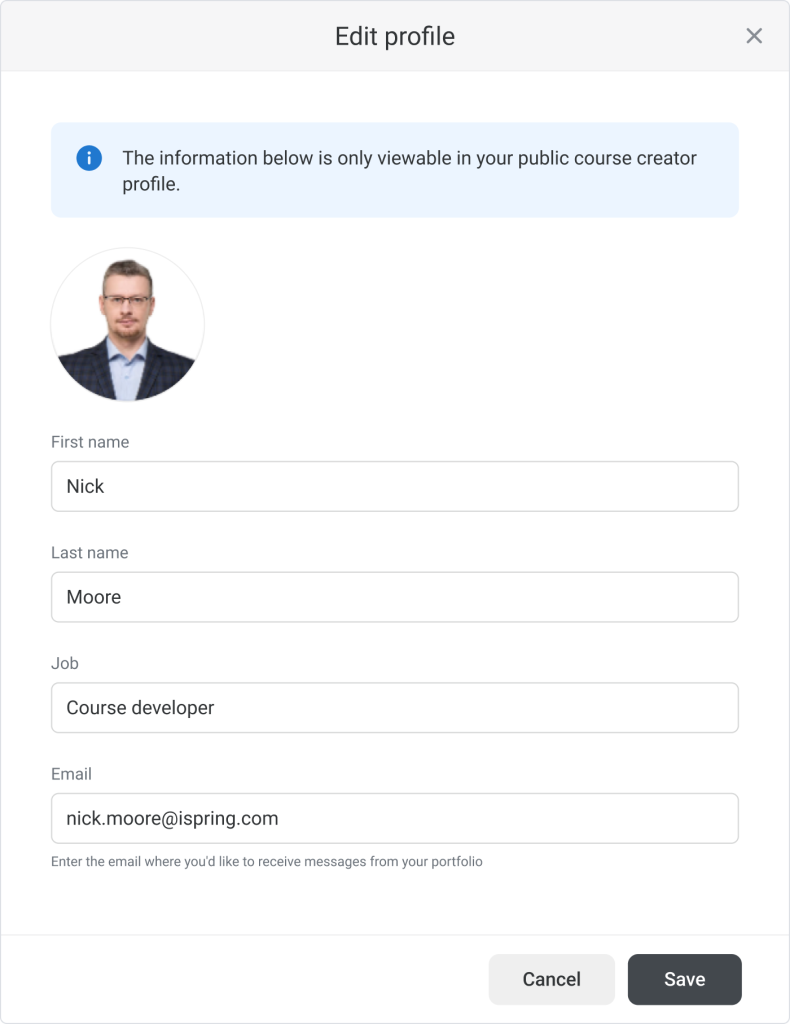
To fill in information about yourself, click Edit on the portfolio page. Then enter your email, job, and work experience, and click Save. You can also upload a profile photo.
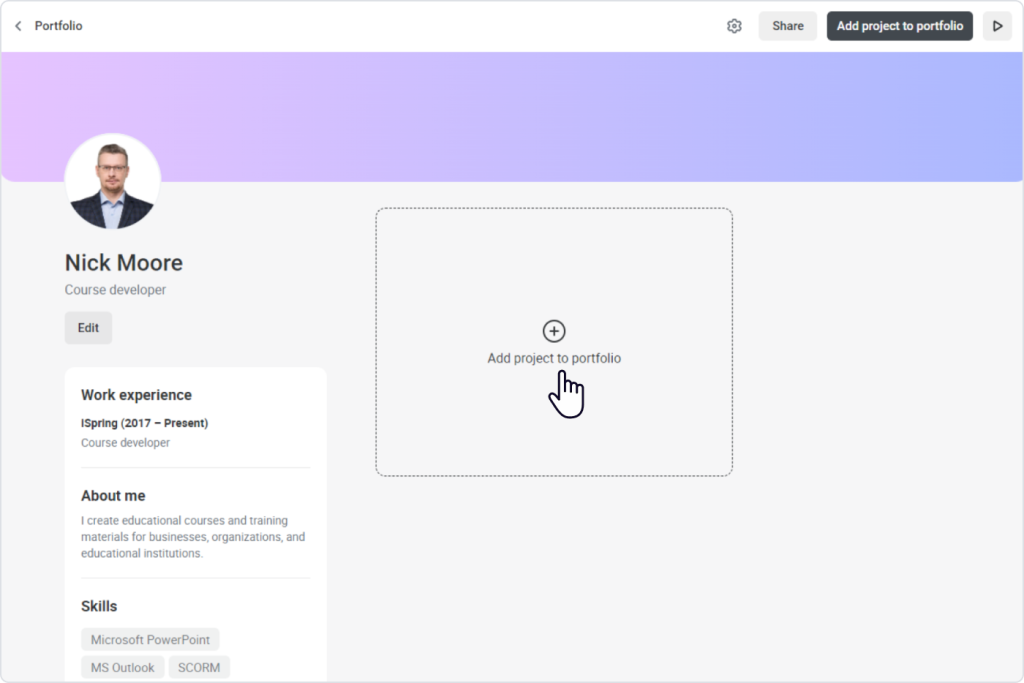
And voila! You’ve added valuable information for your potential clients. Now you just need to add your projects.
Step 4. Add Courses to Your Portfolio
To add content, click Add project to portfolio and select the desired course.
On the Project Properties page, add the project’s name and its description, upload the cover, and then click Save.
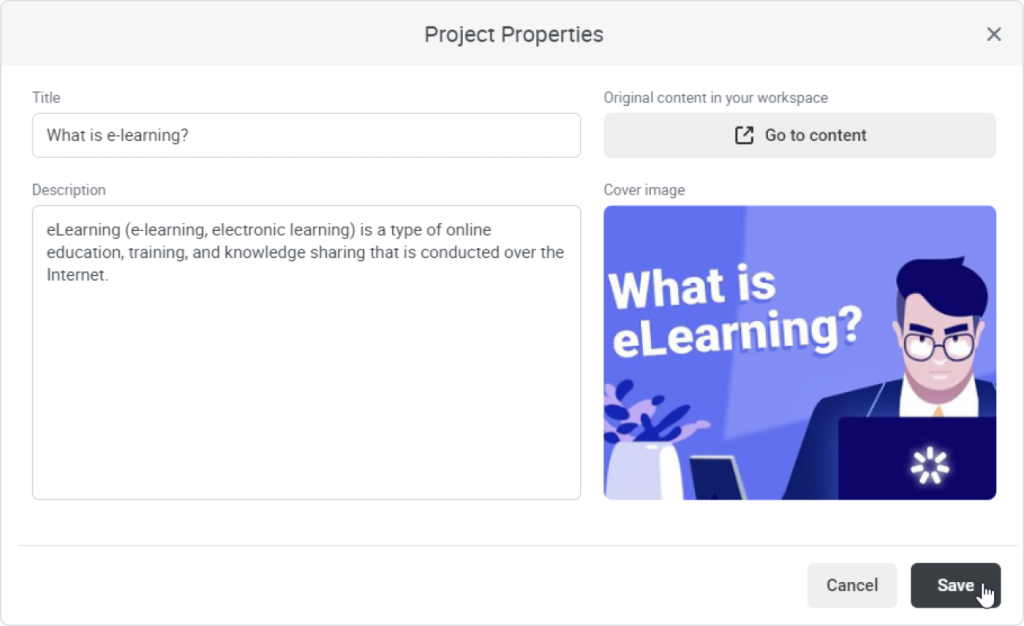
Congratulations! You’ve added a course to your portfolio.
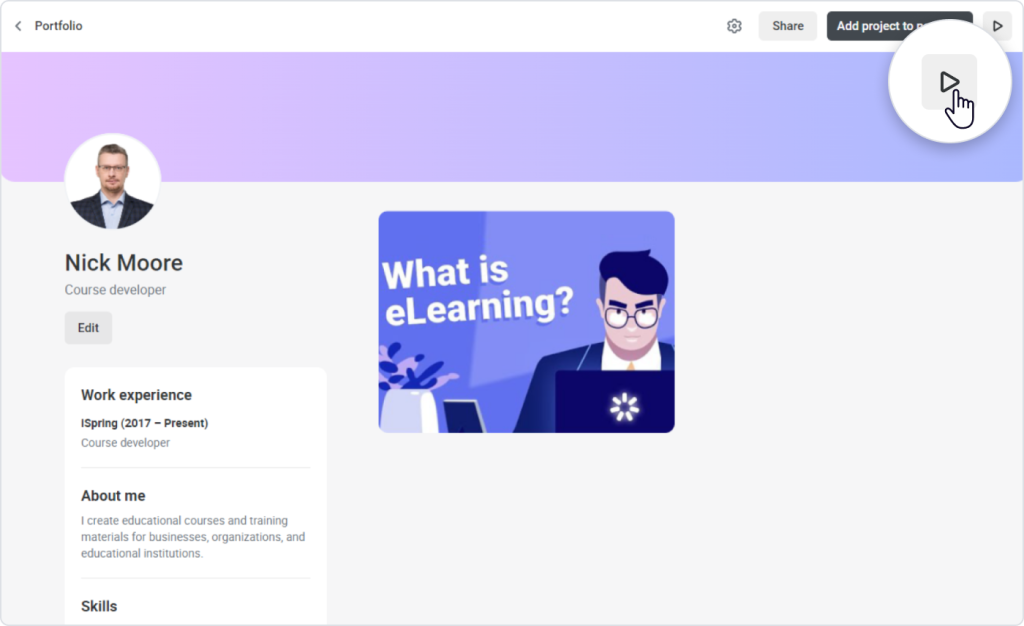
Step 5. Share Your Portfolio
To let others see your works, share a link to your portfolio. But first, check out what it looks like. To do this, click on Preview.
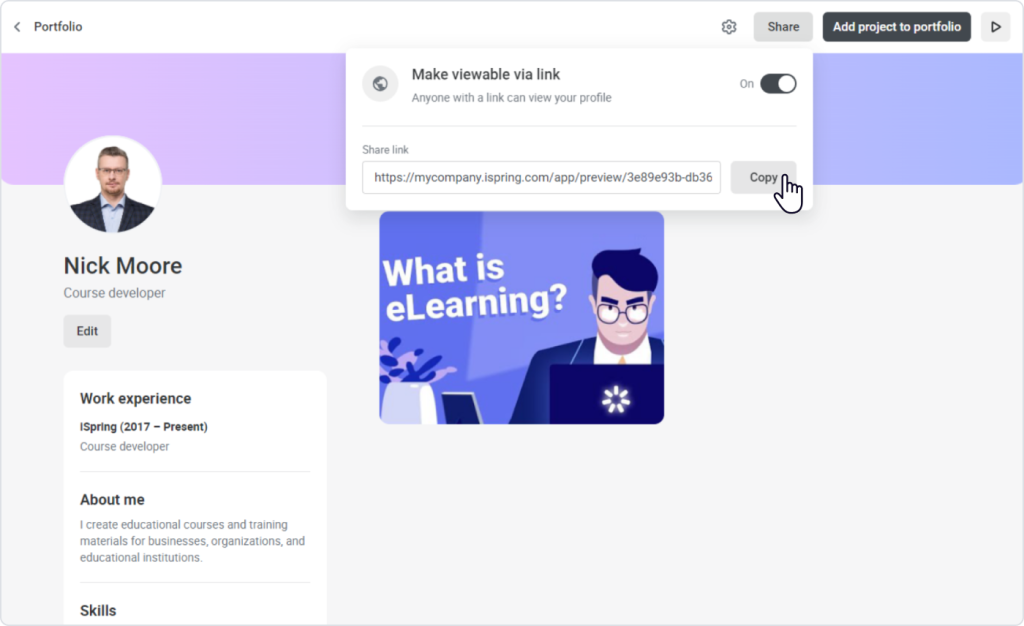
To share your portfolio, click Share, enable Make viewable via link, copy the link, and send it to your employer or post it on social media.
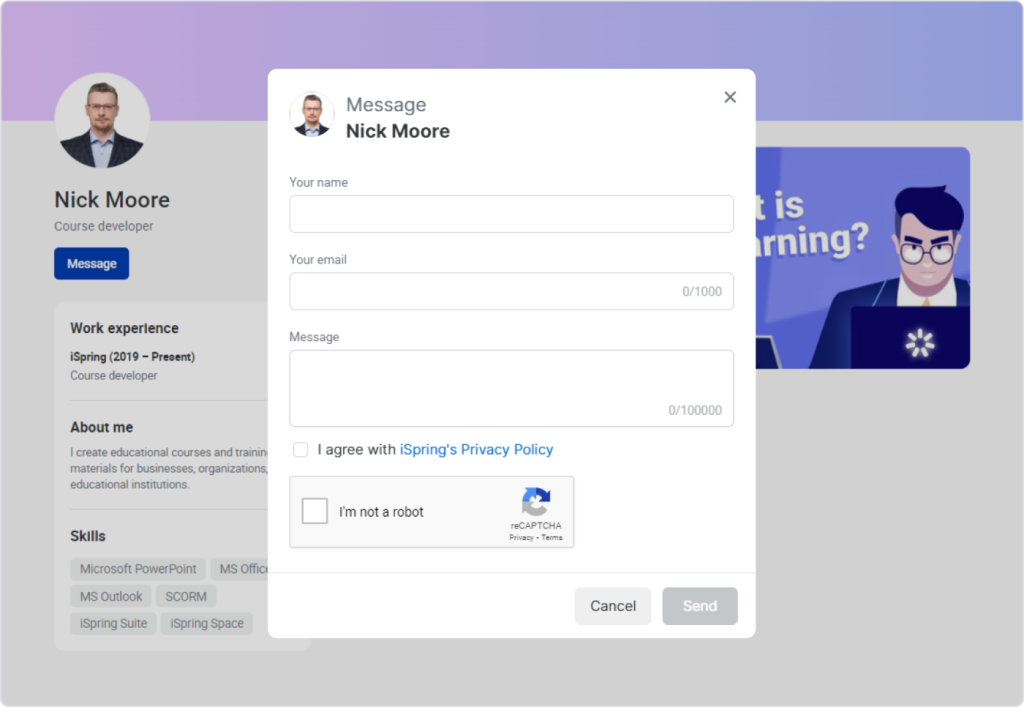
Anyone you have shared your portfolio with can see your work and contact you via the email that you provided when registering to iSpring Page.
This is how you can easily create your course portfolio and share your best works with prospective customers. You can also watch this video to learn more about how to set up your portfolio.
Related Articles