How to Add a SCORM Course into Schoology LMS
Schoology LMS has gone through compliance tests with iSpring learning courses and we can now confirm that it supports SCORM uploading and reporting. Check out how to create a learning package with iSpring.
Just follow this tutorial on how to get your SCORM package into Schoology LMS:
- 1
Make sure that you are logged in as an administrator with rights to add content items.

- 2
Click Resources and from the drop-down menu choose the destination for your SCORM package.

- 3
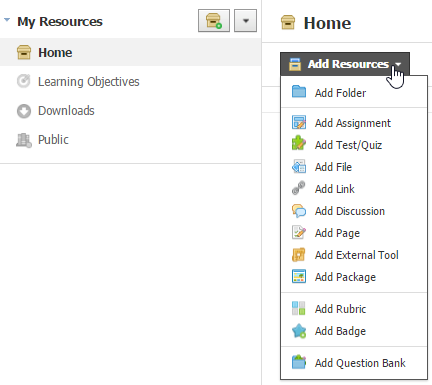
Click Add Resources and from the drop-down menu choose Add Package.
- 4
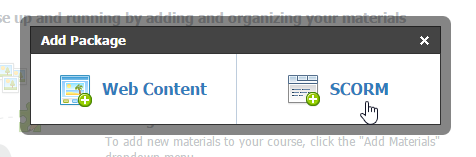
Sel ect the option to add SCORM.
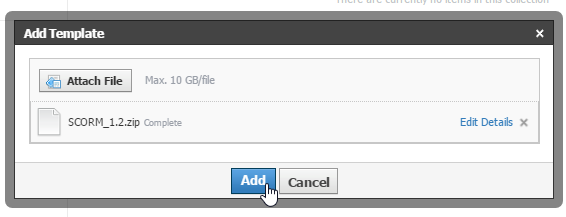
- 5
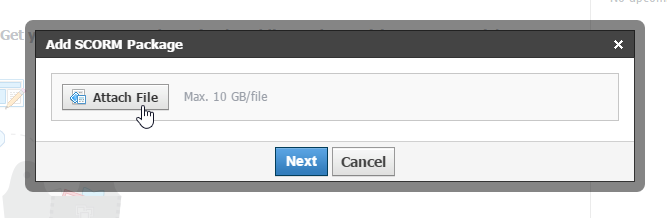
Click Attach File and locate the SCORM package on your device.
- 6
Click Add to complete.
To add SCORM directly to a course, follow these steps:
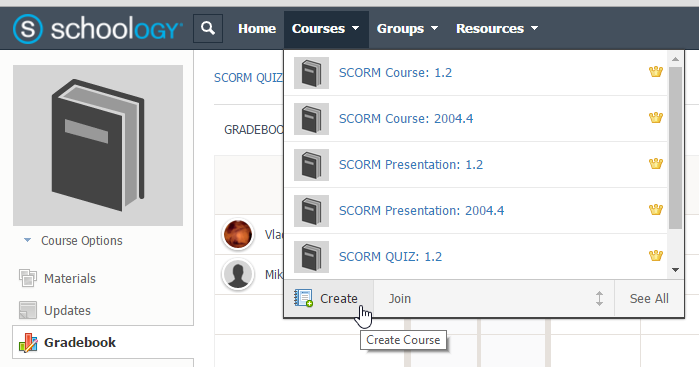
- 1
Click Courses and fr om the drop-down menu choose a course folder or click Create to create a new course.
Note that if you create a new course, you will need to configure some settings in the dialog window, which will appear on click. - 2
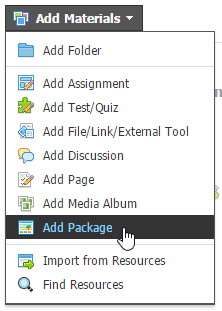
Click Add Materials and from the drop-down menu choose Add Package.
- 3
Select the option to add SCORM.
- 4
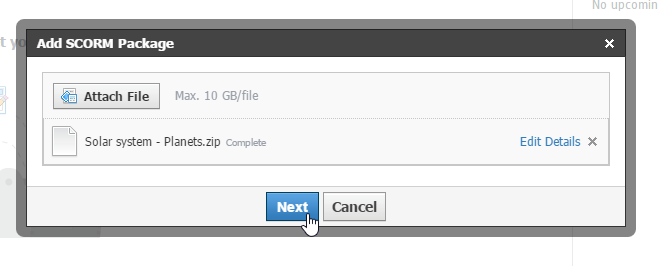
Click Attach File and locate the SCORM package on your device.
- 5
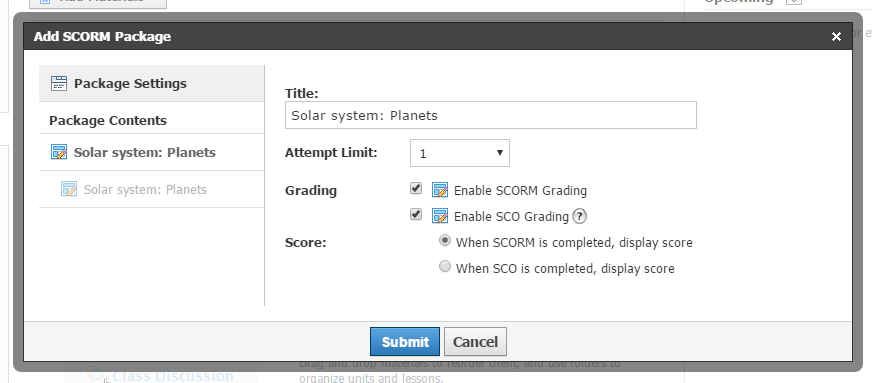
Click Next to configure SCORM settings, such as grading options.
Once the SCORM has been added, you need to configure tracking settings. - 6
Click Submit to complete.
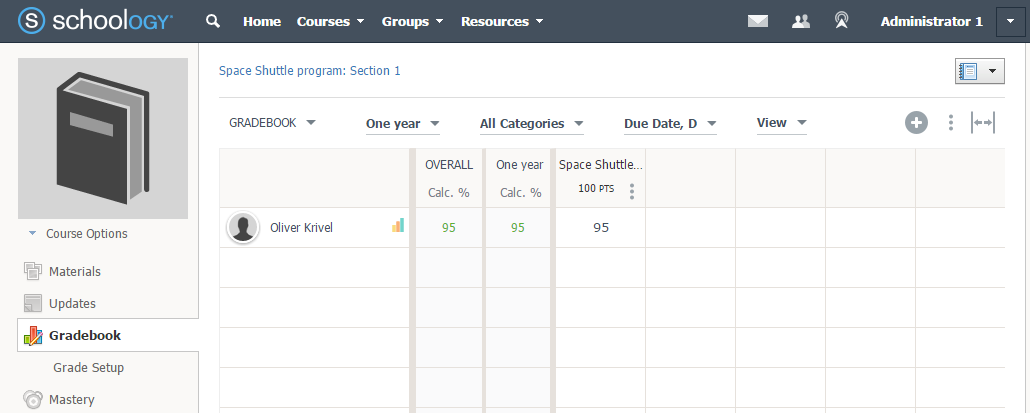
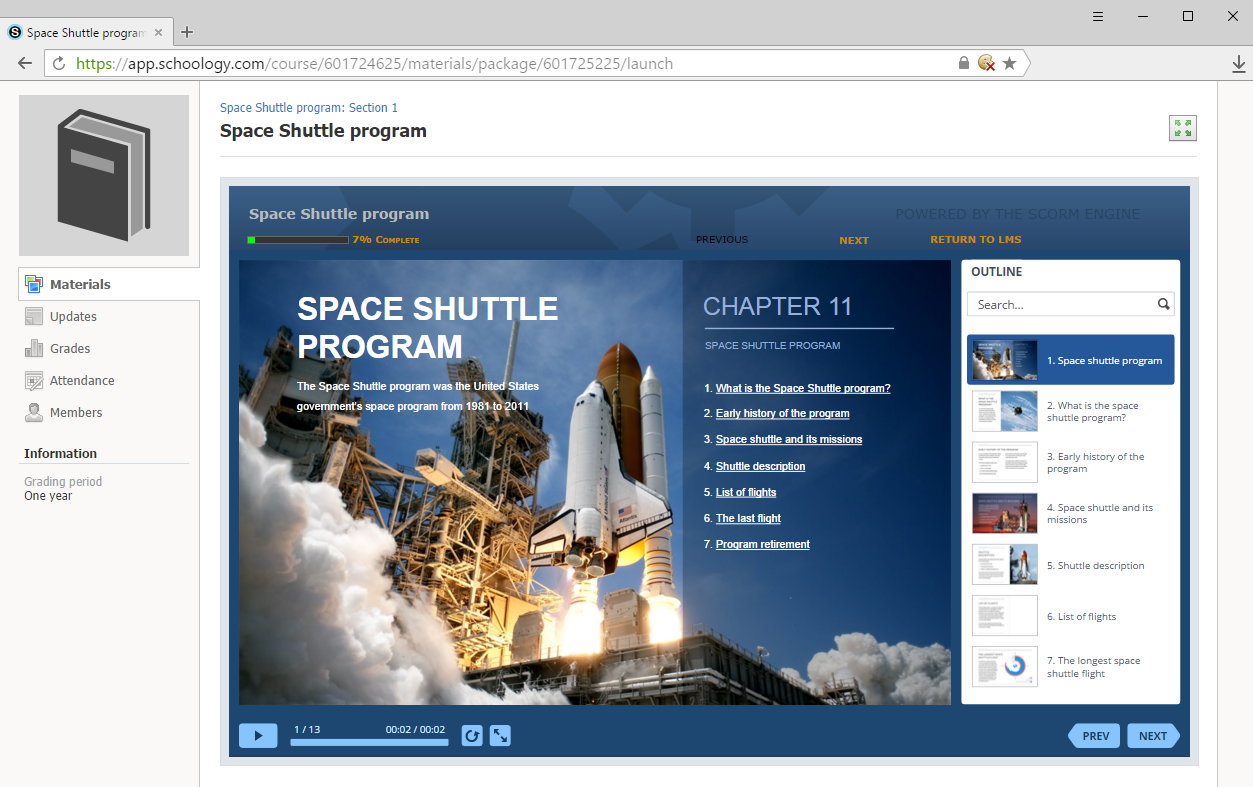
Once the course has been created, go ahead and enroll students. This is how learners see iSpring SCORM courses in Schoology:
Administrators and supervisors can track user activity in Gradebook or enter grades manually.