How Can I Add a Vimeo Video to My iSpring Course?
It’s easy to enrich your course with a video from Vimeo, a popular video hosting site. You can either add a video you have created and uploaded to Vimeo yourself, or use a video created by others as long as its owner has not disabled embedding. In this article, you will learn how to embed a Vimeo video in your iSpring course.
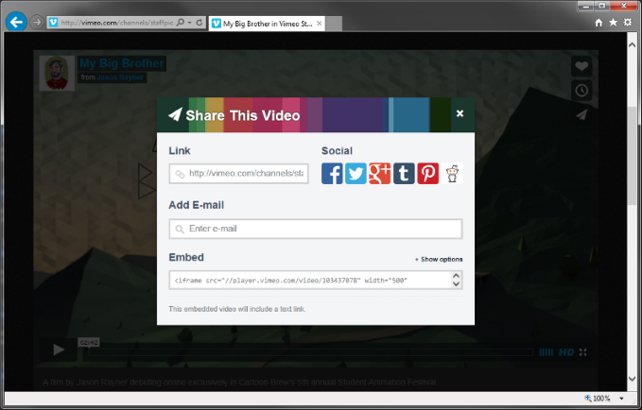
Open the Vimeo video that you wish to add. Then click “Share” (it looks like a paper airplane icon).
A window will pop up.
Copy the text in the “Embed” section, and paste it into a text editing program like Notepad or Word.
The text you have copied will be rather long and code-looking, something like this:
<iframe src="https://player.vimeo.com/video/103437078" width="640" height="360" frameborder="0" webkitallowfullscreen mozallowfullscreen allowfullscreen></iframe>
<p><a href="https://vimeo.com/103437078">My Big Brother</a> from <a href="https://vimeo.com/jasonrayner">Jason Rayner</a> on <a href="https://vimeo.com">Vimeo</a>.</p>
You need to copy only a small portion of it (a hyperlink), shown in bold in the code above.
Download and install a fully-functional free trial of iSpring Converter Pro.
Now open your course and select the slide you wish to add the video to. Then switch to the iSpring tab and click «Web Object».
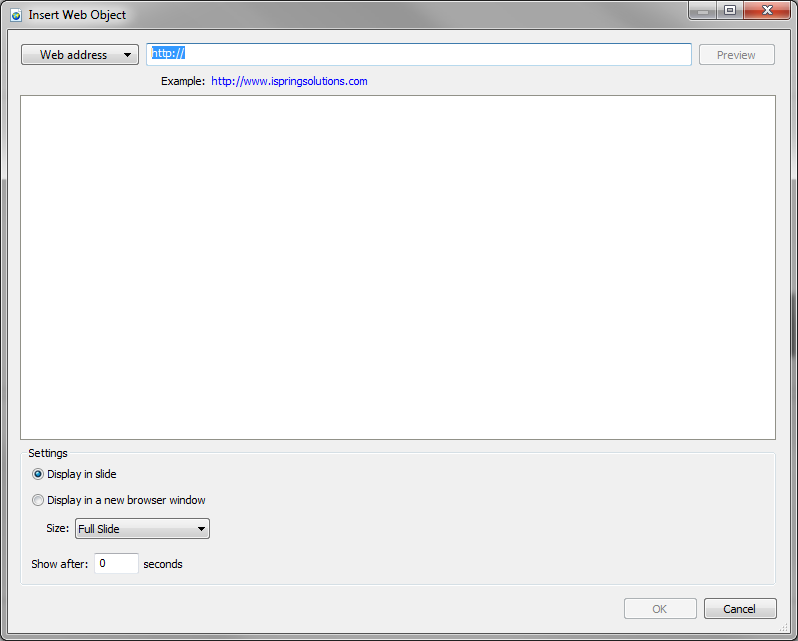
The “Insert Web Object” window will open, and you will see a space to enter a Web address:
Paste the video URL link that you have copied and click “Preview.” An image of the video will appear in the larger space below.
You now have the options to choose whether you want your video to appear in the slide or a new browser window. You can also select the size of the video: if you select “Full Slide”, the video will take the full slide. If you select “Custom” you will be able to drag and drop the video on the slide and insert other objects. Once you have fine-tuned the settings, click “OK.”
Your video now appears as a Web Object icon. To see how it will look to your users and to try playing it, click the “Preview” button on the iSpring tab. You can choose to preview your entire course or only the selected slide.
Enjoy sharing videos with your learners through iSpring!
If you liked the article, please let us know by clicking the Share button.
If you have any ideas what kind of e-Learning topics you’d like to see discussed, feel free to leave a comment; we’re always happy to write new content for you.


