New Screen Recording Tool Added to iSpring Suite 8
Screen recording is extremely useful in any tool for creating training materials, demonstrating computer software or services, or simply guiding viewers through your materials. Screen recording is also sometimes called screen capture.
While screen recording is a vital addition, not every e-Learning authoring toolkit offers it. iSpring Suite 8 has been enhanced to include this essential feature with all necessary options: hotkeys, sound recording, mouse cursor highlighting, etc.
No more extra software to do what you need to do: everything is available right from your PowerPoint with iSpring Suite 8!
iSpring Suite
Fully-stocked eLearning authoring toolkit for PowerPoint. No training required to start!
If you want to get an idea of how to use the new Screen Recording Tool in the upcoming iSpring Suite 8, check out this video and the illustrated walkthrough below.
How to Record Your Screen Fast and Easy with iSpring Suite 8:
From the iSpring Suite 8 toolbar, click Screen Recording to start a new recording. You can also use the drop-down menu (small black arrow) to open a previous recording.
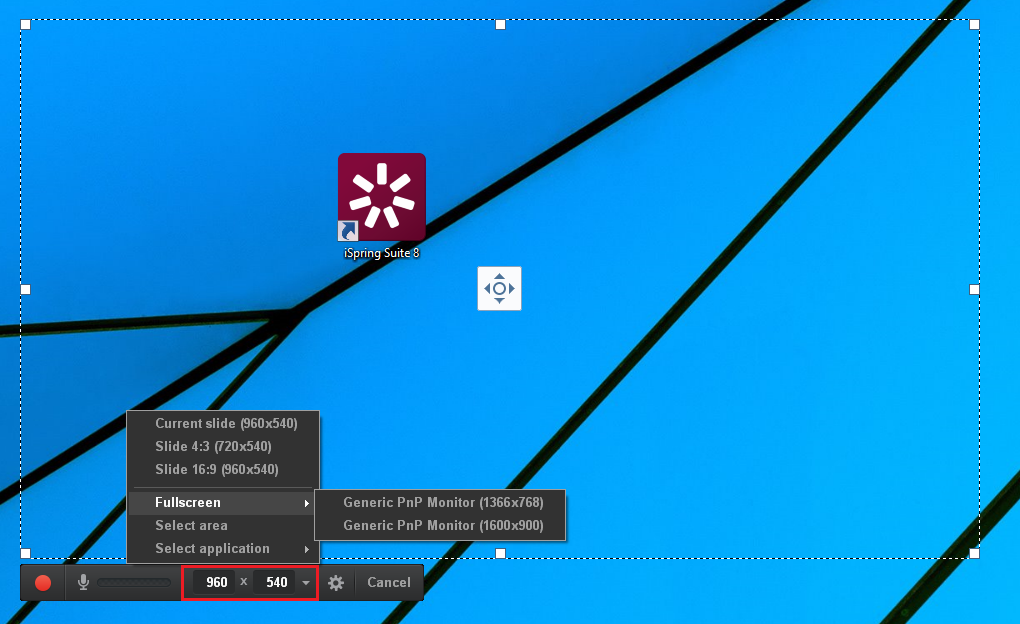
The screen recording area will pop up. You can easily select the screen area you would like to record from the resolution pop-up menu button (outlined in red in the screenshot below). The menu offers standard PowerPoint slide sizes for screen areas, plus a fullscreen option, even for multiple monitors. You can also select a custom area or a particular application to record.
To configure hotkeys, sound recording, mouse cursor, and other advanced options, click the Settings ![]() button on the Screen Recording toolbar.
button on the Screen Recording toolbar.
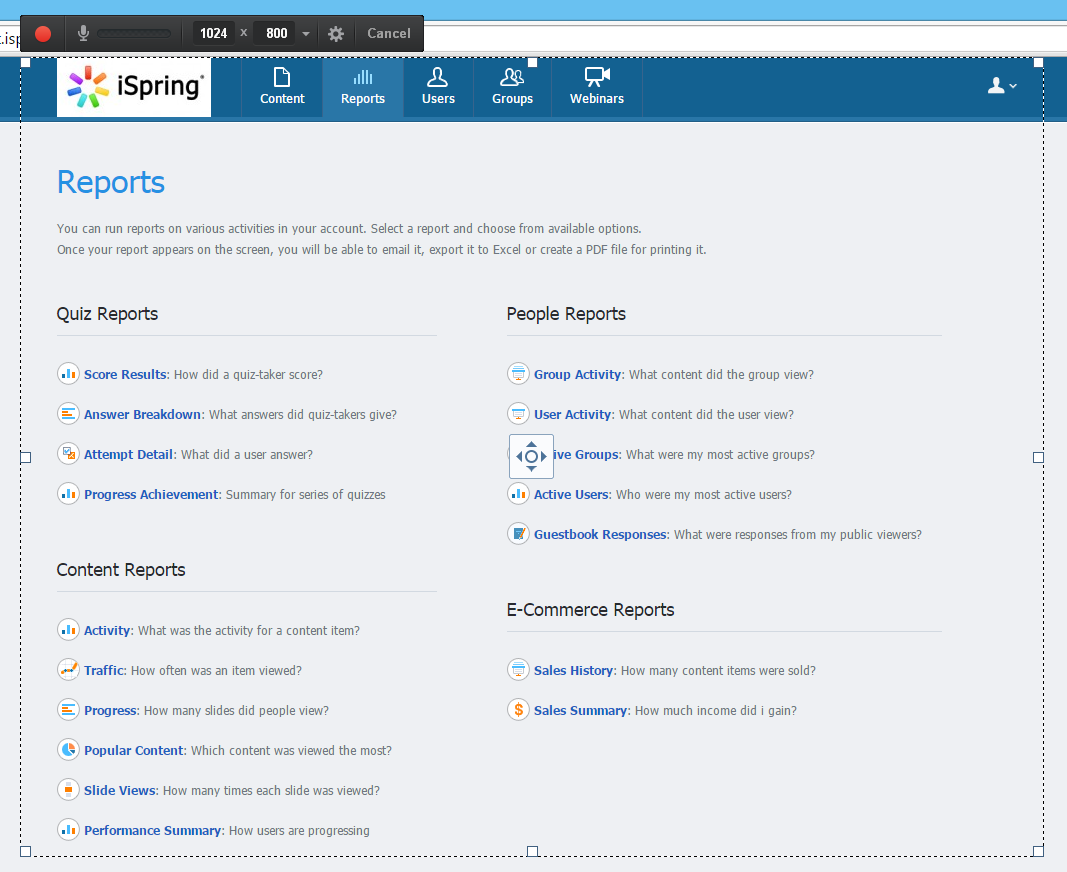
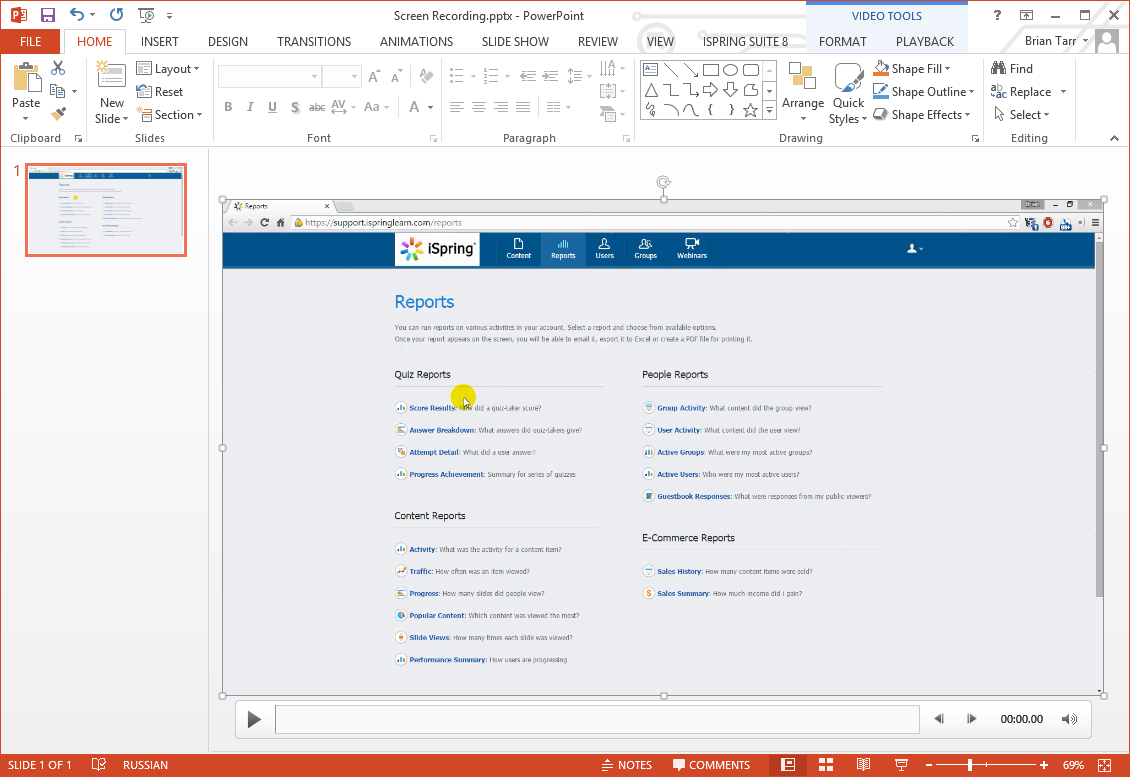
For this example, I’m going to make a brief recording of the Reports section of iSpring
Learn. When you’re ready to start recording, click the red Start Recording
 button on the left side of the Screen Recording toolbar.
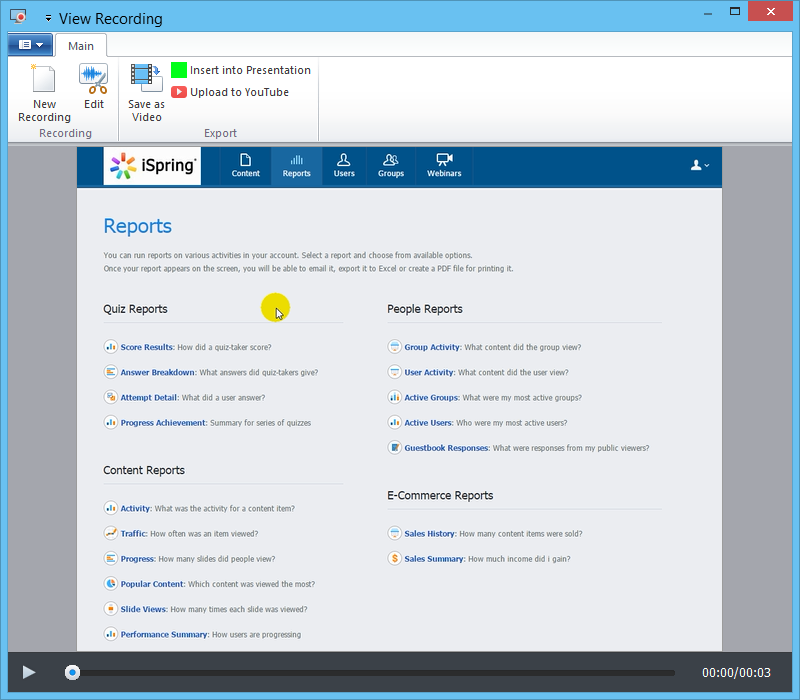
When you’re done recording, click Done or press the F10 key on your keyboard, and the View Recording window will pop up. Here, you have several options for what to do with your video: Edit it with the iSpring Video Editor, Save it as an .mp4 video on your hard drive, Insert it right into your presentation, or Upload it directly to YouTube.

Saving Options
The View Recording window provides several options for saving your screen recording.
You can insert your screen recording directly into your PowerPoint presentation by clicking Insert into Presentation. This will automatically create a new PowerPoint slide and insert your screen recording as a standard PowerPoint video object.
Also, you can save your recording as a video file right on your computer. Just click the Save as Video option, and a standard Save As dialog will open. You can choose a file name and folder on your computer to save a high-quality .mp4 video file.
Uploading a Screen Recording to YouTube
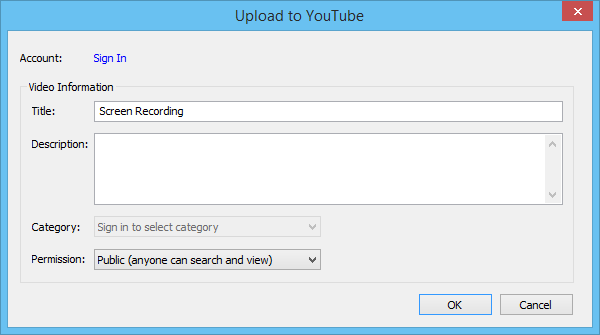
If you choose to upload your screen recording to YouTube, click Upload to YouTube from the View Recording window, and the Upload to YouTube dialog will open.
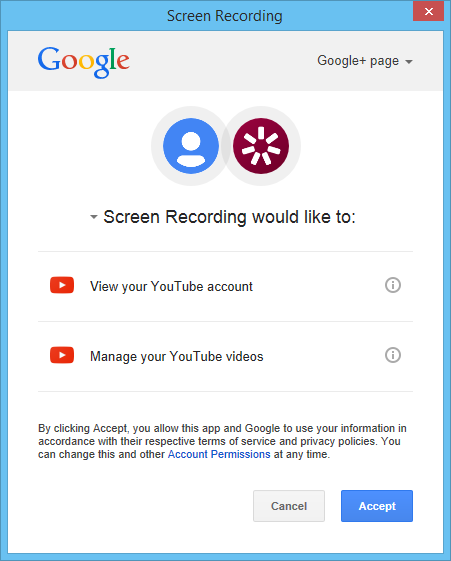
Click Sign In and a standard Google login window will pop up. Enter your email and password, and click through.

The iSpring Screen Recording tool will ask you for permission to view your YouTube account and manage your videos. This is so you can enter your video information directly from the tool. Click Accept.

Now you can enter your video’s title and description in the Upload to YouTube dialog
(Step 1), and select a category and permission level. Click OK to upload your video directly to YouTube.
Conclusion
The Screen Recording tool is just one of the latest additions to the iSpring Suite arsenal of supercharged e-Learning features. With this tool, you can easily capture all or part of your screen, or a specific application to demonstrate and fit perfectly on your PowerPoint slides. It’s never been easier to put screen recordings directly into a PowerPoint presentation!
Curious about the other new features in iSpring Suite 8? Stay tuned to the iSpring blog for more updates!
