How to Add a SCORM Course into BIStrainer LMS
BIStrainer LMS has gone through compliance tests with iSpring learning courses and we can now confirm that it supports SCORM uploading and reporting. Check out how to create a learning package with iSpring.
Just follow this tutorial on how to get your SCORM package to BIStrainer LMS:
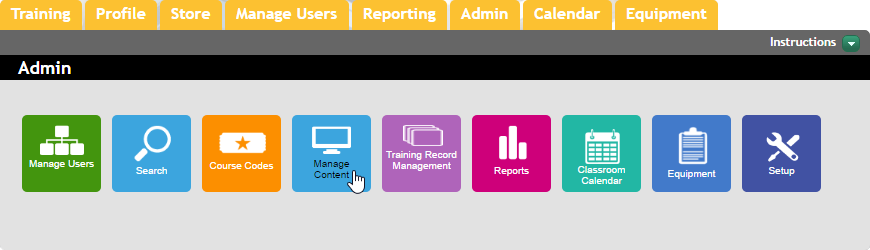
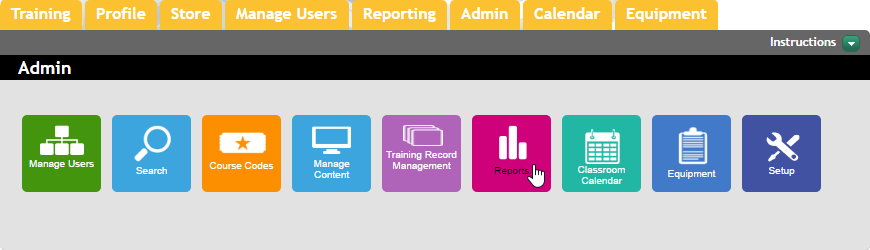
- 1 Make sure that you are an administrator and see Admin on the main dashboard.
-
2
Navigate to the Admin tab and click on the Manage Content button.
-
3
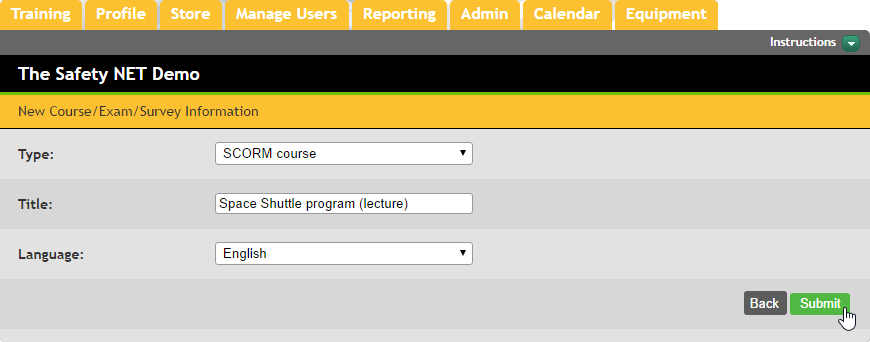
Click on Add on the ribbon.

-
4
Select SCORM course in the Type field, enter a new course title and choose a language.
-
5
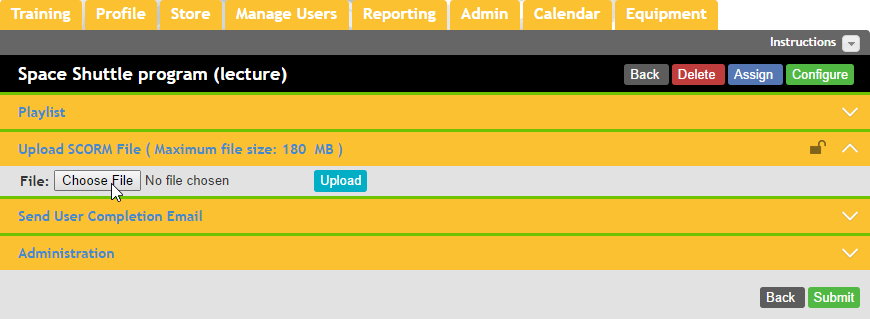
Click on Choose File to locate a zipped package.
-
6
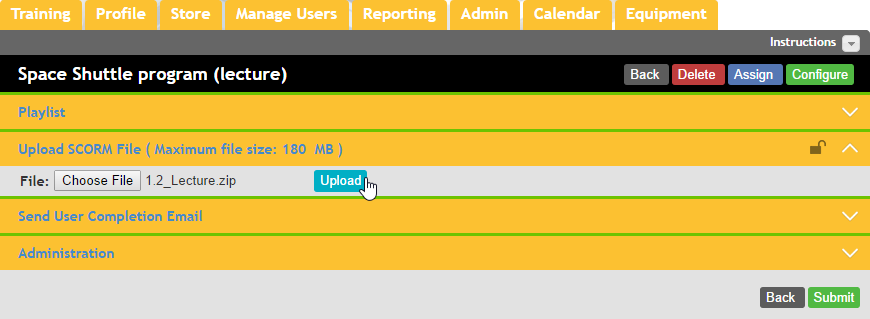
Click on Upload to import the package.
-
7
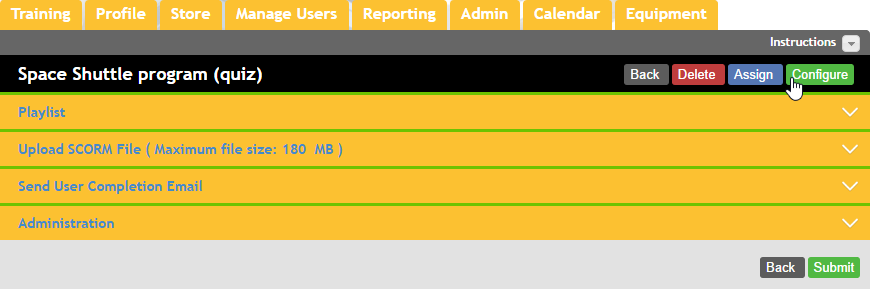
It is recommended to configure additional settings. This is required for SCORM 2004 and sometimes for SCORM 1.2 courses too.
To do that, click on Configure.
-
8
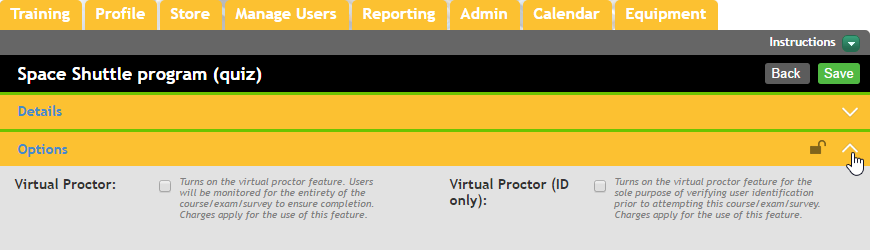
Expand the Options drop-down menu.
-
9
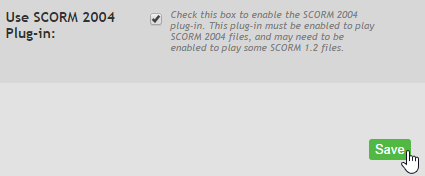
Scroll down to the bottom of the Options menu and mark Use SCORM 2004 Plug-in.
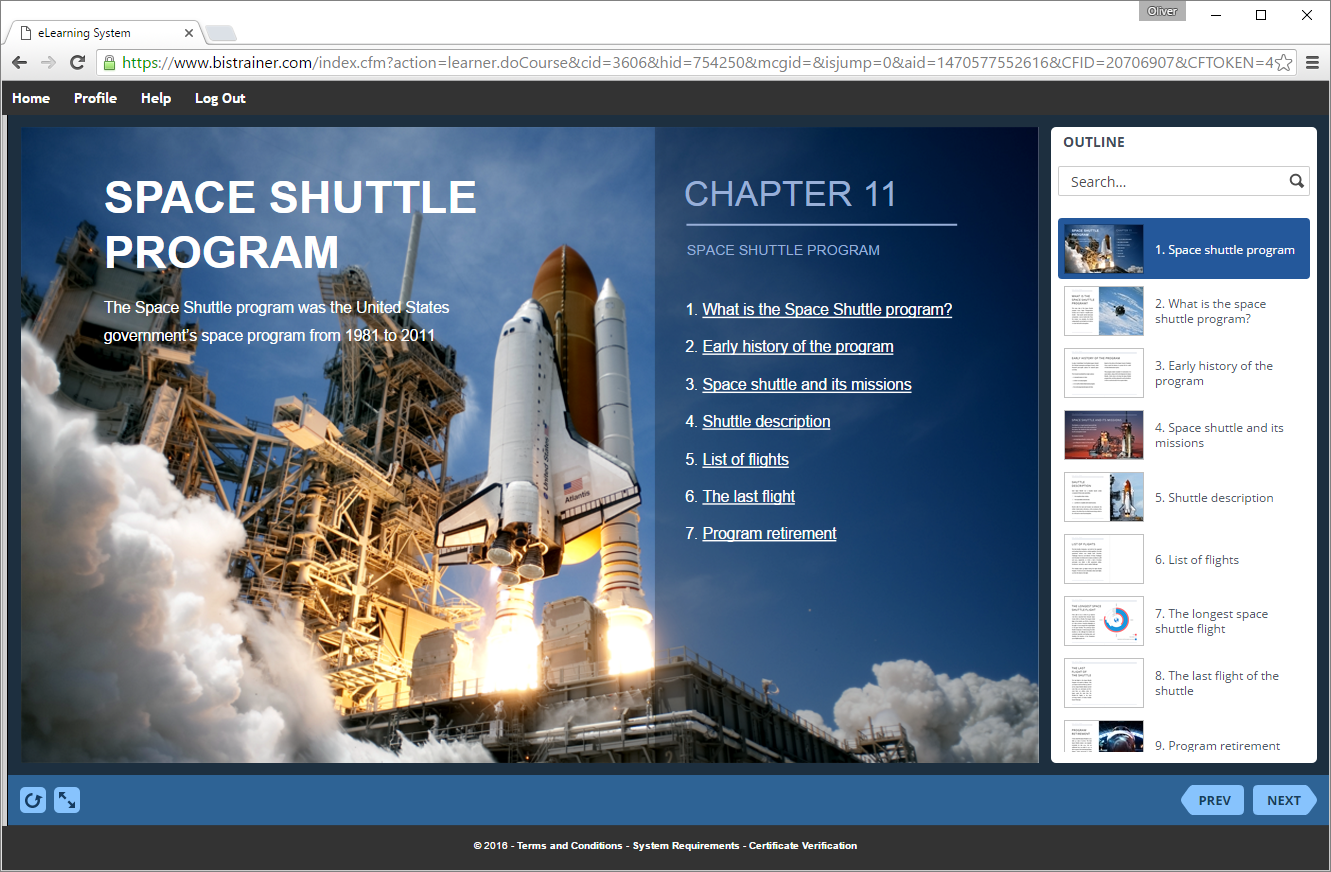
 Here is a sample course launched by a student:
How to generate reports in BIStrainer LMS
- 1 Make sure that you are an administrator and see Admin on the main dashboard.
-
2
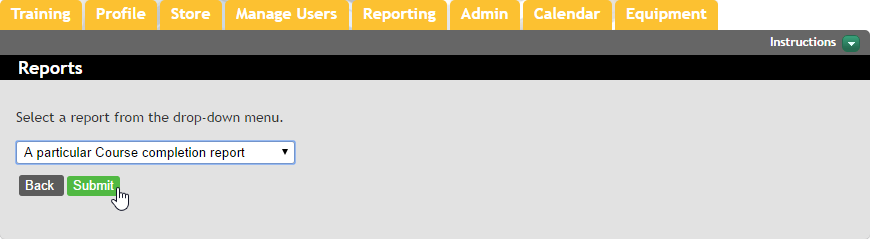
Select Reports under the Admin tab.
-
3
Select a report you want to run and click on Submit.
-
4
Select a course and an output format, then click on Submit.

-
5
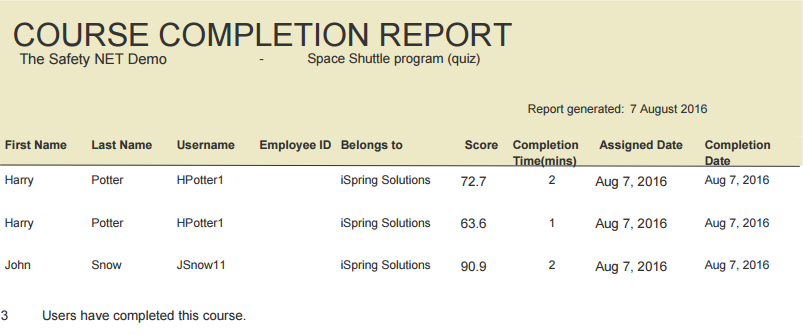
Here is a sample report:
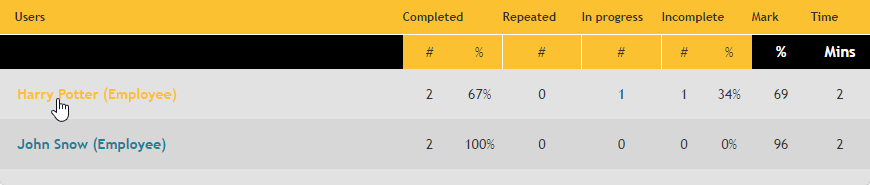
To see general statistics for all users in one location and their responses, Select Manage Users on the main dashboard.
-
1
Click on View next to the location name.

-
2
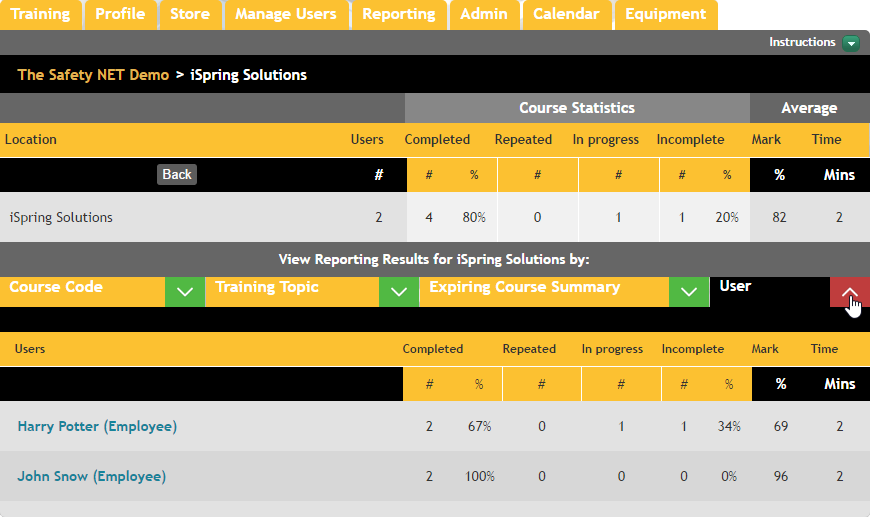
Expand the User menu to see general statistics for all users in the selected location.
-
3
Click on a user name to see how his/her progress.
-
4
Click on View next to a course title on the Completed Courses panel to see the attempt details.
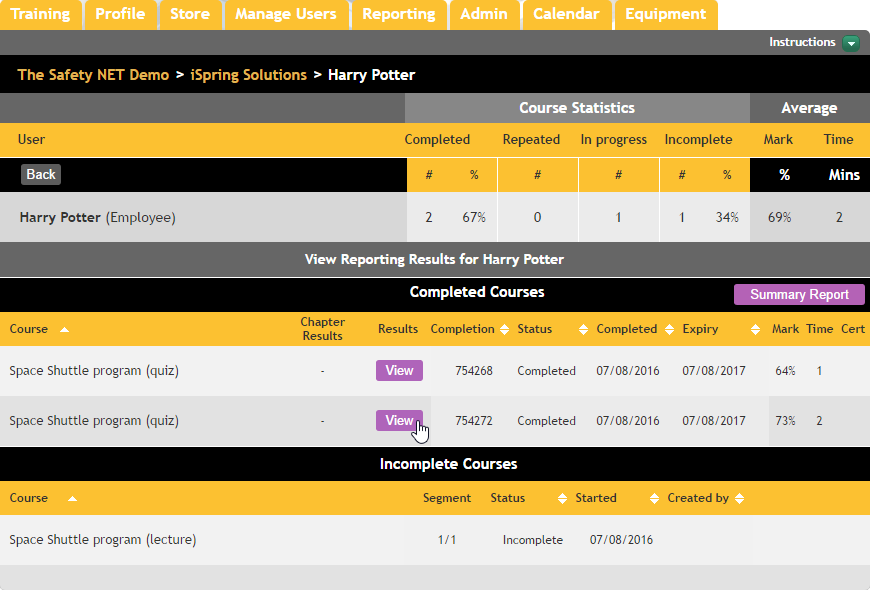
-
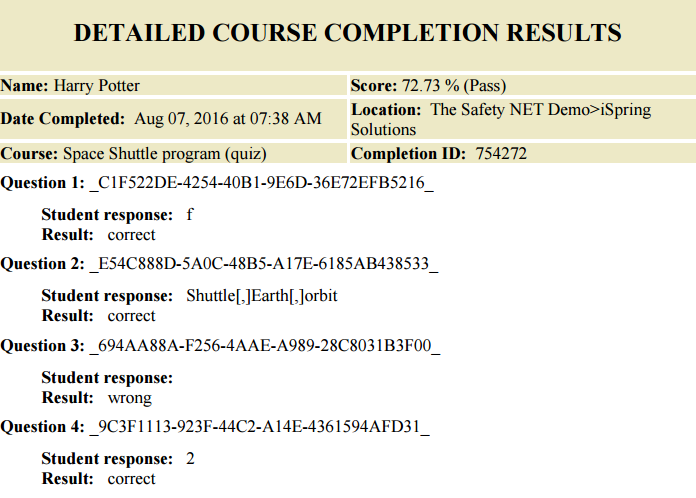
5
Here is an attempt detail report:
Related Articles